
There is something undeniably nostalgic about the scent of cinnamon and toasted oats wafting through a warm kitchen. While chocolate chip cookies often steal the spotlight, those who know truly great baking understand that the Butterscotch Oatmeal Cookie often affectionately called the “Oatmeal Scotchie”—is the real MVP of the cookie jar. These cookies offer a sophisticated depth of flavor thanks to the brown sugar and earthy oats, punctuated by the intense, caramel-like sweetness of butterscotch chips.

In this guide, I will show you how to achieve that elusive “bakery-style” texture: a cookie that is crisp around the very edges but stays incredibly soft, dense, and chewy in the center. Whether you are baking for a school fundraiser, a holiday gift, or just a Tuesday night craving, this recipe is engineered for perfection every single time. Get ready to meet your new favorite cookie.
Why You’ll Love This Recipe
You might be wondering what sets this specific recipe apart from the back-of-the-bag versions you’ve tried before. First, the texture is unrivaled. By using a specific ratio of brown sugar to granulated sugar, we ensure a moist, fudgy crumb. Second, the addition of ground cinnamon provides a warm backnote that cuts through the sweetness of the butterscotch. Finally, it is a fail-proof method. We incorporate a short chilling period which prevents the cookies from spreading into flat puddles, ensuring a thick, satisfying bite. This recipe is also incredibly versatile, making it easy to whip up with pantry staples you likely already have on hand.
What Is a Butterscotch Oatmeal Cookie?
At its core, a Butterscotch Oatmeal Cookie is a variation of the traditional oatmeal raisin cookie, where the raisins are swapped for butterscotch morsels. The history of this cookie is closely tied to the mid-20th century when butterscotch chips became a popular grocery staple. Unlike chocolate, which has a cocoa-forward profile, butterscotch is made from brown sugar and butter, which complements the molasses notes in the cookie dough perfectly. This creates a cohesive “toffee-like” flavor profile that feels much more integrated than other mix-ins. It’s a classic American “drop cookie” that relies on the structural integrity of rolled oats to provide a hearty, rustic feel.
Ingredients Overview
To achieve the perfect bake, quality and measurement are key. Here is what you will need:
- Unsalted Butter (1/2 Cup): Softened to room temperature. Butter provides flavor and that essential melt-in-your-mouth quality.
- Light Brown Sugar (1/2 Cup): This is the secret to chewiness. The molasses in brown sugar keeps the cookies soft.
- Granulated Sugar (1/4 Cup): Helps the edges crisp up perfectly.
- Large Egg: Use a room-temperature egg to ensure it emulsifies properly with the creamed butter.
- Vanilla Extract (1 tsp): Always use pure vanilla for the best aromatic depth.
- All-Purpose Flour (1 Cup): Measured using the “spoon and level” method to avoid a cakey cookie.
- Baking Soda (1/2 tsp): Our leavening agent that helps the cookies rise and brown.
- Ground Cinnamon (1/2 tsp): Essential for that classic “Scotchie” flavor.
- Salt (1/4 tsp): To balance the intense sweetness of the butterscotch.
- Old-Fashioned Rolled Oats (1 1/2 Cups): These provide the best texture. They hold their shape better than quick oats during the baking process.
- Butterscotch Chips (1 Cup): The star of the show! Use a high-quality brand for the smoothest melt.
Ingredient Substitutions & Tips
If you find yourself missing an ingredient, don’t panic. You can substitute Quick Oats for Old-Fashioned Oats in a pinch; however, the cookies will be softer and less “hearty.” If you only have Dark Brown Sugar, you can use it—it will simply result in a deeper molasses flavor and a slightly darker cookie. For a nutty twist, feel free to replace half of the butterscotch chips with chopped pecans or walnuts. If you are a fan of the “sweet and salty” trend, a light sprinkle of flaky sea salt on top of the cookies immediately after they come out of the oven is a game-changer.
Step-by-Step Instructions
1. Cream the Butter and Sugars
In the bowl of a stand mixer fitted with the paddle attachment (or a large bowl with a hand mixer), beat the softened butter, light brown sugar, and granulated sugar. You want to beat this for at least 1-2 minutes until the mixture is pale and fluffy. This process, called “creaming,” incorporates air and helps with the final lift.
2. Add Wet Ingredients
Add the egg and vanilla extract. Continue mixing on medium speed until the egg is fully incorporated. Scrape down the sides of the bowl to ensure no streaks of butter remain.
3. Mix the Dry Ingredients
In a separate bowl, whisk together the flour, baking soda, cinnamon, and salt. Stir in the rolled oats. By mixing the dry ingredients first, you ensure the leavening agent and spices are evenly distributed before they hit the wet dough.
4. Combine and Fold
Add the dry mixture to the wet ingredients. Mix on low speed until just combined. Overmixing at this stage develops gluten, which can make the cookies tough. Finally, fold in the butterscotch chips using a spatula.
5. The Critical Chill
Cover the dough and refrigerate for at least 30 minutes. This allows the oats to hydrate and the butter to solidify, which prevents excessive spreading.
6. Scoop and Bake
Preheat your oven to 350°F (177°C). Use a 1.5-tablespoon scoop to form balls. Place them on a lined baking sheet and slightly flatten each one. Bake for 10-13 minutes. The edges should be golden, but the centers should still look slightly soft—they will firm up as they cool!
Expert Baking Tips
To elevate your cookies from good to professional, follow these three tips. First, never overbake. Oatmeal cookies are notorious for looking “undone” when they are actually perfect. If the edges are set, take them out! Second, use parchment paper or silicone mats. This prevents the bottoms from browning too quickly and ensures an even bake. Third, check your oats. Ensure you aren’t using “Steel Cut” oats, as these will remain hard and crunchy even after baking. Stick to Old-Fashioned or Quick-Cooking varieties for the intended texture.
The Importance of Chilling Cookie Dough
Why do we insist on a 30-minute chill? Chilling the dough does two vital things. First, it concentrates the flavor. As the dough rests, the flour and oats absorb the moisture from the egg and butter, leading to a more complex, caramelized taste. Second, it controls the spread. Cold fat takes longer to melt in the oven. If you put warm dough into a hot oven, the butter melts instantly, and the cookie flattens before the structure has time to set. For a thick, chewy cookie, the refrigerator is your best friend.
Serving Suggestions
These cookies are best enjoyed slightly warm, perhaps 15 minutes after they leave the oven. They pair beautifully with a cold glass of milk or a hot cup of coffee. For a decadent dessert, use two cookies to create an ice cream sandwich filled with salted caramel or vanilla bean ice cream. They also make a fantastic addition to a lunchbox or a hiking snack, as the oats provide a bit more “staying power” than a standard sugar cookie.
Storage & Make-Ahead Tips
Store your baked cookies in an airtight container at room temperature for up to 7 days. To keep them extra soft, place a slice of white bread in the container; the cookies will absorb the moisture from the bread. You can also freeze the unbaked dough balls for up to 3 months. When ready to bake, simply add an extra 1-2 minutes to the baking time—no need to thaw!
FAQs
Can I use salted butter?
Yes, but reduce the added salt in the recipe to just a tiny pinch to avoid an overly salty cookie.
Why did my cookies come out flat?
This usually happens if the butter was too melted/soft or if the dough wasn’t chilled long enough. Ensure your oven is fully preheated before putting the trays in.
Can I add raisins to this recipe?
Absolutely! You can do a 50/50 split of butterscotch chips and raisins for a “Loaded Oatmeal” experience.
How do I get perfectly round cookies?
Use a circular cookie cutter or a glass to “scoot” the cookies into a perfect circle immediately after they come out of the oven while they are still soft.
What is the “Spoon and Level” method?
Instead of dipping the measuring cup into the flour bag (which packs it down), spoon the flour into the cup until overflowing, then level it off with a flat knife.
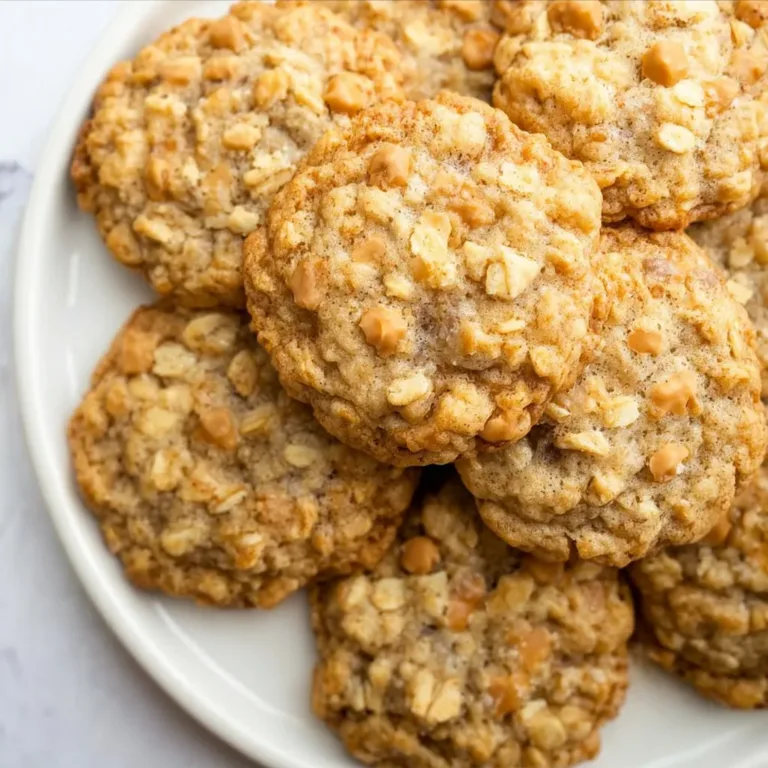
Chewy Butterscotch Oatmeal Cookies
These soft and chewy butterscotch oatmeal cookies (often called Oatmeal Scotchies) are a nostalgic favorite. The combination of earthy oats, warm cinnamon, and creamy butterscotch chips creates a flavor profile that is far superior to your standard chocolate chip cookie.
Ingredients
1/2 cup (115g) unsalted butter, softened
1/2 cup (100g) light brown sugar, packed
1/4 cup (50g) granulated sugar
1 large egg, room temperature
1 teaspoon pure vanilla extract
1 cup (125g) all-purpose flour, spooned & leveled
1/2 teaspoon baking soda
1/2 teaspoon ground cinnamon
1/4 teaspoon salt
1 1/2 cups (150g) old-fashioned rolled oats
1 cup (180g) butterscotch chips
Instructions
1. In a large bowl, beat the butter, brown sugar, and granulated sugar together until well combined (1-2 minutes).
2. Add the egg and vanilla extract and mix until fully combined.
3. In a separate bowl, whisk together the flour, baking soda, cinnamon, salt, and oats.
4. Add dry ingredients to wet and mix until just combined. Fold in butterscotch chips.
5. Cover and refrigerate the dough for at least 30 minutes.
6. Preheat oven to 350°F (177°C) and line baking sheets with parchment paper.
7. Scoop 1.5 tablespoon balls of dough, slightly flatten, and place on sheets.
8. Bake for 10-13 minutes until edges are lightly browned. Cool on the pan for 10 minutes before moving to a wire rack.
Notes
Store in an airtight container for up to 7 days.
Freeze dough for up to 3 months.
Use old-fashioned oats for the best chewy texture.