
If you have ever stepped foot in a Canadian bakery, you know that the butter tart is more than just a dessert—it is a cultural icon. With a history stretching back to the early settlers, these little pastries represent the pinnacle of comfort food. My version takes the traditional recipe and elevates it with the rich, woody depth of pure maple syrup, replacing the standard corn syrup for a more sophisticated, “true-North” flavor profile. Whether you prefer them with raisins, pecans, or perfectly plain, this recipe delivers a flaky, melt-in-your-mouth crust and a custard center that hits all the right nostalgic notes.

Why You’ll Love This Recipe
This butter tart recipe stands out for several reasons. First, the crust is exceptionally flaky thanks to a specific pulsing technique that leaves small pockets of butter intact. Second, using pure maple syrup instead of corn syrup provides a complex sweetness that isn’t just “sugary”—it’s aromatic and rich. The filling is designed to be the perfect “medium-runny” consistency; it won’t pour out of the tart, but it remains soft and luxurious. Finally, it’s a versatile base recipe that allows you to settle the great Canadian debate: raisins or no raisins? (Though we think both versions are spectacular!)
What Is a Butter Tart?
A butter tart is a classic Canadian pastry consisting of a highly buttery, flaky shell filled with a mixture of butter, sugar, syrup, and egg. Unlike a pecan pie, which is firm and dense, a true butter tart should have a slightly runny, gooey center that contrasts with the crispness of the pastry. While there are variations across the provinces, the core elements remain the same: high-quality fat, a touch of acidity or salt to balance the sweetness, and a custard that caramelizes beautifully in the oven. It is the ultimate handheld treat for coffee breaks or holiday gatherings.
Ingredients Overview
To achieve the best results, the quality of your ingredients is paramount. For the crust, use all-purpose flour and unsalted butter. The butter must be ice-cold to ensure a flaky texture. Fine sea salt and a hint of granulated sugar season the dough, while cold water binds it all together.
For the filling, pure maple syrup (Grade A Dark or Amber) is the star. Combined with packed brown sugar, it creates a deep caramel color. Unsalted butter at room temperature ensures a smooth emulsion when creamed with the sugar. Large eggs act as the binder, giving the filling its custard-like body. A splash of pure vanilla extract and a pinch of fine sea salt are essential to cut through the richness and highlight the maple notes. If you choose to add mix-ins, high-quality sultana raisins or chopped pecans are the traditional choices.
Ingredient Substitutions & Tips
- The Syrup: If you don’t have maple syrup, you can use light or dark corn syrup, though you will lose that distinct Canadian flavor profile.
- The Butter: Do not substitute margarine for butter. The high water content in margarine will ruin the pastry’s flakiness and the filling’s flavor.
- Vinegar Trick: Some bakers like to add a teaspoon of white vinegar to the dough to tenderize the gluten; this is optional but helpful if you tend to overwork your dough.
- Sugar: You can use dark brown sugar instead of light brown sugar for an even deeper, molasses-like undertone in your filling.
Step-by-Step Instructions
1. Prepare the Pastry
Using a food processor, pulse the 2-1/2 cups flour, 1 tablespoon sugar, and 1 teaspoon fine sea salt. Add the 1 cup cold unsalted butter in chunks. Pulse 5 to 8 times, or until the butter is broken down into small, pea-sized pieces. Slowly add the 3/4 cup cold water, pulsing just until the dough starts to clump together.
2. Chill the Dough
Turn the dough onto two pieces of plastic wrap. It will be super sticky—don’t panic! This moisture is what makes it tender. Form into discs, wrap tightly, and refrigerate for at least one hour.
3. Cut the Shells
Sprinkle a small amount of flour on a flat surface. Roll out one disc at a time to about 1/8 inch thickness. Use a 4-inch round cutter or a large lid to cut 15 circles. Press each circle gently into the bottom of a greased muffin pan. Chill these shells while you prepare the filling.
4. Create the Filling
Preheat your oven to 350°F. In a medium bowl, cream the softened 1/4 cup butter and 1/2 cup brown sugar. Add the eggs one at a time, mixing well. Whisk in the maple syrup, salt, and vanilla. Let the mixture sit for 5-10 minutes to ensure the sugar is fully dissolved, then give it one final whisk.
5. Bake to Perfection
If using raisins or nuts, drop a few into each shell. Pour the filling into the crusts (filling about 3/4 full). Bake for 25 minutes. The crust should be golden, and the filling should be bubbling but still slightly jiggly in the center.
Expert Baking Tips
- Temperature Control: Keep your dough cold but your filling ingredients at room temperature. This ensures the crust doesn’t melt before it sets and the filling emulsifies perfectly.
- Don’t Overfill: It is tempting to fill the shells to the brim, but the filling will bubble up significantly. If it overflows, it will stick to the pan like glue.
- The “Sit” Rule: Letting the filling sit for 10 minutes before baking is the secret to a smooth, non-gritty texture. It allows the granulated bits of brown sugar to melt into the syrup.
- The Pour: Use a glass measuring cup with a spout to fill the shells. It provides much better control than a spoon.
The Great Debate: To Raisin or Not To Raisin?
In Canada, the “raisin debate” is legendary. Purists argue that a butter tart should be nothing but gooey filling and pastry. Others insist that the chewiness of a raisin or the crunch of a pecan is necessary to balance the sweetness. If you are catering to a crowd, I recommend making half the batch plain and the other half with raisins. To keep the raisins plump, you can soak them in a little warm water (or even rum!) for 10 minutes before adding them to the tart shells.
Serving Suggestions
Butter tarts are best served slightly warm or at room temperature. For a truly indulgent experience, serve a warm tart with a scoop of high-quality vanilla bean ice cream or a dollop of unsweetened whipped cream to balance the sugar. They also pair exceptionally well with a sharp cheddar cheese on the side—a classic sweet-and-savory combination favored by many traditionalists. Of course, a strong cup of black coffee or a bold Pekoe tea is the standard accompaniment for a mid-afternoon treat.
Storage & Make-Ahead Tips
Storage: These tarts keep beautifully at room temperature in an airtight container for up to 2 days. For longer storage, keep them in the refrigerator for up to a week.
Make-Ahead: You can make the pastry dough up to 3 days in advance. You can also freeze the baked tarts! Wrap them individually in plastic wrap and store in a freezer bag for up to 3 months. Simply thaw at room temperature for an hour before serving.
FAQs
Q: Why did my filling turn out grainy?
A: This usually happens if the sugar wasn’t fully dissolved before baking. Make sure to let the filling sit for at least 5-10 minutes and give it a good final whisk before pouring.
Q: Can I use store-bought pastry shells?
A: While you can, the homemade crust in this recipe is specifically designed to handle the moisture of the maple filling. Store-bought shells are often thinner and may become soggy.
Q: How do I get the tarts out of the pan without breaking them?
A: Let them cool for exactly 10 minutes. If they are too hot, they will fall apart; if they are too cold, the escaped sugar will act like cement. Run a thin knife around the edge if any filling has spilled over.
Q: Why is my dough so sticky?
A: This recipe uses a higher hydration level to ensure a tender crust. Use plenty of flour on your rolling surface and keep the dough chilled until the moment you roll it.
Mastering the Canadian butter tart is a rite of passage for any home baker. The combination of the flaky, salty crust and the amber, maple-infused center is a flavor profile that is hard to beat. This recipe provides the perfect foundation for you to experiment with different mix-ins or to simply enjoy the pure, unadulterated joy of a classic tart. Happy baking, and enjoy a little taste of Canada from your own kitchen!
Print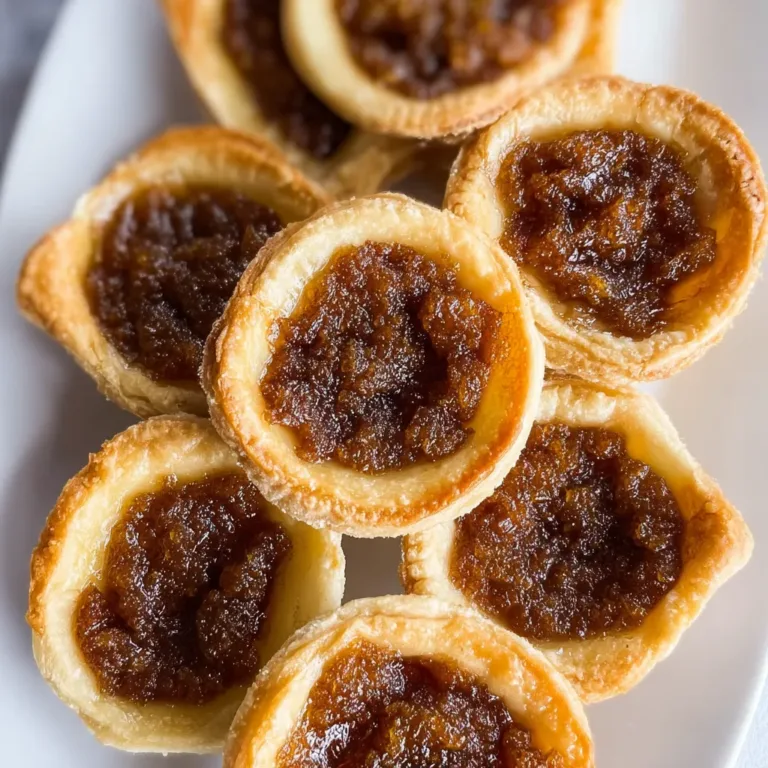
Authentic Canadian Butter Tarts with Maple Syrup
The quintessential Canadian dessert, these butter tarts feature a signature flaky crust and a deeply flavorful maple syrup filling that is perfectly gooey without being overly sweet.
Ingredients
2–1/2 cups flour
1 tablespoon sugar
1 teaspoon fine sea salt
1 cup unsalted butter, cold
3/4 cup cold water
1/4 cup unsalted butter, at room temperature
1/2 cup brown sugar
2 eggs, at room temperature
1 cup maple syrup
1/4 teaspoon fine sea salt
1 teaspoon vanilla extract
Instructions
1. Pulse flour, 1 tbsp sugar, and 1 tsp salt in food processor. Add 1 cup cold butter chunks; pulse 5-8 times until butter is pea-sized.
2. Add 3/4 cup cold water; pulse until dough comes together. Divide onto plastic wrap, pat into discs, and chill for 1 hour.
3. Roll dough to 1/8 inch thickness. Cut 15 circles (4-inch diameter) using a cutter or lid.
4. Press circles into greased muffin tins. Chill while making filling.
5. Preheat oven to 350°F. Cream 1/4 cup softened butter and brown sugar. Whisk in eggs one at a time.
6. Stir in maple syrup, 1/4 tsp salt, and vanilla. Let sit 5-10 minutes, then whisk again.
7. Optional: Add 1 tsp raisins or nuts to each cup. Pour filling into shells.
8. Bake for 25 minutes. Cool 10 minutes in pan before transferring to a rack.
Notes
For a runnier tart, bake for 22 minutes. For a firmer set, bake for full 25-27 minutes.
If adding nuts or raisins, place them in the bottom of the shell before pouring liquid.
Store in an airtight container for up to 2 days at room temperature or 1 week in the fridge.