
There is something deeply nostalgic about a “Yum Yum” dessert. Whether you grew up calling it a Lush, a Delight, or a Dream, the concept remains the same: a buttery crust, a fluffy cream cheese layer, and fruit filling that makes every bite feel like a celebration.
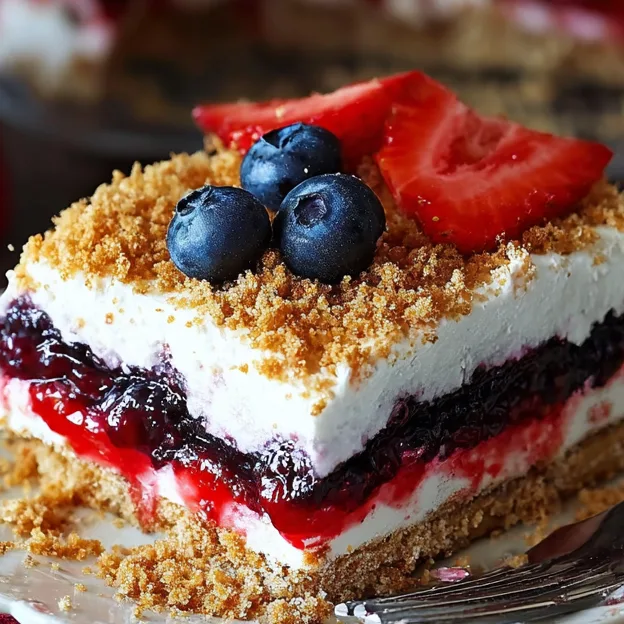
This Mixed Berry Yum Yum is the crown jewel of no-bake desserts. With its vibrant red and blue layers, it’s the perfect centerpiece for a 4th of July cookout, a Memorial Day gathering, or any summer potluck where you want to impress without ever turning on your oven. The combination of tangy cream cheese, pillowy homemade whipped cream, and those sweet bursts of strawberry and blueberry is simply irresistible.
If you’ve been looking for a dessert that feels “fancy” but is secretly incredibly easy to assemble, you’ve found it. Let’s dive into why this recipe deserves a permanent spot in your recipe box.
Why You’ll Love This Recipe
- No-Bake Magic: Perfect for those sweltering summer days when the last thing you want is a hot kitchen.
- Crowd-Pleasing Visuals: The distinct layers of red, white, and blue look stunning when sliced, making it a natural fit for patriotic holidays.
- Make-Ahead Friendly: This dessert requires an overnight rest, which means your prep is done well before the party starts.
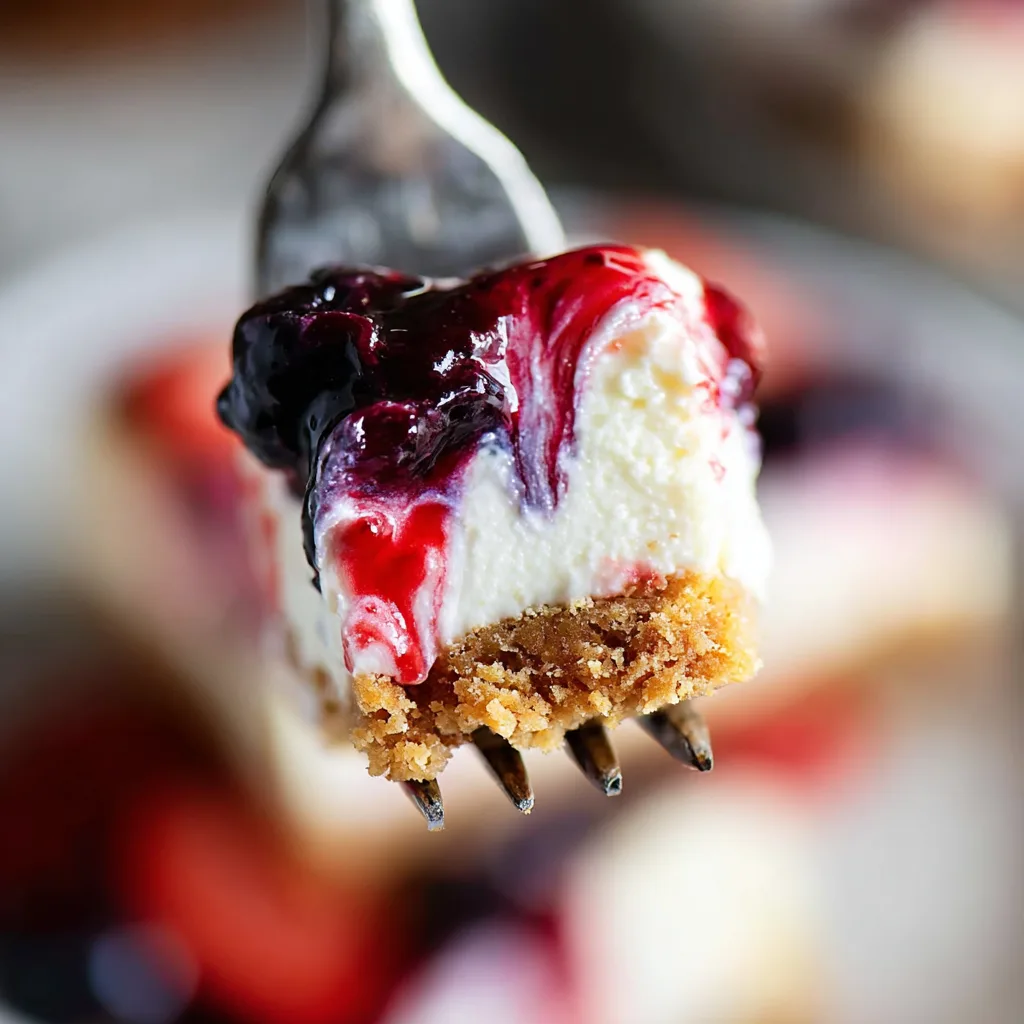
- Texture Heaven: You get the crunch of the buttery graham cracker, the silkiness of the cream cheese, and the saucy sweetness of the fruit.
- Customizable: Once you master the base, the fruit combinations are endless.
Ingredient Notes
To get that professional, bakery-style finish, a few ingredient choices make all the difference.
- Graham Cracker Crumbs: You can buy these pre-crushed or pulse whole crackers in a food processor. Ensure the crumbs are fine so the crust holds together.
- Unsalted Butter: This acts as the “glue” for your crust. We use unsalted so we can control the saltiness of the base.
- Cream Cheese: It is vital that your cream cheese is completely softened to room temperature. If it’s cold, you’ll end up with tiny lumps in your filling.
- Whipping Cream: Look for “Heavy Whipping Cream” for the best stability. It needs to be very cold before whipping.
- Premium Pie Filling: My secret tip is to use “premium” or “more fruit” versions of canned strawberry and blueberry pie filling. This ensures you get actual berries in every slice rather than just flavored gel.
- Vanilla Extract: High-quality pure vanilla extract elevates the flavor of the cream layer from “plain” to “gourmet.”
Step-by-Step Instructions
1. Prepare the Crust
In a medium bowl, combine your graham cracker crumbs and melted butter. Use a fork to toss them until the mixture feels like wet sand. Don’t forget: set aside 3 tablespoons of this mixture for the final garnish! Press the remaining crumbs firmly into a 9×13-inch pan. I like to use the bottom of a flat measuring cup to really pack it in; a tight crust is less likely to crumble.
2. The Cream Cheese Base
Using a stand mixer or hand mixer, beat the softened cream cheese with the confectioners’ sugar and 1 teaspoon of vanilla. Aim for a silky-smooth consistency. In a separate, chilled bowl, whip the heavy cream with the granulated sugar and the remaining vanilla. Whip until you reach stiff peaks—this provides the structural integrity needed for the layers.
3. Folding it Together
Gently fold the whipped cream into the cream cheese mixture by hand using a spatula. This keeps the mixture light and airy while ensuring it’s stable enough to support the fruit layers.
4. Assembling the Layers
This is where the magic happens!
- First Layer: Spread 1/3 of your cream mixture over the crust.
- Second Layer: Dollop the strawberry filling over the cream and gently spread.
- Third Layer: Add another 1/3 of the cream mixture. Go slowly here so you don’t “muddy” the fruit layer below.
- Fourth Layer: Dollop the blueberry filling and spread.
- Fifth Layer: Top with the final 1/3 of the cream mixture and sprinkle with those reserved crumbs.
Expert Tips for Best Results
- The Chilling Rule: I cannot stress this enough—refrigerate this dessert overnight. The layers need time to “marry” and set. If you cut it after only 2 or 3 hours, the fruit layers will slide right out like a delicious landslide.
- Cleaning the Spatula: When spreading the cream over the fruit layers, clean your spatula frequently. This keeps the white layers looking pristine and prevents the red/blue filling from streaking through the top.
- Spray Your Pan: Even though the crust has plenty of butter, a quick spray of non-stick cooking spray makes it much easier to lift that first slice out cleanly.
- Whip it Good: When making the whipped cream, don’t stop at soft peaks. You want it firm enough that it holds its shape on the whisk. This prevents the dessert from becoming “soupy” after a few hours on the counter.
Variations and Substitutions
While this Mixed Berry Yum Yum is perfect as-is, you can certainly play with the flavors:
- The Cool Whip Shortcut: If you’re short on time, you can swap the 4 cups of homemade whipped cream for 16 ounces (two 8oz tubs) of thawed Cool Whip. It’s a bit sweeter and less “dairy-forward,” but it works beautifully for stability.
- Lemon Twist: Add a tablespoon of fresh lemon zest to the cream cheese layer for a bright, citrusy punch that cuts through the sweetness.
- Crust Swap: Try using crushed Golden Oreos or Nilla Wafers instead of graham crackers for a different flavor profile.
- Fruit Swaps: Not a fan of blueberry? Try cherry, peach, or raspberry pie fillings!
Storage and Freezing
To Store: Keep your Mixed Berry Yum Yum covered with plastic wrap or a lid in the refrigerator. It will stay fresh and delicious for up to 4 days. In fact, many people think it tastes even better on day two!
To Freeze: While you can freeze this dessert, the texture of the pie filling can change slightly upon thawing (it may become a bit more watery). If you do freeze it, wrap it tightly in a double layer of foil and thaw it in the fridge for 24 hours before serving.
FAQ
Can I use fresh berries instead of pie filling?
While fresh berries are delicious, they won’t provide the same “saucy” layer that defines a Yum Yum. If you want to use fresh fruit, I recommend making a quick stovetop compote with cornstarch to achieve that thickened consistency.
Why did my dessert fall apart when I sliced it?
This usually happens for two reasons: either the cream cheese wasn’t beaten enough with the whipped cream, or it didn’t chill long enough. Make sure to hit that 8-hour minimum in the fridge!
Can I make this in a different sized pan?
This recipe is specifically scaled for a 9×13-inch pan. You could halve the recipe for an 8×8-inch pan, but your layers will be slightly thicker.
The Perfect Potluck Showstopper
There’s a reason this dessert has survived generations of church basements and family reunions—it’s pure, unadulterated joy in a pan. The Mixed Berry Yum Yum is easy enough for a weeknight treat but impressive enough for your biggest summer celebrations.
When you pull this out of the fridge and reveal those beautiful layers, be prepared to share the recipe. It’s called “Yum Yum” for a reason—one bite, and you’ll see why!
Print
Mixed Berry
A show-stopping, no-bake layered dessert featuring vibrant strawberry and blueberry fillings tucked between clouds of homemade whipped cream and cream cheese.
Ingredients
2 1/2 c. graham cracker crumbs
12 T. unsalted butter, melted
2 (8 oz.) packages cream cheese, softened
1 c. confectioners’ sugar
4 c. whipping cream
2 tsp. vanilla extract, divided
6 T. granulated sugar
1 (21 oz.) can strawberry pie filling
1 (21 oz.) can blueberry pie filling
Instructions
1. In a bowl, combine graham cracker crumbs and melted butter. Blend with a fork until crumbs are moistened. Set aside 3 tablespoons of crumbs to sprinkle on the top.
2. Press crumb mixture into the bottom of a 9×13-inch pan that’s been sprayed with non-stick cooking spray.
3. With an electric mixer, cream together softened cream cheese, confectioners’ sugar, and 1 teaspoon vanilla extract until smooth.
4. In a separate bowl, whip the whipping cream, granulated sugar, and remaining 1 teaspoon vanilla extract until stiff peaks form.
5. By hand, mix together whipped cream and cream cheese mixture until well combined.
6. Spread 1/3 of the cream cheese/whipped cream mixture (roughly about 3 cups) evenly over the crust.
7. Drop strawberry pie filling by large spoonful dollops on top of the cream cheese layer. Gently spread evenly.
8. Top strawberry layer with another 1/3 cream cheese mixture. Gently spread it evenly.
9. Drop blueberry pie filling by large spoonful dollops on top of the second cream cheese layer. Gently spread evenly.
10. Top blueberry layer with remaining 1/3 cream cheese mixture and spread evenly.
11. Sprinkle the top with the 3 tablespoons reserved graham cracker crumbs.
12. Cover and refrigerate overnight before serving.
Notes
Use “premium” pie fillings for more whole fruit.
You can substitute Cool Whip for the homemade whipped cream, though homemade yields a better flavor and texture.
Overnight chilling is mandatory to prevent the layers from sliding when sliced.