
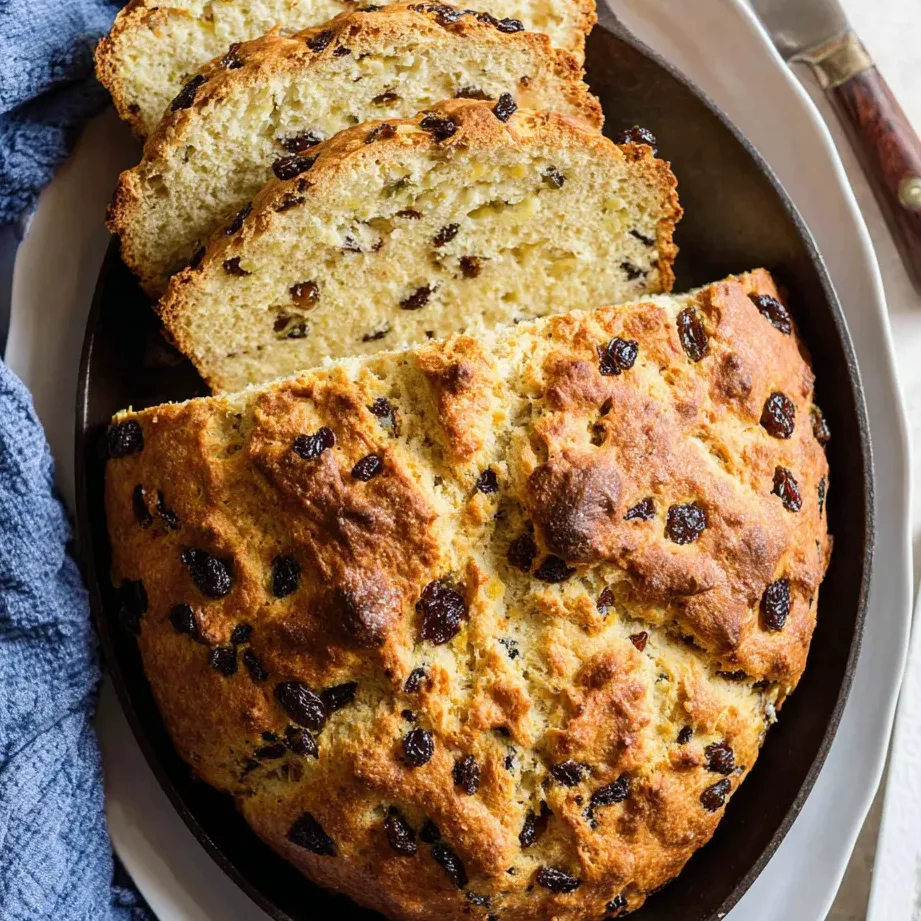
There is something profoundly comforting about the aroma of freshly baked bread wafting through a home, yet the daunting prospect of yeast, proofing times, and kneading often keeps home bakers away. Enter the Irish Soda Bread. This rustic, crusty loaf is the ultimate “emergency” bread—it requires no yeast, no rising time, and minimal effort. By utilizing a simple chemical reaction between buttermilk and baking soda, you can achieve a loaf with a craggy, golden-brown crust and a soft, tender crumb that rivals any artisan bakery. Whether you are preparing for a festive St. Patrick’s Day feast or simply need a warm loaf to accompany a hearty Sunday stew, this skillet-baked version provides the perfect texture and flavor. In just over an hour, you’ll have a steaming loaf ready for a thick slather of salted Irish butter.
Why You’ll Love This Recipe
You will fall in love with this recipe because it is incredibly forgiving and fast. Unlike traditional sourdough or yeast breads that require hours of patience, this soda bread goes from mixing bowl to oven in under 15 minutes. The use of a cast-iron skillet creates a superior, crunchy bottom crust that you simply can’t achieve with a standard cookie sheet. Additionally, the inclusion of raisins and a touch of sugar transforms it into a “Spotted Dog” style loaf, offering a subtle sweetness that balances the tangy buttermilk perfectly. It is a versatile, one-bowl recipe that uses pantry staples you likely already have on hand, making it the perfect solution for busy weeknights or last-minute gatherings.
What Is Irish Soda Bread?
Traditionally, Irish Soda Bread is a product of necessity. In the mid-19th century, Ireland faced economic hardship and lacked access to high-quality yeast. Bakers discovered that “soft” wheat flour reacted perfectly with bicarbonate of soda (baking soda) and the lactic acid in sour milk (buttermilk) to create a rise. This chemical leavening process replaced biological yeast. Authentic versions were often just flour, salt, soda, and buttermilk. Over time, families began adding “luxury” ingredients like eggs, butter, and dried fruits for special occasions. The iconic “X” cut into the top has many folklore origins—from “letting the fairies out” to symbolic blessings—but scientifically, it allows the dense dough to expand and the heat to penetrate the center of the loaf.
Ingredients Overview
To achieve the perfect texture, the quality and temperature of your ingredients matter significantly.
- All-Purpose Flour: This provides the necessary structure. While some use bread flour, all-purpose keeps the crumb tender rather than chewy.
- Baking Soda: The star leavener. Ensure it is fresh so it reacts vigorously with the buttermilk.
- Cold Unsalted Butter: Cutting cold butter into the flour creates tiny pockets of steam, resulting in a crumb that is slightly flaky and rich, almost like a giant biscuit.
- Low-fat Buttermilk or Kefir: The acid is crucial. It reacts with the soda to lift the dough. Kefir is an excellent substitute if buttermilk is unavailable, offering a similar tang and acidity.
- Large Egg: While not in the most “minimalist” traditional recipes, the egg adds richness and helps the bread hold its shape, preventing it from being too crumbly.
- Raisins or Dried Cranberries: These provide bursts of sweetness. If you prefer a savory loaf, you can omit these and add caraway seeds or fresh herbs instead.
Ingredient Substitutions & Tips
If you find yourself missing an ingredient, don’t panic. For the buttermilk, you can make a quick DIY version by adding 1 tablespoon of lemon juice or white vinegar to 1 ¾ cups of regular milk; let it sit for 5 minutes until curdled. If you are vegan, a soy-milk and apple cider vinegar mixture works, though the texture will be slightly different. For a gluten-free option, a high-quality 1-to-1 baking flour blend can be used, though you may need to add an extra tablespoon of buttermilk as GF flours tend to be thirstier. Finally, if you want to skip the sugar for a more savory “brown bread” feel, replace 1 cup of all-purpose flour with whole wheat flour.
Step-by-Step Instructions
- Prep the Skillet: Begin by preheating your oven to 375˚F (190°C). Grease your 10-inch cast-iron skillet generously with butter. This ensures the bottom doesn’t stick and develops a deep, fried-bread flavor.
- Dry Mix: In a large bowl, whisk 4 cups of flour, 1/4 cup sugar, salt, and baking soda. This aeration ensures no clumps of soda remain, which can cause bitter green streaks in the finished bread.
- The Butter “Crumble”: Drop in the 6 tablespoons of cold, cubed butter. Use your fingertips to rub the butter into the flour. You are looking for a “coarse meal” texture—some pea-sized lumps are perfectly fine.
- Add Fruit: Toss in the raisins. Coating them in the flour mixture prevents them from sinking to the bottom of the loaf.
- Wet Mix: Whisk the buttermilk and egg together. Create a well (a hole) in the center of your dry ingredients and pour the liquid in.
- The Gentle Mix: Using a wooden spoon, fold the mixture. Stop as soon as the flour is moistened. The dough should look shaggy and slightly sticky. Over-mixing at this stage develops gluten, which will make your soda bread tough and rubbery.
- Shape and Score: Turn the dough onto a floured surface. With floured hands, give it 2-3 gentle folds just to form a round. Place it in the skillet. Use a sharp knife to cut a deep “X” (about 1 inch deep) across the top.
- Bake: Slide the skillet into the center rack. Bake for 50-55 minutes. If the top browns too quickly, tent it loosely with foil for the last 10 minutes.
Expert Baking Tips
The secret to world-class soda bread is temperature control. Always use cold butter, cold buttermilk, and a cold egg. This prevents the butter from melting before it hits the oven, ensuring those pockets of steam create a light texture. Another tip is the “hollow test.” When you think the bread is done, carefully lift it (using oven mitts!) and tap the bottom. It should sound like a drum. If it sounds dull, it needs another 5 minutes. Lastly, resist the urge to slice it immediately. As tempting as the steam is, the bread continues to set its structure as it cools. Waiting 20 minutes ensures the interior isn’t gummy.
The Magic of Cast Iron Baking
Why use a skillet instead of a standard baking sheet? Cast iron is a powerhouse of heat retention and distribution. Unlike thin aluminum pans that can have hot spots, cast iron radiates heat evenly, which is vital for a dense loaf like soda bread. The heavy bottom of the skillet fries the base of the dough slightly in the butter, creating a crust that is incredibly satisfying to bite into. Furthermore, the high sides of the skillet help reflect heat back into the sides of the loaf, contributing to an even rise. It’s the closest a home cook can get to a professional stone deck oven without the expensive equipment.
Serving Suggestions
Irish Soda Bread is best served warm. The classic way to enjoy it is with a thick layer of high-quality salted Irish butter. For a full breakfast, serve it alongside soft scrambled eggs and smoked salmon. It also acts as the perfect vessel for soaking up the juices of a traditional lamb stew or a bowl of creamy potato leek soup. If you have leftovers, toast a slice and top it with orange marmalade or honey for a delightful afternoon tea snack.
Storage & Make-Ahead Tips
This bread is preservative-free, so it is best enjoyed within 48 hours. Store leftovers in an airtight bag at room temperature. For longer storage, you can refrigerate it for up to a week, though it is best toasted at that point to revive the texture. You can also freeze the baked loaf! Wrap it tightly in plastic wrap and then foil; it will stay fresh for up to 3 months. Simply thaw at room temperature and warm in a 350°F oven for 10 minutes.
FAQs
Q: Why is my Irish Soda Bread so dense and dry?
A: This usually happens from over-working the dough or adding too much flour. The dough should be shaggy and slightly sticky. If you knead it like a traditional yeast bread, you’ll end up with a very hard loaf.
Q: Can I make this without a cast-iron skillet?
A: Absolutely. You can use a parchment-lined baking sheet or a greased 9-inch cake pan. However, the crust may be slightly less crunchy on the bottom.
Q: My bread has a metallic or bitter taste. What happened?
A: This is usually due to an imbalance of baking soda and buttermilk. The acid in the buttermilk must neutralize the soda. If your buttermilk wasn’t acidic enough or you used too much soda, a bitter taste can remain.
Q: Can I use whole wheat flour?
A: Yes! You can replace up to half of the all-purpose flour with whole wheat flour for a heartier, more traditional “brown bread” flavor. You may need an extra tablespoon of buttermilk as whole wheat absorbs more liquid.
Baking bread doesn’t have to be a day-long project. This skillet Irish Soda Bread proves that with just a few basic ingredients and 15 minutes of prep, you can create a centerpiece-worthy loaf that brings a touch of Irish tradition to your table. Its rugged beauty, crunchy crust, and tender interior make it a recurring favorite in any kitchen. Grab your skillet, skip the yeast, and enjoy the simple magic of soda bread today!
Print
Irish Soda Bread
A traditional, rustic Irish Soda Bread that requires zero yeast and no rising time. This recipe yields a thick, crunchy crust with a soft, biscuit-like interior, perfectly complemented by sweet raisins and the tang of buttermilk. Baking it in a cast-iron skillet ensures a superior golden-brown bottom and even heat distribution.
- Total Time: 70 minutes
- Yield: 12 servings
Ingredients
All-purpose flour – 4 cups
Granulated sugar – 1/4 cup
Sea salt – 1 tsp
Baking soda – 1 tsp
Cold unsalted butter – 6 Tbsp
Grease for pan (butter) – 1/2 Tbsp
Cold buttermilk or kefir – 1 3/4 cups
Large egg (cold) – 1
Raisins or dried cranberries – 1 cup
Instructions
Preheat your oven to 375˚F. Generously grease a 10” cast-iron skillet with 1/2 Tbsp of butter to prevent sticking and add flavor.
In a large mixing bowl, whisk together the flour, sugar, salt, and baking soda until well combined.
Cut the cold butter into small cubes. Using your fingers or a pastry cutter, work the butter into the flour until it resembles coarse crumbs.
Stir in the raisins, ensuring you break up any clumps so they are evenly distributed.
Make a well in the center of the flour mixture. In a separate measuring cup, whisk the cold buttermilk and egg together.
Pour the liquid into the well. Use a wooden spoon to mix just until the dough starts to come together and is lightly moistened.
Transfer the shaggy dough to a floured surface. With floured hands, gently shape it into a round loaf. Do not over-knead.
Place the loaf into the prepared skillet. Use a sharp knife to score a deep ‘X’ into the top of the dough.
Bake for 50-55 minutes. The bread is done when the top is golden and it sounds hollow when tapped.
Cool on a wire rack before slicing. Enjoy fresh with salted butter!
Notes
• Keep the butter, egg, and buttermilk as cold as possible for the best rise.
• If you don’t have a cast-iron skillet, a parchment-lined baking sheet or a 9-inch cake pan will work.
• To keep the crust soft, wrap the warm bread in a clean kitchen towel while it cools.
• The ‘X’ on top isn’t just tradition; it allows the center of the dense loaf to cook through.
- Prep Time: 15 minutes
- Cook Time: 55 minutes
- Cuisine: Irish