
Get ready to hop into spring with these utterly delightful Easter Sugar Cookies! These aren’t just any sugar cookies; they are soft, tender, and impossibly delicious, melting in your mouth with every bite. Each cookie provides a perfect canvas for vibrant, smooth royal icing, making them as beautiful to look at as they are to eat. The delicate vanilla and almond notes sing together, creating a flavor profile that is both classic and irresistible. Perfect for gifting, sharing, or simply indulging, these cookies will become an instant favorite for your Easter celebrations.
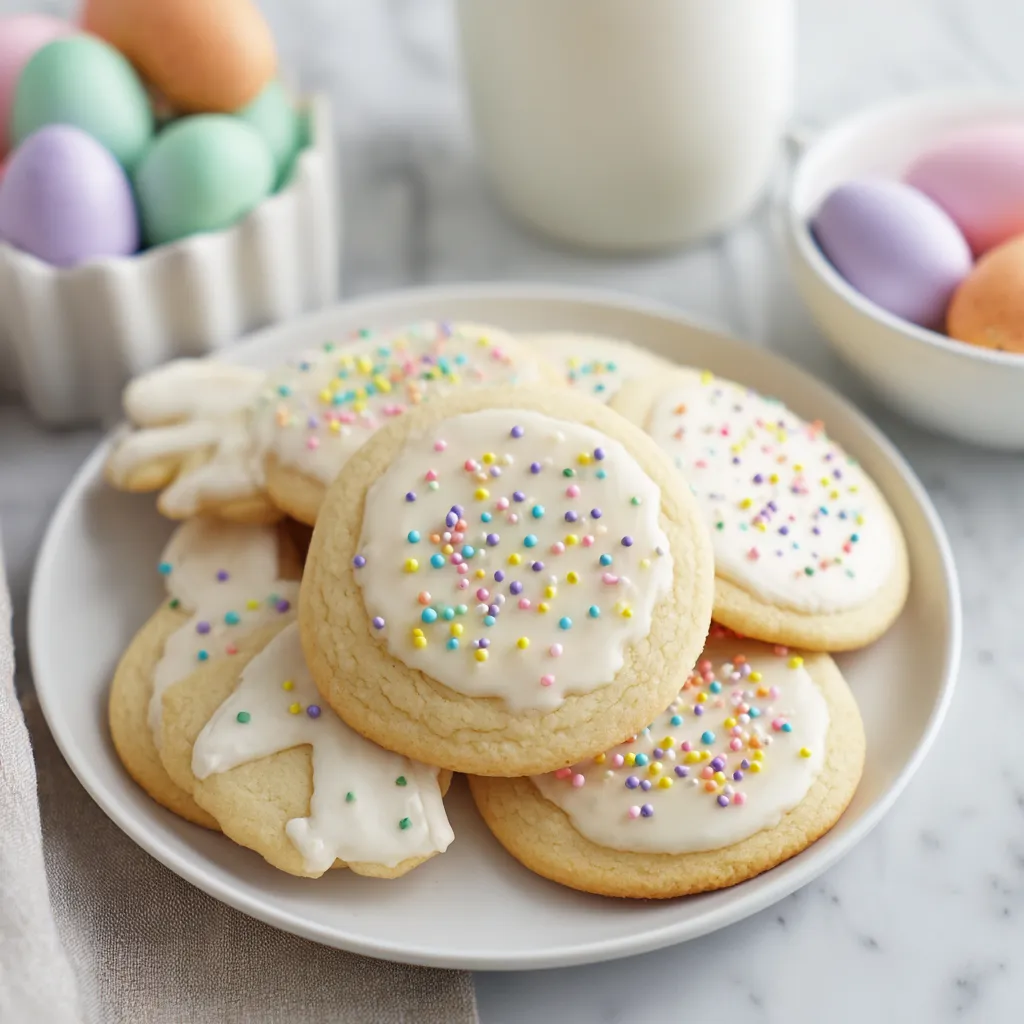
Why We Love These Easter Sugar Cookies
What sets these Easter Sugar Cookies apart is their unparalleled texture and balanced flavor. Unlike many sugar cookie recipes that can turn out hard or overly crumbly, ours yields a cookie that is remarkably soft and chewy in the center, with just the right amount of crispness around the edges. This isn’t a stiff, brittle cookie; it’s a tender embrace of buttery sweetness that practically dissolves on your tongue. The secret lies in the precise ratio of ingredients and a specific chilling method that ensures they hold their shape beautifully without compromising on that coveted melt-in-your-mouth quality.
The flavor profile is a harmonious blend of pure vanilla extract and a subtle hint of almond, which elevates the classic sugar cookie taste to something truly special. It’s nostalgic yet refined, appealing to both traditionalists and those looking for a little something extra. We believe in letting the quality of our ingredients shine through, so you won’t find any overpowering flavors here, just pure, sweet perfection designed to complement any festive icing. This recipe skips the common pitfalls of overly sweet or bland cookies, striking a delightful balance that keeps you reaching for just one more.
These cookies are not just a dessert; they’re a celebration in edible form. They are absolutely perfect for Easter picnics, holiday dessert tables, or as charming homemade gifts. The sturdy yet soft dough is a dream to work with, allowing for intricate cookie cutter shapes without tearing or spreading excessively in the oven. This makes them ideal for decorating with all sorts of festive designs, from cute bunnies and chicks to colorful eggs and flowers. They are truly a labor of love that feels incredibly rewarding, and every bite is a testament to the care put into making them.
An Unforgettable Easter Feast for the Senses!
Prepare yourself for an unparalleled sensory journey with every single one of these Easter Sugar Cookies. Picture this: the moment you taste one, your palate is first greeted by the subtle, sweet kiss of vanilla, quickly followed by the delicate, almost ethereal hint of almond. It’s a flavor combination that whispers spring, a comforting warmth that evokes childhood memories and holiday joy. The aroma alone, as they bake, fills your home with an irresistible, buttery sweetness that promises something truly special, drawing everyone into the kitchen like a magnet.
But the true magic lies in the texture. These cookies are a masterclass in soft perfection. They’re not crumbly or dry; instead, they possess an almost pillowy tender chewiness that yields effortlessly, contrasting beautifully with the slight structural integrity needed for delightful decorating. Each bite is a delicate dance on the tongue, an indulgent experience where the cookie practically melts away, leaving behind a lingering, comforting sweetness. It’s this irresistible tenderness that makes people utterly unable to resist them, often leading to secret trips back to the cookie jar.
Visually, these cookies are a feast before they even touch your lips. Imagine a vibrant tableau of perfectly shaped bunnies, chicks, and eggs, adorned with smooth, glossy royal icing in every hue of the spring rainbow. The pristine white base of the cookie allows the artistic icing designs to pop with dazzling clarity, turning each cookie into a miniature edible artwork. They’re not just cookies; they’re conversation starters, centerpieces, and delightful handcrafted tokens that bring a smile to anyone’s face. They scream celebration, joy, and the renewal of spring, making them an absolute must for your Easter gathering.
Use High Quality Ingredients for Easter Sugar Cookies
The beauty of a recipe as simple and classic as sugar cookies is how profoundly the quality of your ingredients impacts the final taste and texture. For these Easter Sugar Cookies, using high-quality butter, fresh eggs, and pure extracts isn’t just a suggestion—it’s a critical step that elevates them from good to truly extraordinary. Premium ingredients possess richer, more authentic flavors and textures that simply cannot be replicated with cheaper alternatives, ensuring every bite is a delectable experience rather than just a sweet one. This attention to detail is what sets our cookies apart and makes them truly worth savoring.
Specifically, investing in a good quality unsalted butter makes all the difference. Butter is the heart of these cookies, contributing not only to their rich, nuanced flavor but also to their tender, melt-in-your-mouth texture. A higher fat content butter will result in a more tender cookie that spreads less, providing that perfect canvas for your decorative designs. Similarly, using pure vanilla extract instead of imitation vanilla, and a high-quality almond extract, imparts an authentic depth of flavor that is both comforting and sophisticated, perfectly complementing the sweetness without overwhelming it. These premium choices infuse the cookies with a superior taste that is immediately noticeable.
Opting for fresh, large eggs also plays a vital role. Fresh eggs contribute to a better emulsion in your dough, leading to a more consistent texture and helping the cookies rise beautifully. When selecting your flour, an unbleached all-purpose flour is often preferred for its finer texture and ability to create a tender crumb. Think of these ingredients as the foundation of a masterpiece; you wouldn’t build a beautiful house on a shaky base. By starting with the best, you’re guaranteeing a batch of cookies that are superior in taste, texture, and overall enjoyment, making your Easter baking truly special.
Ingredients You Need
Easter Sugar Cookie Recipe
- All-purpose flour
- Granulated sugar
- Unsalted butter
- Large egg
- Pure vanilla extract
- Almond extract
- Baking powder
- Salt
Royal Icing
- Powdered sugar
- Meringue powder
- Water
- Pure vanilla extract
- Food coloring
Instructions
How to Make The Best Easter Sugar Cookies with Royal Icing!
Begin your baking adventure by ensuring all your ingredients are at room temperature. This is crucial for achieving a smooth, well-combined dough. In a medium bowl, whisk together 3 cups of all-purpose flour, 1 teaspoon of baking powder, and 1/2 teaspoon of salt. Set this aside. In the bowl of a stand mixer fitted with the paddle attachment, cream together 1 cup (2 sticks) of unsalted butter, softened, and 1 1/2 cups of granulated sugar until light and fluffy, about 3-5 minutes, scraping down the sides of the bowl as needed. The mixture should be pale yellow and aerated, indicating that enough air has been incorporated for a tender cookie. Beat in 1 large egg, 1 teaspoon of pure vanilla extract, and 1/2 teaspoon of almond extract until just combined. Be careful not to overmix at this stage.
Gradually add the dry ingredients to the wet ingredients, mixing on low speed until just combined. The dough will be thick and may appear crumbly at first, but resist the urge to add more liquid. Continue mixing until a soft, pliable dough forms. It should pull away from the sides of the bowl and be smooth to the touch, not sticky. Divide the dough into two equal portions, shape each into a disc, wrap tightly in plastic wrap, and refrigerate for at least 30 minutes, or up to 2 hours. This chilling step is non-negotiable; it prevents the cookies from spreading excessively and helps them maintain their intricate shapes.
Once chilled, preheat your oven to 375°F (190°C). Line baking sheets with parchment paper or silicone baking mats. On a lightly floured surface, roll out one disc of dough to about 1/4 inch thickness. Use your favorite Easter-themed cookie cutters to cut out shapes. Carefully transfer the cutouts to the prepared baking sheets, leaving about 1 inch between each cookie. Gather the scraps, gently re-roll, and cut out more shapes until all the dough is used. Bake for 8-10 minutes, or until the edges are lightly golden and the centers are set. The timing will depend on the size and thickness of your cookies, so keep a watchful eye. Avoid over-baking, as this will lead to a dry, hard cookie, sacrificing that beautiful soft texture we’re aiming for. Let the cookies cool on the baking sheets for 5 minutes before transferring them to a wire rack to cool completely before decorating. Residual heat on the baking sheet helps set the cookies and prevents breakage, ensuring they are perfectly firm for icing.
How to Make the Royal Icing
To create the perfect royal icing for your Easter Sugar Cookies, combine 4 cups of powdered sugar and 3 tablespoons of meringue powder in a large bowl. Meringue powder is key here, as it provides the stability and structure needed for piping and a beautiful shine. Gradually add 6-8 tablespoons of lukewarm water, starting with less and adding more as needed, mixing on low speed with an electric mixer until a thick, paste-like consistency forms. Then, increase the speed to medium-high and beat for 5-7 minutes until the icing is bright white, glossy, and holds stiff peaks. Stir in 1/2 teaspoon of pure vanilla extract for an enhanced flavor. Divide the icing into separate bowls for different colors. Add gel food coloring sparingly until you achieve your desired vibrant shades. The icing should be thick enough for outlining but can be thinned with a few drops of water for flooding, creating a smooth, even surface. Ensure the bowls are covered with damp cloths or plastic wrap when not in use to prevent the icing from drying out.
Decorate the Cookies
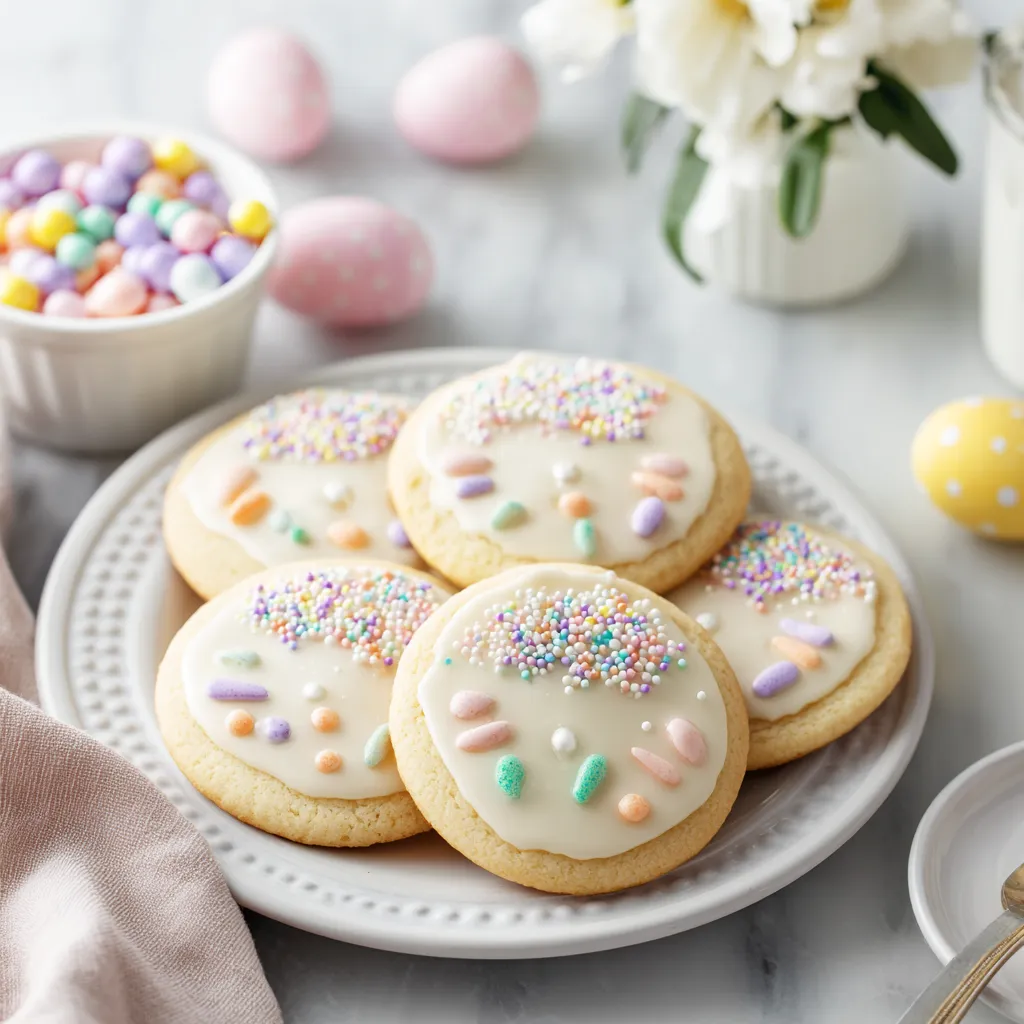
Now for the fun part: decorating your beautifully baked Easter Sugar Cookies! Once your cookies are completely cool and your royal icing is prepared and colored, it’s time to bring them to life. Transfer your outlining icing (thicker consistency) into piping bags fitted with small round tips (like a PME #1 or #2). Carefully pipe outlines around the edges of each cookie shape, creating a barrier to hold the flood icing. Let these outlines dry for 10-15 minutes. While they set, prepare your flooding icing (thinned with a few drops of water to a honey-like consistency) in separate piping bags, or use squeeze bottles for easier application. Fill the outlined areas with the flood icing, using a clean scribe tool or toothpick to gently spread it to the edges and pop any air bubbles. Allow the flood icing to dry completely, ideally for several hours or overnight, before adding any detail work. This ensures your base colors are perfectly smooth and won’t smudge when you add intricate designs on top. The result will be stunning, professional-looking cookies that are almost too pretty to eat!
More Festive Decorating Ideas!
Unleash your inner artist and make these Easter Sugar Cookies truly spectacular with these creative decorating ideas! Beyond simple outlines and floods, consider layering icing for a dimensional effect: pipe small white dots for bunny tails, or create a feathered look on chicks. Experiment with different piping tips to create festive patterns like baskets, stripes, or swirls. For an extra touch of glamour, sprinkle edible glitter or metallic dust onto wet icing, or attach small edible pearls and sprinkles before the icing sets. To celebrate spring, use green icing for grass borders and pipe tiny flowers using different colored royal icing. You can also vary your color palette beyond pastels; try bolder, saturated hues for a modern twist, or stick to classic whites and golds for an elegant Easter. Don’t forget edible markers for adding fine details like eyes or stitching on bunny ears. The possibilities are endless, making each cookie a unique masterpiece!
Storing Easter Sugar Cookies
To keep your beautifully decorated Easter Sugar Cookies fresh and delicious, proper storage is key. If your cookies are unfrosted, they can be stored in an airtight container at room temperature for up to 5-7 days. Layer them between sheets of parchment paper to prevent sticking. Once frosted with royal icing, it’s best to store them in a single layer in an airtight container at room temperature. Royal icing acts as a preservative, so these decorated cookies will also last well for 5-7 days without needing refrigeration, provided your home isn’t overly humid. Refrigeration is generally not recommended for royal-iced cookies, as it can cause condensation, leading to potential smudging or color bleeding. For longer storage, both unfrosted and frosted cookies (once the icing is completely dry and set) can be frozen for up to 3 months. Wrap individual cookies or stack them between parchment paper in a freezer-safe container. To thaw, simply unwrap and let them come to room temperature for a few hours. This method preserves their soft texture and vibrant designs, allowing you to enjoy your Easter treats long after the holiday has passed.
Print
Easter Sugar Cookies Recipe
Easter Sugar Cookies: Easy, Sweet, Perfect Treats! Get the recipe now!
- Total Time: 1 hour
- Yield: 24 cookies
Ingredients
- 3 cups all-purpose flour
- 1 teaspoon baking powder
- 1/2 teaspoon salt
- 1 cup (2 sticks) unsalted butter, softened
- 1 1/2 cups granulated sugar
- 1 large egg
- 1 teaspoon pure vanilla extract
- 1/2 teaspoon almond extract
- 4 cups powdered sugar
- 3 tablespoons meringue powder
- 6–8 tablespoons lukewarm water
- 1/2 teaspoon pure vanilla extract (for icing)
- Food coloring
Instructions
- Begin your baking adventure by ensuring all your ingredients are at room temperature. This is crucial for achieving a smooth, well-combined dough. In a medium bowl, whisk together 3 cups of all-purpose flour, 1 teaspoon of baking powder, and 1/2 teaspoon of salt. Set this aside. In the bowl of a stand mixer fitted with the paddle attachment, cream together 1 cup (2 sticks) of unsalted butter, softened, and 1 1/2 cups of granulated sugar until light and fluffy, about 3-5 minutes, scraping down the sides of the bowl as needed. The mixture should be pale yellow and aerated, indicating that enough air has been incorporated for a tender cookie. Beat in 1 large egg, 1 teaspoon of pure vanilla extract, and 1/2 teaspoon of almond extract until just combined. Be careful not to overmix at this stage.
- Gradually add the dry ingredients to the wet ingredients, mixing on low speed until just combined. The dough will be thick and may appear crumbly at first, but resist the urge to add more liquid. Continue mixing until a soft, pliable dough forms. It should pull away from the sides of the bowl and be smooth to the touch, not sticky. Divide the dough into two equal portions, shape each into a disc, wrap tightly in plastic wrap, and refrigerate for at least 30 minutes, or up to 2 hours. This chilling step is non-negotiable; it prevents the cookies from spreading excessively and helps them maintain their intricate shapes.
- Once chilled, preheat your oven to 375°F (190°C). Line baking sheets with parchment paper or silicone baking mats. On a lightly floured surface, roll out one disc of dough to about 1/4 inch thickness. Use your favorite Easter-themed cookie cutters to cut out shapes. Carefully transfer the cutouts to the prepared baking sheets, leaving about 1 inch between each cookie. Gather the scraps, gently re-roll, and cut out more shapes until all the dough is used. Bake for 8-10 minutes, or until the edges are lightly golden and the centers are set. The timing will depend on the size and thickness of your cookies, so keep a watchful eye. Avoid over-baking, as this will lead to a dry, hard cookie, sacrificing that beautiful soft texture we’re aiming for. Let the cookies cool on the baking sheets for 5 minutes before transferring them to a wire rack to cool completely before decorating. Residual heat on the baking sheet helps set the cookies and prevents breakage, ensuring they are perfectly firm for icing.
- To create the perfect royal icing for your Easter Sugar Cookies, combine 4 cups of powdered sugar and 3 tablespoons of meringue powder in a large bowl. Meringue powder is key here, as it provides the stability and structure needed for piping and a beautiful shine. Gradually add 6-8 tablespoons of lukewarm water, starting with less and adding more as needed, mixing on low speed with an electric mixer until a thick, paste-like consistency forms. Then, increase the speed to medium-high and beat for 5-7 minutes until the icing is bright white, glossy, and holds stiff peaks. Stir in 1/2 teaspoon of pure vanilla extract for an enhanced flavor. Divide the icing into separate bowls for different colors. Add gel food coloring sparingly until you achieve your desired vibrant shades. The icing should be thick enough for outlining but can be thinned with a few drops of water for flooding, creating a smooth, even surface. Ensure the bowls are covered with damp cloths or plastic wrap when not in use to prevent the icing from drying out.
- Now for the fun part: decorating your beautifully baked Easter Sugar Cookies! Once your cookies are completely cool and your royal icing is prepared and colored, it’s time to bring them to life. Transfer your outlining icing (thicker consistency) into piping bags fitted with small round tips (like a PME #1 or #2). Carefully pipe outlines around the edges of each cookie shape, creating a barrier to hold the flood icing. Let these outlines dry for 10-15 minutes. While they set, prepare your flooding icing (thinned with a few drops of water to a honey-like consistency) in separate piping bags, or use squeeze bottles for easier application. Fill the outlined areas with the flood icing, using a clean scribe tool or toothpick to gently spread it to the edges and pop any air bubbles. Allow the flood icing to dry completely, ideally for several hours or overnight, before adding any detail work. This ensures your base colors are perfectly smooth and won’t smudge when you add intricate designs on top. The result will be stunning, professional-looking cookies that are almost too pretty to eat!
Notes
Get ready to hop into spring with these utterly delightful Easter Sugar Cookies! These aren’t just any sugar cookies; they are soft, tender, and impossibly delicious, melting in your mouth with every bite. Each cookie provides a perfect canvas for vibrant, smooth royal icing, making them as beautiful to look at as they are to eat. The delicate vanilla and almond notes sing together, creating a flavor profile that is both classic and irresistible. Perfect for gifting, sharing, or simply indulging, these cookies will become an instant favorite for your Easter celebrations.
- Prep Time: 45 minutes
- Cook Time: 10 minutes
- Category: Dessert
- Cuisine: American