
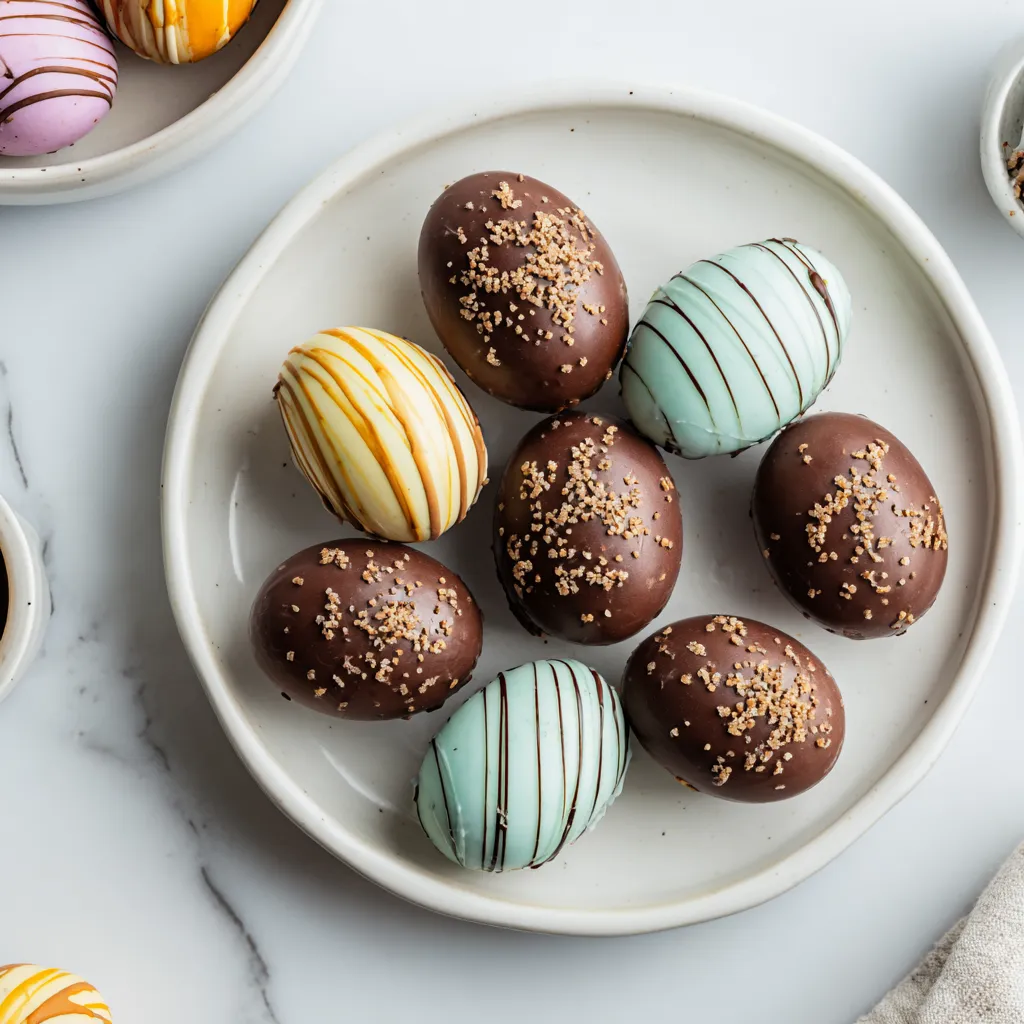
Easter is a time for renewal, joy, and, let’s be honest, an abundance of delicious treats! These Chocolate-Covered Easter Eggs are an absolute dream come true, bringing together creamy, melt-in-your-mouth centers with a decadent, snappy chocolate shell. Each bite is a symphony of textures and flavors – the rich, sweet interior perfectly balanced by the slightly bitter, glossy chocolate coating. They’re charming, incredibly fun to make, and guaranteed to be the star of any Easter basket or dessert spread, offering a homemade touch that store-bought versions simply can’t compete with.
Why We Love This Chocolate-Covered Easter Eggs
These Chocolate-Covered Easter Eggs aren’t just another dessert; they’re an experience! What sets them apart is the incredible contrast between the soft, yielding interior and the crisp, crackly chocolate shell. Unlike many overly sweet or cloyingly rich recipes, our version strikes the perfect balance, ensuring each egg is intensely flavorful without being overwhelming. The centers themselves are a delightful blend, offering a subtle hint of warmth from the vanilla that truly elevates the overall taste profile.
The texture is truly what makes these Easter eggs stand out. Imagine biting into a smooth, creamy filling that practically melts on your tongue, followed by the satisfying snap of tempered chocolate. We’ve perfected the ratio of sweetness to richness, making them utterly irresistible. Plus, the homemade touch means you control every ingredient, resulting in a cleaner, more authentic flavor that’s miles beyond anything you’d find pre-packaged.
These beautiful confections are perfect for so many occasions! Of course, Easter is the prime time, making fantastic edible gifts, dessert platter additions, or even a fun activity for a family gathering. But honestly, they’re so good, you’ll want to make them all year round for birthdays, celebrations, or just because you deserve a little extra sweetness. They’re simple enough for beginners but impressive enough to wow even the most discerning dessert connoisseur.
An Over-the-Top Indulgence!
Prepare yourself for an indulgence that borders on sinful with these Chocolate-Covered Easter Eggs! From the moment you lay eyes on their glossy, perfectly molded exteriors, you know you’re in for a treat. The subtle fragrance of vanilla and rich chocolate wafts up, hinting at the deliciousness within. Then comes the glorious moment of the first bite: that distinct, satisfying “snap” of the chocolate shell giving way to a velvety, luscious center that coats your palate with pure bliss. It’s a multi-sensory delight that completely captivates.
Each egg offers a journey of textures. The firm yet creamy interior, whether it’s a buttery vanilla or a nut butter dream, melts slowly, releasing its full, sweet flavor. This is beautifully contrasted by the thin, crisp layer of tempered chocolate, which prevents it from being too soft or sticky. The combination creates a textural symphony that’s incredibly addictive – you’ll find yourself reaching for just one more, then another!
These eggs are truly unforgettable. They’re not just a dessert; they’re a piece of edible art, handcrafted with love. Serve them on a beautiful platter for a special occasion, tucked into individual cellophane bags as thoughtful gifts, or even alongside a cup of coffee for an elevated afternoon treat. Their elegant appearance and exquisite taste make them a showstopper, guaranteeing compliments and requests for the recipe every single time.
Use High Quality Ingredients for Chocolate-Covered Easter Eggs
The secret to truly spectacular Chocolate-Covered Easter Eggs lies unequivocally in the quality of your ingredients. While it might be tempting to cut corners, trust me when I say that investing in premium components will elevate these treats from good to absolutely extraordinary. High-quality ingredients provide a depth of flavor and a superior texture that simply cannot be replicated with lesser alternatives. This recipe truly allows the inherent deliciousness of each element to shine through, making ingredient selection paramount.
For instance, the chocolate you choose for the coating is not just a covering; it’s a major flavor component. Opt for a high-quality baking chocolate or couverture chocolate with a cacao percentage you enjoy – whether it’s a rich dark, a creamy milk, or even a sweet white chocolate. This will result in a glossy, snappy shell that melts beautifully in your mouth, carrying complex flavor notes. Similarly, using real butter, pure vanilla extract, and fresh confectioners’ sugar for the filling will ensure a velvety smooth texture and a clean, vibrant taste that avoids any artificial aftertastes.
Choosing premium ingredients makes a tangible difference in both the process and the final product. Your filling will be smoother, your chocolate will temper more easily, and the overall enjoyment of eating these eggs will be significantly enhanced. Read labels, seek out reputable brands, and consider these ingredients an investment in the ultimate Easter indulgence. This attention to detail is precisely what makes these Chocolate-Covered Easter Eggs truly special and unforgettable.
Ingredients You Need
Chocolate-Covered Easter Eggs Recipe
- Confectioners’ sugar
- Butter
- Cream cheese
- Vanilla extract
- Powdered milk
- Salt
- Semisweet chocolate
- Coconut oil
- Chocolate melting wafers
- Peanut butter (optional, for variation)
- Cocoa powder (optional, for variation)
- Food coloring (optional, for variation)
Decorative Elements for Easter Eggs
- Sprinkles
- Royal icing
- Edible glitter
- Candy pearls
- Mini chocolate chips
- White chocolate for drizzling
Instructions
How to Make The Best Chocolate-Covered Easter Eggs with Decorative Elements!
First things first, let’s get that creamy, dreamy filling ready. In a large mixing bowl, beat together the softened butter and cream cheese until the mixture is light, fluffy, and perfectly smooth. This is crucial for a lump-free interior! Now, gradually add in the confectioners’ sugar, about a cup at a time, mixing well after each addition until it’s fully incorporated. Don’t rush this step; you want a consistent, smooth dough. Next, stir in the pure vanilla extract and a tiny pinch of salt – this enhances all the sweet flavors. If you’re doing a peanut butter variation, now is the time to blend in about half a cup of smooth peanut butter until thoroughly combined. The mixture should be firm enough to handle, but still pliable. If it’s too sticky, add a little more confectioners’ sugar; if it’s too dry, a tiny splash of milk or cream will help. Once your base is perfect, cover the bowl and refrigerate for at least 1-2 hours, or until the mixture is firm enough to roll without sticking to your hands. This chilling step is non-negotiable for perfectly shaped eggs! Once chilled, scoop out small portions, about 1-1.5 tablespoons each, and gently roll them between your palms into an egg shape. Place these sculpted beauties on a parchment-lined baking sheet and pop them back into the refrigerator or freezer for another 30 minutes. This firms them up even more, ensuring they hold their shape beautifully when dipped in chocolate and preventing the chocolate from seizing or becoming clumpy.
How to Make the Decorative Elements
Once your egg centers are perfectly chilled and firm, it’s time to prepare our glorious chocolate coating and delightful decorations! For the dipping chocolate, combine your chosen chocolate (semisweet, milk, or white) with a touch of coconut oil in a microwave-safe bowl. Heat in 30-second intervals, stirring thoroughly after each, until the chocolate is completely melted and beautifully smooth, without any lumps. Aim for a temperature around 90-92°F (32-33°C) for perfect tempering, which gives that lovely snap and shine. While the chocolate is melting, gather your decorative elements – sprinkles, edible glitter, finely chopped nuts, or contrasting melted chocolate for drizzling. Have these ready in shallow dishes or bowls, as you’ll want to decorate the eggs immediately after dipping, while the chocolate is still wet and pliable, allowing the decorations to adhere perfectly. This organized approach ensures a smooth and enjoyable decorating process.
Dip the Easter Eggs
Now for the fun part: dipping! Take your chilled egg centers out of the fridge. Using a dipping fork or two regular forks, carefully submerge one egg at a time into the melted chocolate, ensuring it’s completely coated. Gently tap the fork against the side of the bowl to allow any excess chocolate to drip off, creating a smooth, even coating. This prevents puddles at the bottom and ensures a perfectly sleek finish. Immediately transfer the chocolate-covered egg to the prepared parchment-lined baking sheet. While the chocolate is still wet, sprinkle generously with your chosen decorations – vibrant sprinkles, shimmering edible glitter, or delicate candy pearls. This quick action allows the decorations to adhere securely before the chocolate sets. Repeat this glorious process until all your delightful eggs are dipped and adorned, then let them set completely at room temperature or in the refrigerator until the chocolate is firm and snappy.
More Festive Decorating Ideas!
Beyond simple sprinkles, let your creativity truly shine with these festive Easter eggs! Try drizzling contrasting melted white or dark chocolate over the set eggs in zig-zag patterns for an elegant look. You can also create ombre effects by dipping the bottom half in one color, letting it set, then dipping the top half in another. For a more artistic touch, use a small paintbrush to splatter edible gold or silver paint for a glamorous finish. Consider using royal icing to pipe delicate floral designs, tiny polka dots, or personalized initials. Another charming idea is to create a “nest” effect by rolling the chocolate-dipped eggs in toasted shredded coconut while the chocolate is still wet. For a textured look, finely chop different types of nuts or colorful dried fruit and press them onto the wet chocolate. And don’t forget the power of food coloring – separate your white chocolate into bowls and tint each a pastel shade for a truly rainbow array of eggs!
Storing Chocolate-Covered Easter Eggs
To keep your beautiful Chocolate-Covered Easter Eggs fresh and delicious, proper storage is key! For short-term enjoyment (within a day or two), you can store them at cool room temperature in an airtight container, away from direct sunlight or heat, to prevent the chocolate from melting or blooming. For longer freshness, and to maintain the creamy texture of the filling, it’s best to store them in the refrigerator. Place them in a single layer in an airtight container – a flat shallow container works perfectly to prevent them from sticking or getting smushed together. They will remain wonderfully fresh for up to 2-3 weeks when refrigerated. If you’re planning to make a large batch, these eggs freeze beautifully! Arrange them in a single layer on a parchment-lined baking sheet until solid, then transfer them to a freezer-safe airtight container or freezer bag, separating layers with parchment paper. They will keep in the freezer for up to 2-3 months. To enjoy, simply thaw them overnight in the refrigerator, or for about an hour at room temperature, allowing the filling to soften slightly before serving for the best texture and flavor.
Print
Chocolate Easter Eggs
Chocolate-Covered Easter Eggs: Make delicious treats! Get your free recipe now! ➡️ [Link]
- Total Time: 1 hour 30 minutes
- Yield: 24 servings
Ingredients
- 500 grams Confectioners’ sugar
- 113 grams (1 stick) Butter, softened
- 226 grams (8 ounces) Cream cheese, softened
- 1 teaspoon Vanilla extract
- 2 tablespoons Powdered milk (optional)
- ¼ teaspoon Salt
- 300 grams Semisweet chocolate, chopped
- 1 tablespoon Coconut oil
- 200 grams Chocolate melting wafers (optional)
- 120 grams (½ cup) Peanut butter (optional, for variation)
- 1 tablespoon Cocoa powder (optional, for variation)
- Food coloring (optional, for variation)
- Sprinkles
- Royal icing
- Edible glitter
- Candy pearls
- Mini chocolate chips
- White chocolate for drizzling
Instructions
- In a large mixing bowl, beat together the softened butter and cream cheese until the mixture is light, fluffy, and perfectly smooth. Gradually add in the confectioners’ sugar, about a cup at a time, mixing well after each addition until it’s fully incorporated. Stir in the pure vanilla extract and a tiny pinch of salt. If making the peanut butter variation, blend in about half a cup of smooth peanut butter until thoroughly combined. If too sticky, add more confectioners’ sugar; if too dry, add a tiny splash of milk or cream. Cover the bowl and refrigerate for at least 1-2 hours, or until the mixture is firm enough to roll without sticking to your hands.
- Once chilled, scoop out small portions, about 1-1.5 tablespoons each, and gently roll them between your palms into an egg shape. Place these sculpted beauties on a parchment-lined baking sheet and pop them back into the refrigerator or freezer for another 30 minutes. This firms them up even more, ensuring they hold their shape beautifully when dipped in chocolate and preventing the chocolate from seizing or becoming clumpy.
- For the dipping chocolate, combine your chosen chocolate (semisweet, milk, or white) with a touch of coconut oil in a microwave-safe bowl. Heat in 30-second intervals, stirring thoroughly after each, until the chocolate is completely melted and beautifully smooth, without any lumps. Aim for a temperature around 90-92°F (32-33°C). Gather your decorative elements – sprinkles, edible glitter, finely chopped nuts, or contrasting melted chocolate for drizzling – and have them ready in shallow dishes or bowls.
- Take your chilled egg centers out of the fridge. Using a dipping fork or two regular forks, carefully submerse one egg at a time into the melted chocolate, ensuring it’s completely coated. Gently tap the fork against the side of the bowl to allow any excess chocolate to drip off, creating a smooth, even coating. Immediately transfer the chocolate-covered egg to the prepared parchment-lined baking sheet. While the chocolate is still wet, sprinkle generously with your chosen decorations. Repeat this process until all your eggs are dipped and adorned, then let them set completely at room temperature or in the refrigerator until the chocolate is firm and snappy.
- Drizzle contrasting melted white or dark chocolate over the set eggs in zig-zag patterns. Create ombre effects by dipping the bottom half in one color, letting it set, then dipping the top half in another. Use a small paintbrush to splatter edible gold or silver paint. Pipe delicate floral designs, tiny polka dots, or personalized initials with royal icing. Create a ‘nest’ effect by rolling chocolate-dipped eggs in toasted shredded coconut. For a textured look, finely chop different types of nuts or colorful dried fruit and press them onto the wet chocolate. Separate white chocolate into bowls and tint each a pastel shade with food coloring.
- For short-term enjoyment (within a day or two), store at cool room temperature in an airtight container, away from direct sunlight or heat. For longer freshness, store them in the refrigerator in a single layer in an airtight container for up to 2-3 weeks. To freeze, arrange them in a single layer on a parchment-lined baking sheet until solid, then transfer them to a freezer-safe airtight container or freezer bag, separating layers with parchment paper. They will keep in the freezer for up to 2-3 months. To enjoy, thaw overnight in the refrigerator, or for about an hour at room temperature.
Notes
These Chocolate-Covered Easter Eggs are an absolute dream come true, bringing together creamy, melt-in-your-mouth centers with a decadent, snappy chocolate shell. Rich, sweet interior perfectly balanced by the slightly bitter, glossy chocolate coating.
- Prep Time: 1 hour
- Cook Time: 30 minutes
- Category: Dessert
- Cuisine: American