
Prepare yourselves for a dessert experience that’s truly out of this world: Butterfinger Cookie Bars! These aren’t just any cookie bars; they’re a sensational symphony of soft, chewy cookie dough, generously studded with crunchy, peanut buttery Butterfinger candy, and then crowned with a rich, decadent chocolate ganache. Each bite delivers an explosion of classic chocolate chip cookie comfort mingled with that unmistakable crisp, honeycomb-like texture and nutty flavor of your favorite candy bar. They’re incredibly easy to make, yet yield a show-stopping treat that will have everyone clamoring for the recipe.
Why We Love This Butterfinger Cookie Bars
These Butterfinger Cookie Bars stand out in a crowded field of desserts because they perfectly marry two beloved classics: the humble chocolate chip cookie and the iconic Butterfinger candy bar. What truly sets them apart is the incredible textural contrast. You get the comforting chewiness of a perfectly baked cookie base, interspersed with glorious pockets of crunchy, shattered Butterfinger pieces that melt in your mouth, leaving behind that distinctive peanut butter and toffee flavor. It’s a sensory delight, making every bite an exciting adventure.
The flavor profile is a harmonious blend of sweet, salty, and nutty. The brown sugar in the cookie dough provides that deep, caramel-like richness, while the Butterfinger pieces introduce a unique, almost malt-like sweetness and a delightful savory note from the peanut butter. Unlike other candy bar desserts that can sometimes be overwhelmingly sweet, these bars strike a beautiful balance. The chocolate ganache drizzled artistically on top adds another layer of luxurious chocolatey goodness, ensuring every morsel is pure bliss.
We’ve fine-tuned this recipe to ensure maximum Butterfinger distribution and a consistently soft, tender crumb that holds up beautifully. The secret lies in slightly under-baking for that ultimate chewy center and not overmixing the dough. These bars are incredibly versatile, perfect for potlucks, birthday parties, game nights, or simply as an indulgent weekend treat. They’re impressive enough for a special occasion but simple enough for a casual gathering, making them a go-to recipe in our kitchen.
An Irresistible Ode to Crunch and Chocolatey Bliss
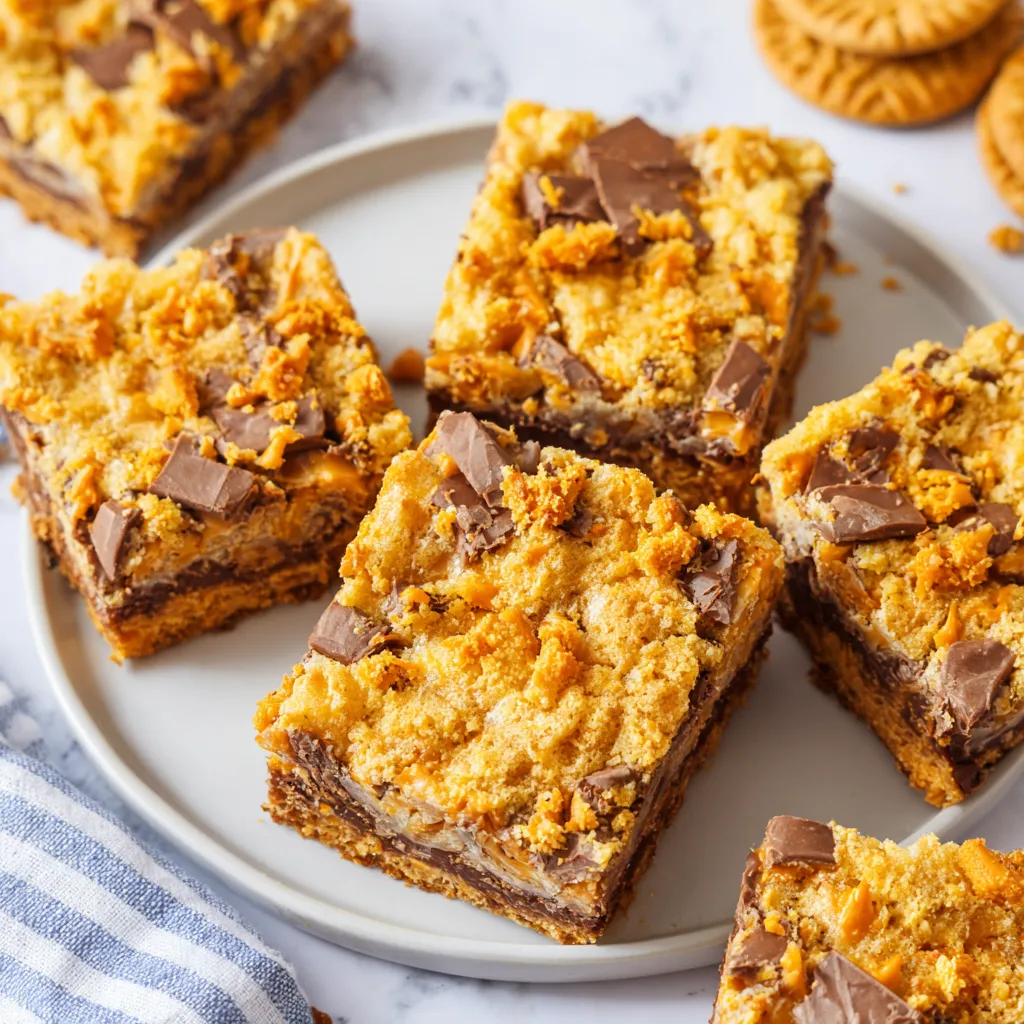
Prepare your senses for an experience that transcends mere dessert; these Butterfinger Cookie Bars are an irresistible ode to crunch and chocolatey bliss. From the moment they emerge from the oven, a warm, inviting aroma of toasted peanuts, sweet butter, and rich chocolate wafts through your home, instantly drawing everyone to the kitchen. The golden-brown surface, speckled with glistening chocolate chips and vibrant orange shards of Butterfinger, is a sight to behold, promising an adventure in every square.
The first bite is an epiphany. Your teeth sink through a remarkably soft, tender cookie base that yields effortlessly, only to encounter the delightful resistance and subsequent shatter of a Butterfinger candy piece. That distinct, airy, almost honeycomb-like crunch transforms the texture, providing an exhilarating contrast to the chewy dough. Then comes the complex flavor: the rich, deep notes of brown sugar and butter from the cookie, seamlessly blending with the sweet, slightly salty, and undeniably peanut buttery taste of Butterfinger. It’s a symphony of textures and flavors that captivates and delights.
People simply can’t resist these bars because they offer a playful nostalgia combined with gourmet appeal. The familiar comfort of a cookie meets the exciting surprise of a beloved candy bar, elevated by a silky smooth chocolate ganache. They’re perfect for any occasion – a casual afternoon pick-me-up, a vibrant addition to a party spread, or a comforting dessert after a homemade meal. Serve them slightly warm with a scoop of vanilla ice cream for an extra layer of decadence, or enjoy them at room temperature with a cup of coffee. Each bar is a memorable moment, creating smiles and satisfying even the most intense sweet cravings.
Use High Quality Ingredients for Butterfinger Cookie Bars
The magic of these Butterfinger Cookie Bars truly begins with the quality of the ingredients you choose. While it might seem like a simple cookie bar recipe, using premium components elevates them from good to absolutely extraordinary. When you invest in better ingredients, you’re not just baking; you’re crafting an experience, and the difference in the final taste and texture is undeniable and deeply rewarding.
For instance, using a high-quality unsalted butter makes a monumental difference. Good butter contributes a richer, creamier flavor to the cookie base and ensures a more tender crumb. Opt for a butter with a higher fat content if available! Similarly, using a good quality vanilla extract, rather than imitation, adds a depth and warmth that really shines through, enhancing the caramel notes of the brown sugar. And of course, the chocolate chips – choose a brand you truly love for snacking, as their flavor will be prominent in every bite.
The Butterfinger candy bars themselves are the star here, so make sure they’re fresh and crunchy for that iconic texture. Don’t underestimate the role of fresh flour and baking soda either; these leavening agents are crucial for the perfect rise and chewiness. By paying attention to these details and selecting the best ingredients you can, you’ll unlock the full potential of these bars, creating a dessert that is not just sweet, but truly complex, comforting, and undeniably delicious.
Ingredients You Need
Butterfinger Cookie Bars Recipe
- Unsalted Butter
- Granulated Sugar
- Light Brown Sugar
- Large Eggs
- Vanilla Extract
- All-Purpose Flour
- Baking Soda
- Salt
- Semi-Sweet Chocolate Chips
- Butterfinger Candy Bars
Chocolate Ganache
- Semi-Sweet Chocolate Chips
- Heavy Cream
- Unsalted Butter
- Light Corn Syrup
Instructions
How to Make The Best Butterfinger Cookie Bars with Chocolate Ganache!
Before you begin your chocolatey adventure, preheat your oven to 350°F (175°C) and line a 9×13-inch baking pan with parchment paper, leaving an overhang on the sides for easy removal later. Lightly grease the parchment to prevent sticking. In a large mixing bowl, using an electric mixer, cream together the softened unsalted butter, granulated sugar, and light brown sugar until the mixture is light, fluffy, and pale in color, about 2-3 minutes. This aeration step is key for a tender bar. Crack in the large eggs one at a time, beating well after each addition, then stir in the vanilla extract until just combined. Don’t overmix at this stage; we want to keep things light. In a separate medium bowl, whisk together the all-purpose flour, baking soda, and salt. Gradually add the dry ingredients to the wet ingredients, mixing on low speed until just combined. Be careful not to overmix the dough, as this can lead to tough bars; stop as soon as no streaks of flour remain. Fold in the semi-sweet chocolate chips and the coarsely chopped Butterfinger candy bars. The dough should be thick and slightly sticky, holding its shape.
Press the glorious dough evenly into your prepared 9×13-inch baking pan. Use the back of a spoon or your greased fingers to ensure it’s an even layer from edge to edge, which will help with uniform baking. Pop the pan into the preheated oven and bake for 25-30 minutes, or until the edges are lightly golden and the center is set but still looks a little soft when gently pressed. Remember, a slightly under-baked bar is a chewy bar! Over-baking will result in a dry, crumbly texture, which we definitely want to avoid. Once baked, remove the pan from the oven and place it on a wire rack to cool completely before attempting to add the ganache or cut. This cooling time is crucial for the bars to set up properly and prevents them from falling apart, allowing the flavors to meld beautifully.
How to Make the Chocolate Ganache
While your Butterfinger Cookie Bars are cooling, it’s time to prepare the luscious chocolate ganache topping. In a medium heatproof bowl, combine your semi-sweet chocolate chips, a tablespoon of unsalted butter, and a hint of light corn syrup (this adds a beautiful sheen and helps prevent sugar crystallization). In a small saucepan, heat the heavy cream over medium heat just until it begins to simmer around the edges – do not let it boil. Immediately pour the hot cream over the chocolate chip mixture. Let it sit undisturbed for about 5 minutes to allow the chocolate to melt completely. Then, using a whisk, gently stir from the center outwards until the ganache is smooth, glossy, and beautifully uniform. It should have a rich, pourable consistency, thick enough to coat a spoon but thin enough to spread easily. If it seems too thick, add a tiny bit more warm cream, a teaspoon at a time, until you reach that perfect luxurious texture.
Drizzle the Bars
Once your Butterfinger Cookie Bars have completely cooled to room temperature, and your chocolate ganache has reached that perfect, velvety consistency, it’s time for the crowning glory! Gently pour the warm ganache over the cooled bars, allowing it to spread naturally or using an offset spatula to
create an even, thin layer over the entire surface. For an extra touch of elegance and Butterfinger abundance, immediately sprinkle additional finely chopped Butterfinger candy pieces over the wet ganache. This ensures they adhere beautifully and adds another pop of color and crunch. Allow the ganache to set at room temperature for about 30-60 minutes, or pop the pan into the refrigerator for 15-20 minutes to speed up the setting process. Once the ganache is firm to the touch, you can lift the bars out of the pan using the parchment paper overhang and cut them into squares using a sharp knife. For the cleanest cuts, wipe your knife with a hot, damp cloth between each slice.
More Festive Decorating Ideas!
Elevate your Butterfinger Cookie Bars even further with a few festive and fun decorating touches! For a vibrant display, consider drizzling a contrasting white chocolate or peanut butter swirl over the dark ganache after it sets. For seasonal flair, crushed peppermint candies can be sprinkled on top during the holidays, or mini candy corn for Halloween to complement the Butterfinger’s orange hue. You could also pipe small rosettes of whipped cream or buttercream on each corner of the cut bars for an elegant touch, or arrange whole mini Butterfinger candy bars for a more dramatic presentation. A dusting of edible gold glitter or cocoa powder adds sophistication, while chocolate shavings or sprinkles can provide a playful finish, making these bars stunning for any celebration.
Storing Butterfinger Cookie Bars
To preserve the delightful crunch and chewiness of your Butterfinger Cookie Bars, proper storage is key. At room temperature, store the bars in an airtight container for up to 3-4 days. This method helps maintain their soft texture without drying them out. For extended freshness, especially in warmer climates, you can refrigerate the bars in an airtight container for up to a week. The ganache will firm up slightly in the fridge, but the bars will still be deliciously chewy. If you prefer them softer, simply let them sit out at room temperature for 15-20 minutes before serving. For longer storage, these bars freeze beautifully! Once completely cooled and the ganache is set, cut them into individual squares and wrap each tightly in plastic wrap, then place them in a freezer-safe bag or container for up to 2-3 months. Thaw them at room temperature for a couple of hours or in the refrigerator overnight. Reheating is generally not necessary, as they are delicious at room temperature, but a quick 10-15 seconds in the microwave can revive that fresh-baked warmth for a truly decadent experience.
Print
Butterfinger Bars Recipe
Irresistible Butterfinger Cookie Bars: Easy Copycat Recipe! Get the recipe now!
- Total Time: 50 minutes
- Yield: 16 servings
Ingredients
- 1 cup (226g) Unsalted Butter, softened
- 1 1/2 cups (300g) Granulated Sugar
- 1 cup (220g) Light Brown Sugar, packed
- 2 Large Eggs
- 2 teaspoons Vanilla Extract
- 3 cups (360g) All-Purpose Flour
- 1 teaspoon Baking Soda
- 1/2 teaspoon Salt
- 1 cup (170g) Semi-Sweet Chocolate Chips
- 10–12 Butterfinger Candy Bars (about 12 oz total), coarsely chopped
- Chocolate Ganache:
- 1 cup (170g) Semi-Sweet Chocolate Chips
- 1/2 cup (120ml) Heavy Cream
- 1 tablespoon (14g) Unsalted Butter
- 1 teaspoon Light Corn Syrup
Instructions
- Preheat your oven to 350°F (175°C) and line a 9×13-inch baking pan with parchment paper, leaving an overhang on the sides for easy removal later. Lightly grease the parchment to prevent sticking. In a large mixing bowl, using an electric mixer, cream together the softened unsalted butter, granulated sugar, and light brown sugar until the mixture is light, fluffy, and pale in color, about 2-3 minutes. Crack in the large eggs one at a time, beating well after each addition, then stir in the vanilla extract until just combined.
- In a separate medium bowl, whisk together the all-purpose flour, baking soda, and salt. Gradually add the dry ingredients to the wet ingredients, mixing on low speed until just combined. Fold in the semi-sweet chocolate chips and the coarsely chopped Butterfinger candy bars. The dough should be thick and slightly sticky, holding its shape.
- Press the glorious dough evenly into your prepared 9×13-inch baking pan. Pop the pan into the preheated oven and bake for 25-30 minutes, or until the edges are lightly golden and the center is set but still looks a little soft when gently pressed. Once baked, remove the pan from the oven and place it on a wire rack to cool completely before attempting to add the ganache or cut.
- While your Butterfinger Cookie Bars are cooling, it’s time to prepare the luscious chocolate ganache topping. In a medium heatproof bowl, combine your semi-sweet chocolate chips, a tablespoon of unsalted butter, and a hint of light corn syrup. In a small saucepan, heat the heavy cream over medium heat just until it begins to simmer around the edges – do not let it boil. Immediately pour the hot cream over the chocolate chip mixture. Let it sit undisturbed for about 5 minutes to allow the chocolate to melt completely. Then, using a whisk, gently stir from the center outwards until the ganache is smooth, glossy, and beautifully uniform.
- Once your Butterfinger Cookie Bars have completely cooled to room temperature, gently pour the warm ganache over the cooled bars, allowing it to spread naturally or using an offset spatula to create an even, thin layer over the entire surface. Sprinkle additional finely chopped Butterfinger candy pieces over the wet ganache. Allow the ganache to set at room temperature for about 30-60 minutes, or pop the pan into the refrigerator for 15-20 minutes to speed up the setting process. Once the ganache is firm to the touch, you can lift the bars out of the pan using the parchment paper overhang and cut them into squares using a sharp knife. For the cleanest cuts, wipe your knife with a hot, damp cloth between each slice.
Notes
Prepare yourselves for a dessert experience that’s truly out of this world: Butterfinger Cookie Bars! These aren’t just any cookie bars; they’re a sensational symphony of soft, chewy cookie dough, generously studded with crunchy, peanut buttery Butterfinger candy, and then crowned with a rich, decadent chocolate ganache. Each bite delivers an explosion of classic chocolate chip cookie comfort mingled with that unmistakable crisp, honeycomb-like texture and nutty flavor of your favorite candy bar. They’re incredibly easy to make, yet yield a show-stopping treat that will have everyone clamoring for the recipe.
- Prep Time: 20 minutes
- Cook Time: 30 minutes
- Category: Dessert
- Cuisine: American