
There is absolutely nothing that compares to the aroma of Soft Homemade Yeast Rolls wafting through the house. It’s a scent that signals comfort, family gatherings, and the promise of a truly spectacular meal. If you’ve ever been intimidated by working with yeast, let this be the recipe that changes your mind.

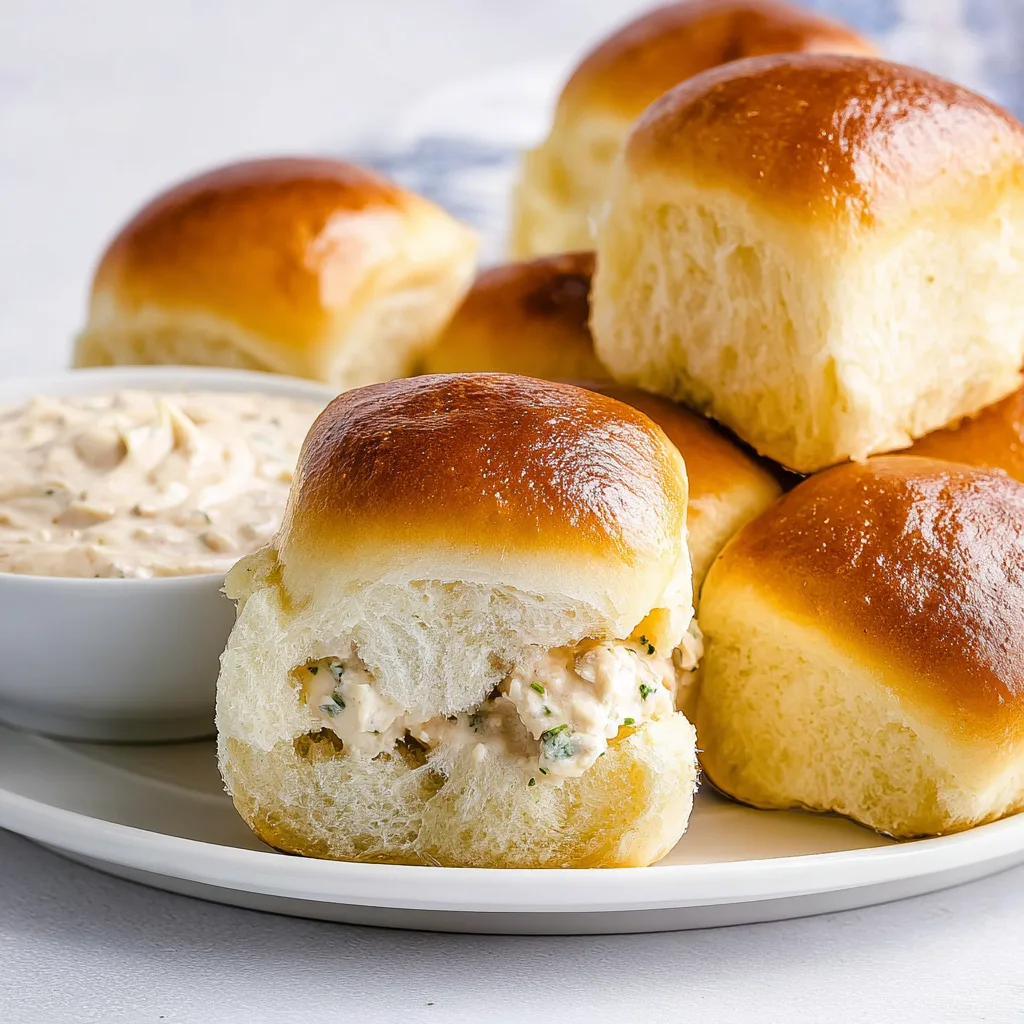
These rolls are the definition of “pillowy.” They have a delicate, golden-brown crust that gives way to a center so soft it practically melts in your mouth. Whether you’re preparing a holiday feast or just want to elevate a simple Sunday roast, these rolls are the crowning glory of the dinner table. Forget the “brown and serve” bags from the grocery store—once you taste a roll made from scratch, there is no going back.
Why You’ll Love This Recipe
- Beginner-Friendly: We use a straightforward method that takes the guesswork out of yeast bread.
- Pantry Staples: You likely already have everything you need in your kitchen: flour, sugar, butter, and milk.
- The Texture: Thanks to the addition of butter and an egg, these are “enriched” rolls, making them much softer than standard crusty bread.
- Perfect for Prep: You can make the dough ahead of time or even freeze the rolls for later.
- Crowd-Pleaser: I have yet to meet a person who can stop at just one of these buttery delights.
Ingredient Notes
Before we dive into the mixing bowl, let’s talk about the key players in this recipe. Understanding your ingredients is the first step to baking success!
- Active Dry Yeast: This recipe calls for one standard packet. The most important thing here is the temperature of your milk. It should be between 105°F and 110°F. Think “warm baby bathwater.” If it’s too hot, you’ll kill the yeast; too cold, and it won’t wake up.
- Warm Milk: While you can use water, milk provides a richer flavor and a softer crumb. I recommend whole milk for the best results.
- Granulated Sugar: This isn’t just for sweetness! Sugar acts as “food” for the yeast, helping it produce the carbon dioxide that makes the rolls rise.
- Unsalted Butter: Use room-temperature butter for the dough to ensure it incorporates smoothly. We’ll use melted butter at the end to give the rolls that signature glossy, savory finish.
- All-Purpose Flour: No need for fancy bread flour here. Standard all-purpose flour provides the perfect balance of structure and tenderness.
Step-by-Step Instructions
1. Bloom the Yeast
In a small bowl, combine your warm milk and sugar. Sprinkle the yeast over the top. Give it a gentle stir and then let it sit for about 5 minutes. You’re looking for it to become “foamy” or “bubbly.” If it doesn’t foam, your yeast might be expired, or your milk was the wrong temperature.
2. Mix the Dough
Transfer your foamy yeast mixture to a large mixing bowl (or the bowl of a stand mixer). Add the ¼ cup of room-temperature butter, the egg, salt, and 2 cups of the flour. Beat this on medium speed until the batter is smooth.
3. Knead to Perfection
Gradually add the remaining flour. You want the dough to form a soft ball. Increase the speed to medium-high and beat for 2-3 minutes. The Golden Rule: The dough should be tacky, but not sticky. If it’s sticking to your fingers like glue, add more flour one tablespoon at a time.
4. The First Rise
Place the dough in a lightly greased bowl, turning it once to coat the surface. Cover it with a clean dish towel and find a warm, draft-free spot. Let it rise until it has doubled in size (usually 45-60 minutes).
5. Shape the Rolls
Punch the dough down gently to release the air. On a lightly floured surface, roll the dough into a 12×8 inch rectangle, about ½ inch thick. Use a sharp knife or a pizza cutter to cut the dough into 24-30 even pieces.
6. The Second Rise
Place your pieces on a baking sheet lined with a silicone mat or parchment paper. Cover again and let them rise for another 45-60 minutes. This second rise is crucial for that “airy” texture!
7. Bake and Butter
Preheat your oven to 350°F. Bake the rolls for 12-15 minutes until the tops are a beautiful golden brown. As soon as they come out of the oven, brush them generously with melted butter.
Expert Tips for Best Results
- Don’t Over-Flour: It is tempting to keep adding flour until the dough is easy to handle, but too much flour leads to dense, heavy rolls. Keep the dough slightly tacky.
- Room Temperature Matters: Make sure your egg and butter are at room temperature. Cold ingredients can shock the yeast and slow down the rising process.
- The Proofing Spot: If your house is cold, turn your oven on for 60 seconds, then turn it off. Place the dough inside the slightly warmed oven to rise.
- Weigh Your Ingredients: For the most consistent results, use a kitchen scale. 1 cup of flour should weigh approximately 125 grams.
Variations and Substitutions
- Honey Butter Rolls: Swap the granulated sugar for honey in the dough, and mix a tablespoon of honey into the melted butter topping.
- Garlic Herb Rolls: Add 1 teaspoon of garlic powder to the dough and stir fresh parsley and minced garlic into the melted butter.
- Whole Wheat: You can swap up to 50% of the all-purpose flour for whole wheat flour, though the rolls will be slightly heartier and less fluffy.
Storage and Freezing
To Store: Keep baked rolls in an airtight container or Ziploc bag at room temperature for up to 3 days. To revive that “just baked” feel, pop them in the microwave for 10 seconds.
To Freeze (Baked): Allow rolls to cool completely. Wrap them tightly in foil and place them in a freezer bag. They will stay fresh for up to 3 months. Thaw at room temperature and warm in a 300°F oven for 5 minutes.
To Freeze (Dough): After shaping the rolls (Step 5), place them on a tray and freeze until solid. Transfer to a freezer bag. When ready to bake, let them thaw and rise in a warm spot (this will take 3-5 hours) before baking as directed.
FAQ
Why didn’t my dough rise?
The most common culprit is the yeast. If the yeast is expired, it won’t activate. Additionally, check your milk temperature; if it was over 120°F, it likely killed the yeast. Lastly, check the room temperature—yeast loves warmth!
It’s been an hour and my dough hasn’t doubled. What now?
Don’t panic! Yeast is a living organism and works on its own schedule. If your room is cold, it simply needs more time. Give it another 30-45 minutes, or move it to a warmer location.
Can I use Instant Yeast instead of Active Dry?
Yes! If using instant yeast, you can skip the blooming step and mix the yeast directly with the dry ingredients. However, I still recommend warming the milk to help the dough rise faster.
Making Soft Homemade Yeast Rolls is a culinary rite of passage that is deeply rewarding. There is a special kind of pride that comes from pulling a tray of golden, buttery rolls out of the oven and knowing you made them from scratch. They are the ultimate comfort food, guaranteed to make your kitchen smell like heaven and your guests feel like royalty.
Print
Soft Homemade Yeast Rolls Recipe
Experience the magic of warm, pillowy, homemade yeast rolls. This foolproof recipe yields incredibly soft dinner rolls with a golden, buttery crust—perfect for Sunday dinner or holiday feasts.
- Total Time: 145
- Yield: 24
Ingredients
1 packet active dry yeast
1 ¼ cups warm milk (about 105–110 degrees F)
⅓ cup granulated sugar
¼ cups unsalted butter room temperature (½ stick)
1 large egg room temperature
1 teaspoon kosher salt
3 ½ – 4 cups all-purpose flour plus more for kneading
3 Tablespoon unsalted butter melted
Instructions
1. In a small bowl, add milk and sugar, sprinkle yeast over it. Let the yeast set until foamy, about 5 minutes.
2. Add the yeast mixture to large mixing bowl. Then add ¼ cup butter, egg, salt and 2 cups flour. Beat the mixture on medium speed until batter is smooth.
3. Gradually add flour until soft ball of dough forms. Then increase speed on mixer to medium high and beat for 2-3 minutes longer. Dough should be tacky, but not sticky. If too sticky, add more flour 1 tablespoon at a time.
4. Lightly grease large bowl and place dough in ball, turning once to coat. Cover the bowl with clean dish towel and set in warm place to rise until doubled in size, about 45-60 minutes.
5. Punch the dough down dough gently. Lightly flour work surface and turn dough out of bowl. Knead lightly if necessary.
6. Let set a few minutes while you prepare the baking sheets with a silicone mat or by spraying with non-stick cooking spray.
7. Roll dough out to 12×8 inch rectangle, ½ inch thick. Cut the dough into even pieces using a sharp knife so you have 24-30 pieces of dough.
8. Transfer rolls to prepared baking sheets. Cover with dish towel and let rise in a warm place until almost doubled in size, about 45-60 minutes.
9. About 20 minutes prior to rising being done, preheat oven to 350 degrees F.
10. Place the rolls in the preheated oven at 350 degrees F. Bake rolls for 12-15 minutes or until golden brown.
11. Remove from oven and brush with melted butter.
Notes
Ensure your milk is between 105-110°F; too hot will kill the yeast, too cold won’t activate it.
If your room is chilly, the rise time may take up to 90 minutes. You can use your oven with the light on (but turned off) as a warm proofing box.
Store leftovers in an airtight container for up to 3 days.
- Prep Time: 20
- Cook Time: 15
- Category: Side Dish
- Method: Baking
- Cuisine: American