Salted Caramel Apple Crumb Bars have become my absolute obsession this fall season, and I’m about to share why these bars will completely transform your autumn baking game. After testing this recipe twelve different ways over the past month, I can confidently say these bars deliver the perfect balance of tart Granny Smith apples, rich salted caramel, and that irresistible buttery crumb topping that everyone raves about.
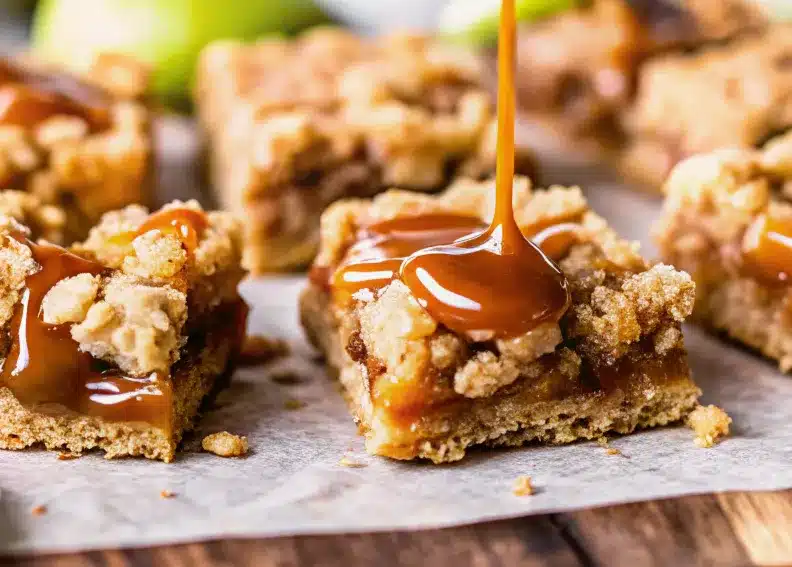
I still remember the first time I attempted these bars three years ago – what a disaster! The crust was soggy, the apples were mushy, and don’t even get me started on the caramel situation. But through countless kitchen experiments and a few burnt batches, I’ve perfected this recipe that now graces our family table every weekend during apple season.
These aren’t just any ordinary apple bars. The magic happens when that homemade salted caramel sauce mingles with the cinnamon-spiced apples, creating layers of flavor that make each bite absolutely unforgettable. Whether you’re hosting a fall gathering or simply craving something cozy on a crisp autumn evening, these bars deliver bakery-quality results from your own kitchen.
If you love apple desserts as much as I do, you’ll also go crazy for my Apple Pie Crumble Cookies
The Science Behind Perfect Apple Crumb Bars
Understanding Your Apple Selection
The foundation of exceptional Salted Caramel Apple Crumb Bars starts with choosing the right apples. Through extensive testing, I’ve discovered that Granny Smith apples are absolutely essential for this recipe. Here’s why this variety works so brilliantly:
Tartness Balance: Granny Smith apples provide the perfect acidic counterpoint to the sweet salted caramel. This contrast prevents the bars from becoming overwhelmingly sweet and creates that addictive flavor profile that keeps you reaching for another piece.
Texture Retention: Unlike softer apple varieties like Red Delicious or Gala, Granny Smith apples hold their shape during the 45-minute baking process. They soften just enough to become tender while maintaining enough structure to provide that satisfying apple bite in every square. If you’re interested in learning more about different apple varieties and their best uses for baking and storage, Sally’s Baking Addiction offers an excellent comprehensive guide.
Natural Pectin Content: These apples contain higher levels of natural pectin, which helps the filling achieve the ideal consistency without becoming watery or overly thick.
The Critical Role of Salted Caramel
What elevates these bars from ordinary to extraordinary is the salted caramel component. The salt doesn’t just add flavor – it enhances every other ingredient in the recipe. When I first started making these bars, I used regular caramel sauce and wondered why something felt missing. The game-changer was that pinch of sea salt that amplifies the apple’s natural sweetness while balancing the richness.
Pro Tip: If you’re using store-bought salted caramel sauce, taste it first. Some commercial varieties are overly sweet or lack that essential salty punch. I recommend brands that list sea salt or flaky salt as an ingredient, not just “natural flavoring.” For those feeling adventurous, making homemade salted caramel sauce is surprisingly simple and requires only four ingredients: sugar, butter, heavy cream, and salt.
The Perfect Crumb Science
Creating that coveted crumbly texture requires understanding fat distribution. The secret lies in keeping your butter cold and not overmixing. When cold butter pieces are scattered throughout the flour mixture, they create steam pockets during baking, resulting in those beautiful, tender crumbs that make these bars so irresistible.
Mastering the Technique
Essential Equipment and Preparation
Before diving into the mixing process, proper preparation sets you up for success. I always start by preheating my oven to 375°F and preparing my 9×13-inch baking pan with cooking spray. This temperature hits the sweet spot – hot enough to create a golden-brown crust but not so hot that the top browns before the apples cook through.
Temperature Tip: I’ve tested these bars at various temperatures, and 375°F consistently produces the best results. At 350°F, the bars take too long and can become dry. At 400°F, the top burns before the apples become tender.
The Apple Preparation Process
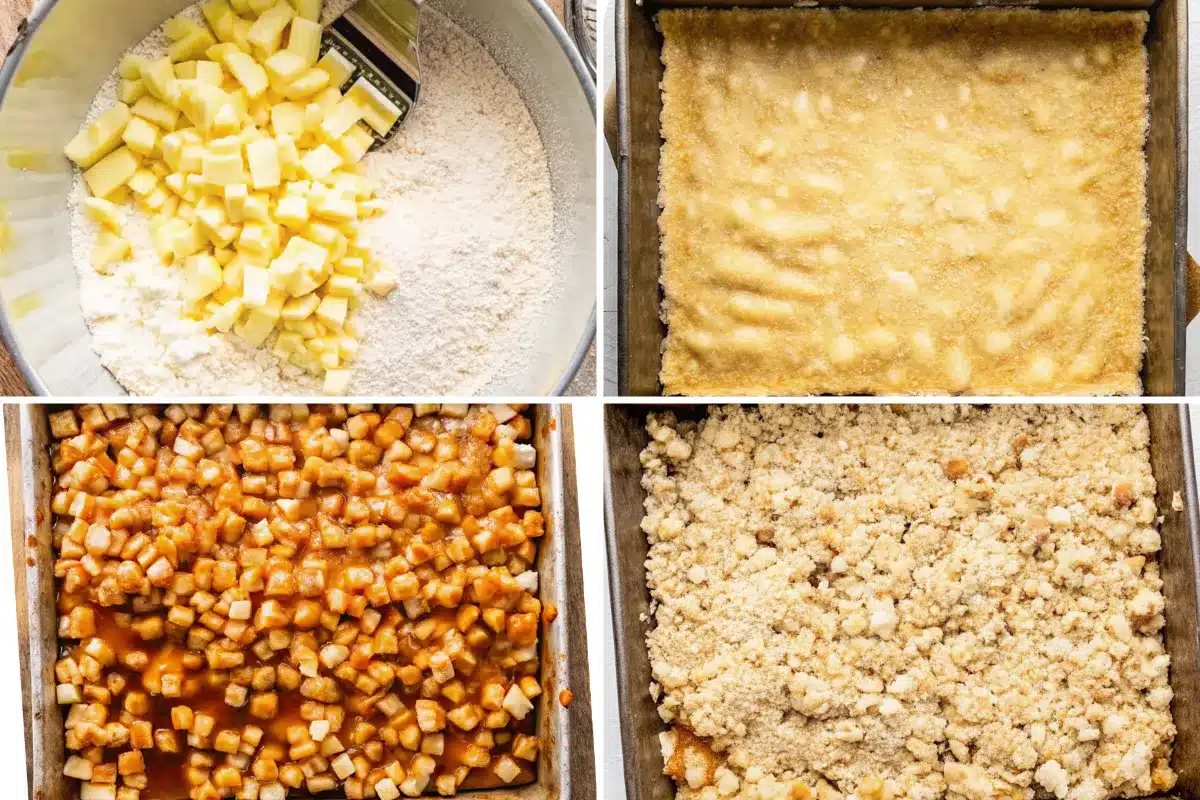
Properly preparing your apples makes the difference between soggy, flavorless bars and perfectly textured ones. Here’s my step-by-step approach:
Peeling Technique: Use a sharp vegetable peeler and work in long strokes to maintain consistent thickness. Uneven peeling leads to uneven cooking.
Dicing Method: Aim for uniform ½-inch pieces. Larger chunks won’t cook evenly, while smaller pieces become mushy. I arrange my apple slices in stacks and make parallel cuts for consistency.
Lemon Juice Application: Immediately toss diced apples with fresh lemon juice. This prevents browning and adds crucial acidity that balances the sweetness while helping the apples maintain their structure during baking.
Creating the Spice Blend
The spice combination in these bars creates depth and warmth that screams autumn comfort. The blend of cinnamon, nutmeg, and allspice works synergistically:
Cinnamon provides the dominant warm flavor that pairs naturally with apples
Nutmeg adds subtle complexity and enhances the caramel notes
Allspice brings hints of clove and pepper that create sophistication
I always whisk these spices with the flour and cornstarch mixture to ensure even distribution throughout the apple filling.
The Crust and Topping Technique
This recipe brilliantly uses the same dough for both the bottom crust and top crumble, but the techniques differ slightly:
Bottom Crust: Pat half the dough firmly into the prepared pan, creating an even layer that extends slightly up the sides. This prevents the filling from seeping underneath and creating a soggy bottom.
Top Crumble: Gently crumble the remaining dough over the apple-caramel layer without pressing down. This creates those coveted crispy peaks that add textural interest.
The Salted Caramel Drizzle Strategy
The timing and technique of adding salted caramel can make or break these bars. I drizzle the sauce evenly over the apple filling before adding the top crumble. This positioning allows the caramel to partially sink into the apples while creating pockets of concentrated flavor throughout each bar.
Consistency Check: Your salted caramel should be pourable but not runny. If it’s too thick, warm it slightly. If it’s too thin, it will sink to the bottom and potentially make the crust soggy.
Baking for Perfection
The 45-minute baking time produces perfectly golden bars with tender apples and a crispy top. I always check at the 40-minute mark – the top should be golden brown with darker brown peaks on the crumble. If the edges brown too quickly, tent with foil for the final 10 minutes.
Doneness Indicator: The edges should pull slightly away from the pan, and a toothpick inserted in the center should come out with just a few moist crumbs.
Cooling and Serving Strategy
Patience during the cooling process is crucial. These bars need to cool completely on a wire rack before cutting – typically 2-3 hours. Cutting too early results in messy, falling-apart squares instead of clean, bakery-worthy bars.
Storage Solutions: Store cooled bars in an airtight container in the refrigerator for up to three days. The cold actually enhances the flavors as they meld together. For longer storage, wrap individual bars in plastic wrap and freeze for up to three months.
Serving Suggestions That Wow
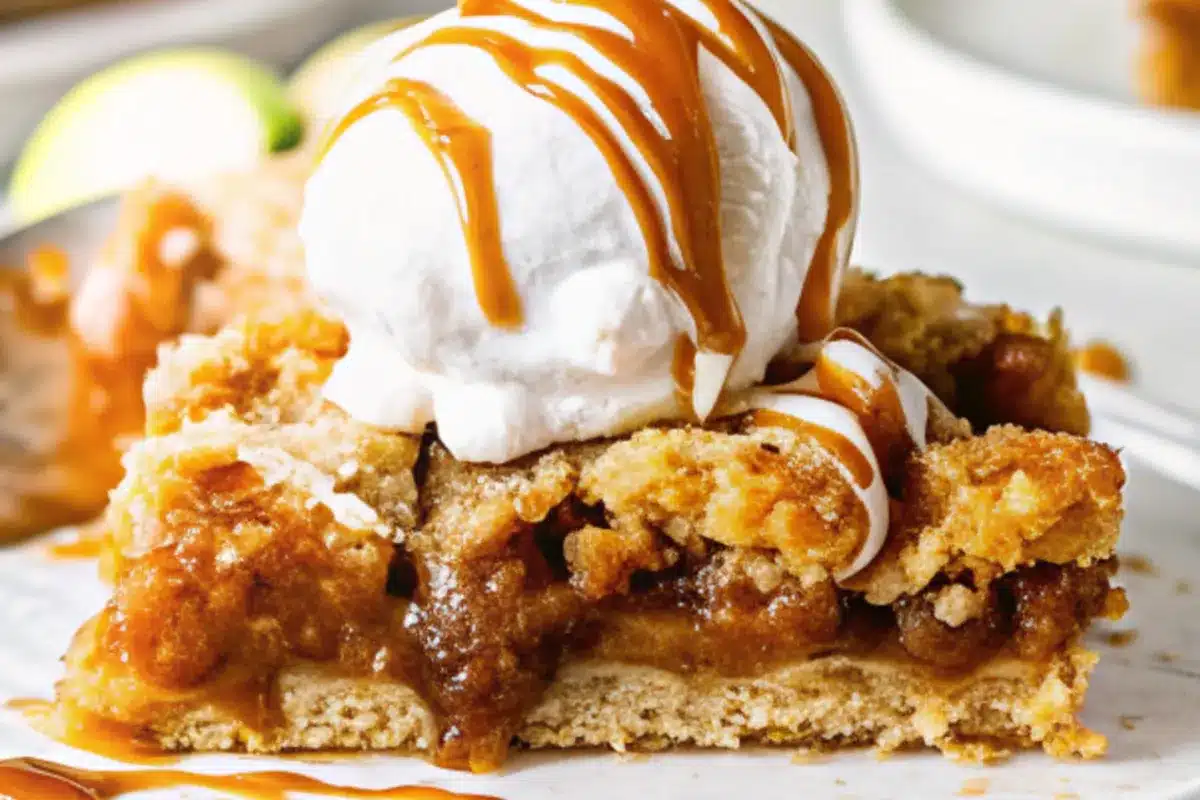
While these bars are absolutely delicious on their own, serving them with vanilla ice cream and an extra drizzle of salted caramel creates a restaurant-quality dessert experience. The temperature contrast between the room-temperature bar and cold ice cream, combined with the additional caramel, creates layers of flavor and texture that will have your guests asking for the recipe.
Presentation Tips: Cut bars into perfect squares using a sharp knife wiped clean between cuts. Dust with powdered sugar for an elegant finish, or serve on individual plates with a small spoon of ice cream and artistic caramel drizzle.
These Salted Caramel Apple Crumb Bars represent everything I love about fall baking – seasonal ingredients, comforting flavors, and that perfect balance of sweet and salty that keeps everyone coming back for more. After years of perfecting this recipe, I’m confident these will become your go-to autumn dessert that friends and family will request again and again.Prep Time: 25 minutesFor the Apple Filling:For the Crust & Crumb Topping:For Serving:Instructions
Learn about nutrition facts and food components from the USDA
Frequently Asked Questions
Can I use different types of apples for these bars?
While Granny Smith apples work best due to their tartness and ability to hold their shape, you can substitute with other firm baking apples like Honeycrisp, Braeburn, or Northern Spy. Avoid soft varieties like Red Delicious or McIntosh, which become mushy during baking.
Can I make my own salted caramel sauce?
Absolutely! Homemade salted caramel sauce tastes incredible and only requires four ingredients. The process takes about 15 minutes and allows you to control the salt level perfectly.
Why is my bottom crust soggy?
This usually happens when the apple mixture releases too much moisture or if the crust isn’t pressed firmly enough. Make sure to pat the bottom crust firmly into the pan and avoid overly juicy apples. Adding the lemon juice and flour coating helps prevent excess moisture.
Can these bars be made ahead of time?
Yes! These bars actually taste better the next day as the flavors meld together. Store them covered in the refrigerator for up to 3 days, or wrap individual squares and freeze for up to 3 months.
How do I prevent the top from browning too quickly?
If the crumb topping starts browning too fast, tent the pan with aluminum foil for the last 10-15 minutes of baking. This allows the apples to finish cooking without over-browning the top.
What’s the best way to cut clean bars?
Let the bars cool completely (at least 2-3 hours) before cutting. Use a sharp knife and wipe it clean between cuts for the neatest squares. Chilled bars cut even more cleanly than room temperature ones.
The Ultimate Salted Caramel Apple Crumb Bars
Salted Caramel Apple Crumb Bars made with layers of buttery crust, spiced apple filling, caramel drizzle, and crumb topping. Perfect for fall gatherings or served warm with ice cream.
- Total Time: 1 hour 10 minutes (plus cooling)
- Yield: 24 bars
Ingredients
For the Apple Filling:
5 cups peeled and diced Granny Smith apples
1 tablespoon fresh lemon juice
½ cup all-purpose flour
1 teaspoon cornstarch
1 cup granulated sugar
¼ teaspoon salt
1 teaspoon ground cinnamon
¼ teaspoon ground nutmeg
¼ teaspoon ground allspice
¾ cup salted caramel sauce (homemade or store-bought)
For the Crust & Crumb Topping:
3 cups all-purpose flour
1 cup granulated sugar
1 teaspoon baking powder
¼ teaspoon salt
¼ teaspoon cinnamon
1 cup cold unsalted butter, cubed
1 large egg, lightly beaten
½ teaspoon vanilla extract
For Serving (optional):
Vanilla ice cream
Extra salted caramel sauce
Instructions
1. Preheat oven to 375°F. Spray a 9×13-inch baking pan with cooking spray.
2. Toss apples with lemon juice. In a bowl, whisk flour, cornstarch, sugar, salt, cinnamon, nutmeg, and allspice. Mix with apples until coated.
3. In another bowl, whisk flour, sugar, baking powder, salt, and cinnamon. Cut in cold butter until mixture looks like coarse crumbs. Mix in egg and vanilla until just combined.
4. Press half of dough into baking pan. Spread apple mixture evenly. Drizzle salted caramel sauce over apples. Crumble remaining dough on top.
5. Bake 45 minutes or until topping is golden brown. Cool completely on wire rack before cutting into bars.
Notes
Storage: Refrigerate up to 3 days or freeze for 3 months.
Serving: Delicious with vanilla ice cream and extra caramel drizzle.
Tip: Allow bars to cool completely before cutting for clean slices.
- Prep Time: 25 minutes
- Cook Time: 45 minutes
- Method: Baking
- Cuisine: American