
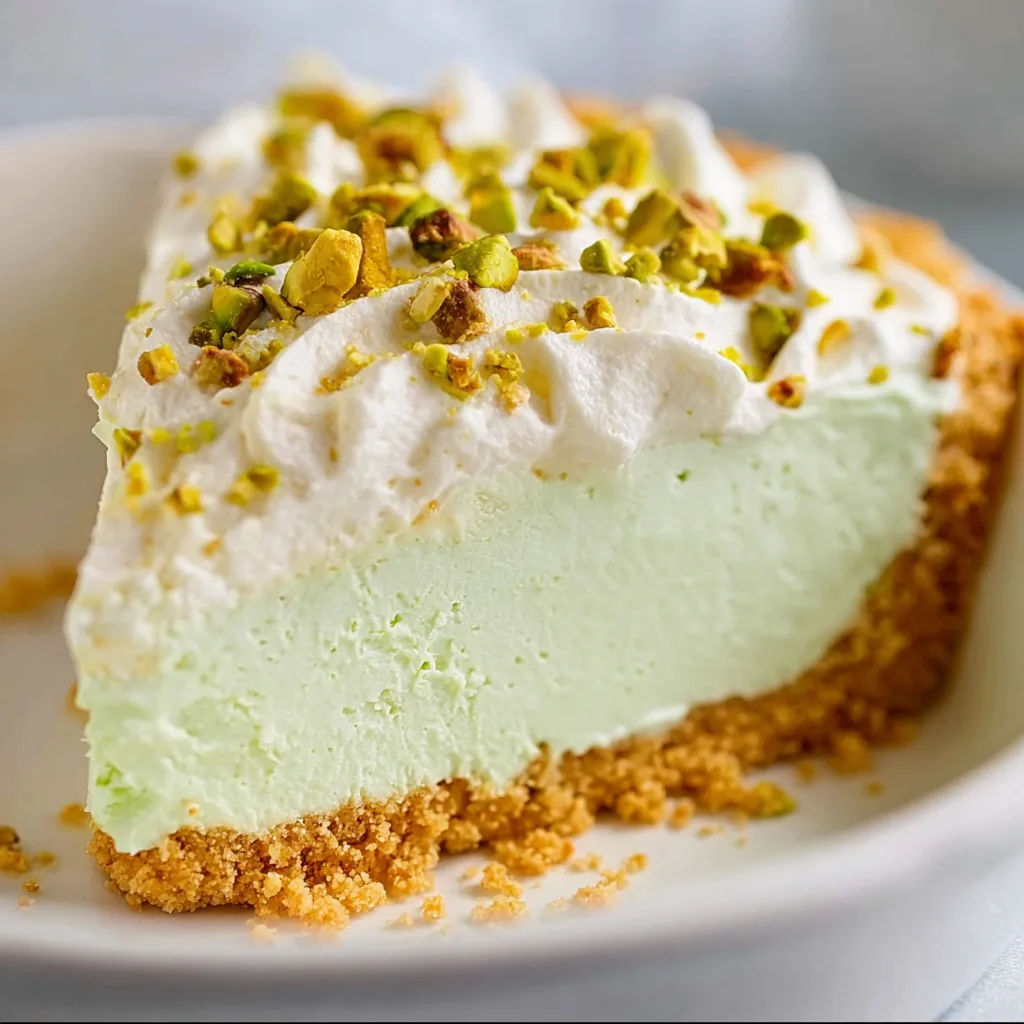
If you are looking for a dessert that combines nostalgia, effortless preparation, and a sophisticated flavor profile, look no further than this No-Bake Pistachio Pudding Pie. There is something inherently comforting about the pale green hue and the subtle, nutty aroma of pistachio. This isn’t just a simple pudding-in-a-crust; by incorporating a rich cream cheese and butter base, we elevate the texture from “snack pack” to “gourmet patisserie.”

Whether you’re hosting a St. Patrick’s Day celebration, a summer potluck, or just need a quick weeknight treat to satisfy a sweet tooth, this pie delivers. It’s light enough for a hot day yet indulgent enough to serve as a holiday centerpiece. Best of all, it requires zero time in the oven, keeping your kitchen cool and your stress levels low. Get ready to meet your new favorite “emergency” dessert recipe that tastes like you spent hours in the kitchen.
Why You’ll Love This Recipe
This recipe is a staple in my kitchen for several reasons. First, the texture is unparalleled. While many pudding pies can be somewhat runny or overly gelatinous, the addition of softened cream cheese and butter provides a structural integrity that creates a velvety, mousse-like mouthfeel. Second, it is incredibly versatile. You can stick to the classic graham cracker base or swap it out for a salty pretzel crust or a rich chocolate Oreo crust. Finally, the minimal effort vs. high reward ratio is off the charts. With only 15 minutes of active prep time, you produce a dessert that looks professionally made and tastes far more complex than its humble ingredients suggest.
What Is Pistachio Pudding Pie?
Pistachio Pudding Pie is a classic American “icebox” style dessert. Historically, these types of pies gained popularity in the mid-20th century with the rise of instant gelatin and pudding mixes. While traditional pistachio desserts often rely on ground nuts and custards, the pudding pie version focuses on convenience and fluffiness. Our specific version utilizes a “fluff” technique, mixing instant pudding with a cream cheese “frosting” base and whipped topping. This results in a stabilized filling that holds its shape when sliced but remains soft and airy on the tongue. It’s a hybrid between a cheesecake and a traditional cream pie, capturing the best of both worlds.
Ingredients Overview
To achieve the perfect balance of flavor and stability, each ingredient plays a critical role:
- Pistachio Instant Pudding Mix: The star of the show. Ensure you use Instant and not Cook and Serve. The instant starch reacts immediately with the cold milk to provide the base structure and that iconic flavor.
- Cold Milk: Whole milk is recommended for the richest flavor, but 2% works as well. It must be very cold to ensure the pudding sets properly during the initial mixing phase.
- Cream Cheese: This provides the tang and the body. It acts as a stabilizer, preventing the pie from becoming too “liquidy” as it sits.
- Butter: A secret addition that adds a professional richness. It helps the filling set with a buttery smoothness that mimics high-end pastry cream.
- Powdered Sugar: Used to sweeten the cream cheese base and help it reach a “frosting” consistency, ensuring no lumps remain in the final pie.
- Whipped Topping: This provides the “air.” It transforms the dense pudding and cheese mixture into a light, cloud-like filling.
- Graham Cracker Crust: The buttery, slightly salty crunch of the crust provides the perfect contrast to the soft filling.
Ingredient Substitutions & Tips
If you find yourself missing an ingredient or want to cater to different dietary needs, here are some easy swaps. For the crust, a chocolate sandwich cookie crust (like Oreo) creates a “pistachio-chocolate” flavor profile that is absolutely divine. If you prefer a more natural approach, you can substitute the whipped topping with stabilized whipped cream (heavy cream whipped with a little powdered sugar and gelatin), though the texture will be slightly denser. For a gluten-free version, simply use a gluten-free graham cracker crust. If you want to intensify the nuttiness, adding a 1/4 teaspoon of almond extract to the pudding mixture will make the pistachio flavor pop even more vividly.
Step-by-Step Instructions
1. Prepare the Pudding Base
Begin by placing your cold milk in a large mixing bowl. Sprinkle the pistachio instant pudding mix over the surface. Using a whisk or an electric mixer on low speed, beat the mixture for exactly 2 minutes. You will notice the color deepening to a vibrant green and the liquid starting to resist the whisk. Set this aside; it will continue to firm up as you prepare the next step.
2. Create the Cream Cheese Frosting
In a separate, smaller bowl, combine your softened cream cheese, softened butter, and powdered sugar. It is vital that these ingredients are at true room temperature. Use an electric mixer to beat them until the mixture is pale, fluffy, and completely smooth. It should look like a thick buttercream frosting. If you see lumps of cream cheese, keep beating!
3. Combine the Elements
Add the cream cheese mixture into the bowl with the thickened pudding. Switch your mixer to medium-high speed and beat the two components together. This step is crucial for achieving a uniform texture. You want the pudding and the cheese base to be perfectly integrated before moving to the final step.
4. The “Fold-In” Technique
Switch to a rubber spatula or use the lowest setting on your mixer. Gently add the whipped topping to the green mixture. Use a folding motion—cutting through the center and lifting from the bottom—to incorporate the topping without deflating the air bubbles. Stop as soon as the color is a consistent, beautiful pale green.
5. Chill and Set
Pour the velvety filling into your graham cracker crust. Use the back of a spoon to create decorative swirls or a perfectly flat surface. Place the pie in the refrigerator for a minimum of 2 hours. This time allows the fats to solidify and the flavors to meld, resulting in a clean slice.
Expert Baking Tips
To ensure your pie is a success every single time, keep these professional tips in mind. First, temperature is everything. If your cream cheese is even slightly cold, it will create tiny white lumps in your green pie that are impossible to remove once the pudding is added. You can soften cream cheese quickly by microwaving it in 10-second intervals. Second, don’t over-mix the whipped topping. The goal is to keep the filling light; over-beating at the final stage will cause the filling to lose its height. Lastly, for the cleanest slices, dip your knife in hot water and wipe it dry between every single cut.
Special Section: The Pistachio Ambrosia Variation
If you want to transform this pie into a “loaded” dessert reminiscent of classic Southern ambrosia salads, it is very easy to do! To make a Pistachio Ambrosia Pie, replace the 1 cup of milk with a 20-oz can of undrained crushed pineapple. Mix the dry pudding mix directly into the pineapple and its juices. Then, follow the cream cheese and whipped topping steps as written. Just before pouring into the crust, fold in 1 cup of mini marshmallows, 1/2 cup of shredded coconut, and 1/2 cup of chopped pecans. This creates a chunky, fruity, and incredibly festive version of the recipe that is a massive hit at family reunions.
Serving Suggestions
Presentation is the key to making a simple pie look like a masterpiece. I recommend piping extra dollops of whipped cream around the perimeter of the pie just before serving. For a sophisticated touch, finely chop some roasted, salted pistachios and sprinkle them over the center. The saltiness of the nuts beautifully balances the sweetness of the pudding. If you’re feeling extra indulgent, a drizzle of white chocolate or a few maraschino cherries on top adds a pop of color and flavor that guests will love.
Storage & Make-Ahead Tips
This pie is a fantastic make-ahead option. In fact, many people find it tastes even better the next day after the crust has had a chance to slightly soften and the flavors have fully developed. You can store the pie in the refrigerator for up to 4 days, provided it is covered tightly with plastic wrap or a pie dome. While you can freeze this pie for a “frozen treat” experience, the texture of the cream cheese may change slightly upon thawing, so it is best enjoyed fresh from the fridge.
FAQs
1. Can I use sugar-free pudding mix?
Yes! You can substitute the standard mix for sugar-free pistachio pudding. However, be aware that sugar-free mixes often set faster and may result in a slightly firmer texture. You may also want to use a sugar-free whipped topping to match.
2. Why is my pie filling runny?
This usually happens for two reasons: either the milk wasn’t cold enough when mixing the pudding, or the cream cheese/butter wasn’t beaten enough to create a stable base. Ensure you chill the pie for the full 2 hours to allow it to set properly.
3. Can I make my own graham cracker crust?
Absolutely. Mix 1.5 cups of graham cracker crumbs with 1/4 cup of sugar and 6 tablespoons of melted butter. Press into a 9-inch pie plate and bake at 350°F for 8 minutes. Let it cool completely before adding the filling.
4. Can I use “Cook and Serve” pudding?
No. Cook and serve pudding requires high heat to activate the thickening agents. Since this is a no-bake recipe, the cook and serve variety will remain a liquid and your pie will not set.
5. Is there a substitute for the butter in the filling?
The butter provides stability and a “fudge-like” quality. If you must omit it, you can add an extra 2 oz of cream cheese, but the flavor won’t be quite as rich.
Final Thoughts
This No-Bake Pistachio Pudding Pie is proof that you don’t need a hot oven or a degree in pastry arts to create a show-stopping dessert. Its combination of creamy texture, nutty flavor, and ease of preparation makes it a “holy grail” recipe for busy home cooks. Once you try the secret addition of butter and cream cheese to the pudding base, you’ll never go back to the basic box instructions again. Happy “baking”—or should we say, happy chilling!