
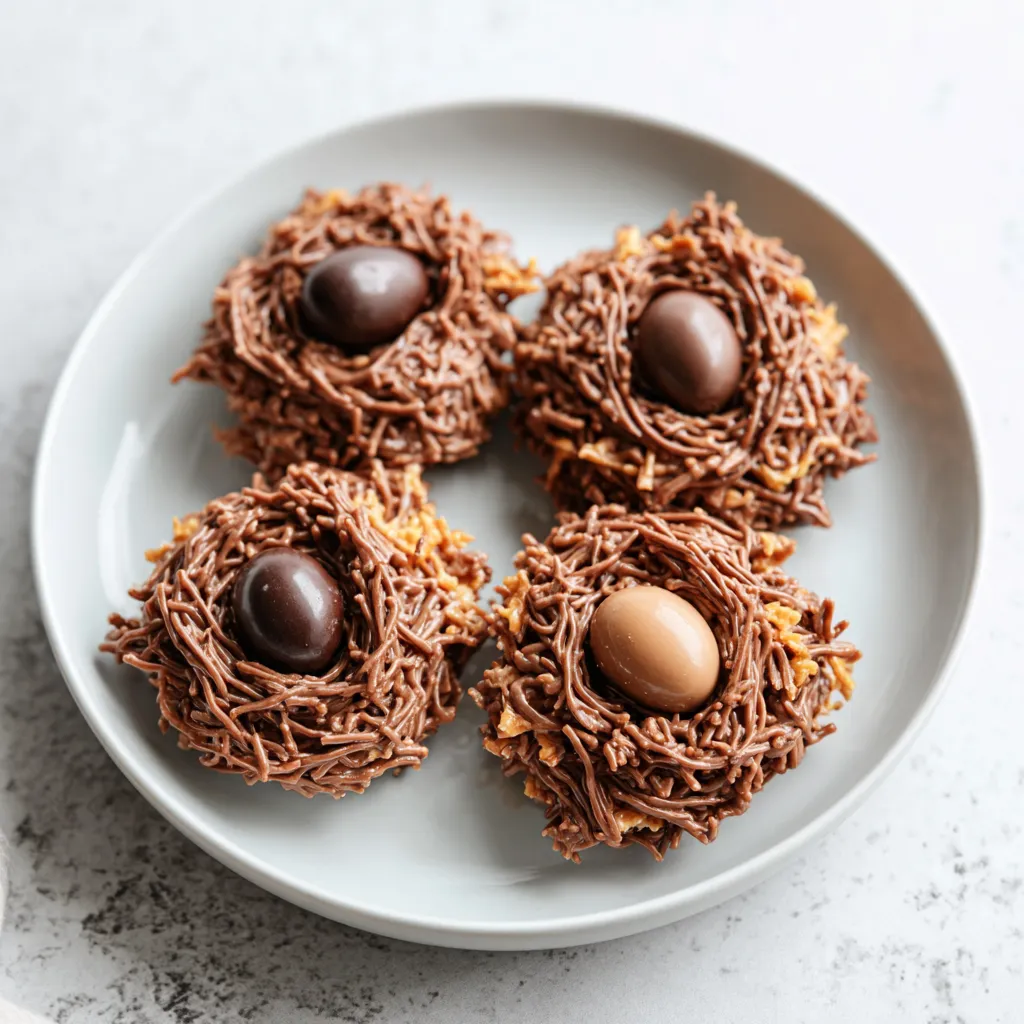
Oh, prepare yourself for a truly enchanting treat that will steal hearts and delight taste buds: our Chocolate Nest Cookies! These aren’t just any cookies; they’re a symphony of rich, fudgy chocolate goodness, perfectly baked to a tender chewiness, then artfully adorned with a vibrant swirl of frosting and charming candy eggs. Imagine biting into that soft, decadent chocolate base, followed by the sweet, creamy frosting, all culminating in the delightful snap of a tiny chocolate candy. They’re utterly irresistible, a visual masterpiece, and a taste sensation that will transport you straight to a springtime wonderland with every single bite.

Why We Love This Chocolate Nest Cookie Recipe
What sets our Chocolate Nest Cookies apart from the crowd isn’t just their undeniable charm, but the meticulous balance of textures and flavors that makes them truly special. The cookie itself is a deep, dark chocolate dream – intensely flavored yet incredibly soft and tender, with just the right amount of chew to keep you coming back for more. We’ve perfected a cocoa blend that delivers a complex, bittersweet note, perfectly offset by the sweetness of the frosting. This isn’t a crumbly, dry cookie; it’s a moist, indulgent base designed to hold up beautifully to its luscious topping.
Unlike many recipes that might lean too heavily on just one aspect, we’ve woven care into every element. Our frosting isn’t just sweet; it’s a creamy, buttery dream, colored naturally for that authentic “nest” look, and piped with a delicate touch to create a realistic, charming design. And those candy eggs? They’re the pop of color and unexpected crunch that elevates these cookies from simple treats to miniature edible works of art. They’re a celebration of spring, perfect for Easter, baby showers, or any occasion where you want to add a touch of playful elegance.
These cookies aren’t just delicious; they’re an experience. They’re simple enough for a beginner baker to master, yet impressive enough to wow even the most discerning dessert connoisseur. They invite creativity, allowing you to personalize the colors and candies to suit any theme. They’re a fantastic way to spread joy, whether as a gift, a party centerpiece, or a sweet indulgence for your family. Once you taste these, you’ll understand why they’ve become a beloved staple in our kitchen, a testament to the magic that happens when simple ingredients are brought together with love and intention.
An Edible Masterpiece That Will Enchant Your Senses Beyond Belief!
Get ready to be utterly captivated because these Chocolate Nest Cookies are not just food; they are a sensory celebration waiting to unfold. The moment you lay eyes on them, their charming, whimsical design immediately draws you in. The deep, rich brown of the chocolate cookie, peeking out from beneath a delicate, swirled nest of pastel frosting, adorned with speckled candy eggs – it’s like a tiny piece of spring art, beckoning you closer. Then, the aroma hits you: a heavenly blend of intense cocoa mingling with sweet vanilla and creamy butter, promising pure indulgence.
But the true magic happens when you take that first bite. The cookie yields with a tender chewiness, releasing an explosion of rich, satisfying chocolate flavor that is both comforting and decadent. It’s not just sweet; it’s a deep, complex cocoa experience that lingers deliciously. This is immediately followed by the smooth, velvety embrace of the buttercream frosting, which melts in your mouth, adding another layer of sweetness and a hint of vanilla. And just when you think it can’t get any better, your teeth encounter the delightful, slight crispness of those miniature candy eggs, providing a playful textural contrast and a final burst of candy-coated chocolate.
Every element of these cookies is designed to tantalize and delight, creating a harmonious balance that makes them utterly irresistible. They’re the perfect size for a delightful mouthful, making them ideal for gatherings where guests can easily enjoy one (or two, or three!). From their stunning visual appeal to their complex flavor profile and delightful textures, these Chocolate Nest Cookies are truly memorable. They’re perfect for bringing a touch of refined whimsy to Easter brunches, spring garden parties, or simply as a special treat to brighten an ordinary day. Prepare for gasps of delight and requests for the recipe!
Use High Quality Ingredients for Chocolate Nest Cookies
The secret to truly exceptional Chocolate Nest Cookies lies not just in the technique, but fundamentally in the quality of the ingredients you choose. When you’re working with such a classic flavor profile, every component plays a starring role. Using premium ingredients isn’t just about being fancy; it’s about building depth, richness, and an unparalleled flavor that truly shines through in the finished product. Think of it as laying down the foundation for a masterpiece – you wouldn’t use subpar materials, would you?
For instance, the cocoa powder in these cookies is paramount. Opt for a high-quality Dutch-processed cocoa. This type of cocoa has a smoother, less bitter, and more intense chocolate flavor, giving your cookies that deep, dark, fudgy appearance and irresistible cocoa punch. Similarly, using a good quality unsalted butter, both in the cookies and the frosting, makes a world of difference. Premium butter has a lower water content and a richer flavor, contributing to a superior texture and a more luxurious mouthfeel for both the cookie and the creamy nest on top.
Don’t skimp on the vanilla extract either; a pure vanilla extract (not imitation!) adds a subtle yet essential warmth and depth that complements the chocolate beautifully. Even the eggs and flour matter – fresh, large eggs contribute to the cookie’s structure and richness, while a good all-purpose flour provides the perfect tender crumb. These small upgrades collectively elevate the chocolate nest cookies from merely good to absolutely extraordinary, ensuring each bite is a testament to quality ingredients and passionate baking.
Ingredients You Need
Chocolate Nest Cookies Recipe
- All-purpose flour
- Unsweetened cocoa powder
- Baking soda
- Salt
- Unsalted butter
- Granulated sugar
- Brown sugar
- Large eggs
- Pure vanilla extract
- Milk
- Powdered sugar
Buttercream Frosting
- Unsalted butter
- Powdered sugar
- Milk or heavy cream
- Pure vanilla extract
- Green food coloring gel
- Small candy eggs
Instructions
How to Make The Best Chocolate Nest Cookies with Buttercream Frosting!
First things first, preheat your oven to a delightful 350°F (175°C) and line your baking sheets with parchment paper or silicone mats. This ensures your cookies don’t stick and bake evenly to golden-brown perfection. In a medium bowl, whisk together your all-purpose flour, unsweetened cocoa powder, baking soda, and salt. Make sure there are no lumps; a well-combined dry mixture is key to consistent cookies. Now, in a large bowl, cream together the softened unsalted butter with both granulated sugar and light brown sugar until the mixture is light and fluffy – this usually takes about 2-3 minutes with an electric mixer. This creaming process is essential for incorporating air, which results in a tender cookie. Next, beat in the large eggs one at a time, incorporating each fully before adding the next, then stir in the pure vanilla extract. At this stage, scrape down the sides of the bowl to ensure everything is well-combined.
Gradually add the dry ingredients to the wet ingredients, mixing on low speed until just combined. Be careful not to overmix, as this can lead to tough cookies. The dough will be thick and rich. Stir in the milk until the dough comes together smoothly. Use a cookie scoop or two spoons to drop rounded tablespoons of dough onto your prepared baking sheets, leaving about 2 inches between each cookie. These cookies will spread slightly, but not excessively. Bake for 8-10 minutes. You’re looking for cookies that are set around the edges but still slightly soft in the center when gently pressed. Don’t overbake! An overbaked chocolate cookie tends to be dry. Remove from the oven and let them cool on the baking sheets for 5 minutes before transferring them to a wire rack to cool completely. Cooling completely is crucial before frosting, otherwise, your beautiful buttercream nest will melt.
How to Make the Buttercream Frosting
While your scrumptious chocolate cookies are cooling, let’s whip up that dreamy buttercream frosting. In a large bowl, using an electric mixer, beat the softened unsalted butter on medium speed for about 2-3 minutes until it becomes light, creamy, and pale in color. This aerates the butter, making for a fluffier frosting. Gradually add the powdered sugar, one cup at a time, beating well after each addition until smooth. Once all the powdered sugar is incorporated, beat in the milk or heavy cream and pure vanilla extract. Continue to beat on medium-high speed for another 2-3 minutes until the frosting is incredibly light and fluffy, with a beautifully smooth consistency. Now, add a few drops of green food coloring gel until you achieve the perfect ‘nest’ shade – a lovely sage green works wonderfully. Mix thoroughly until the color is evenly distributed, and you have a beautifully pipeable, creamy frosting ready for decorating.
Nest the Cookies
Now for the most delightful part – creating those adorable nests! Once your chocolate cookies are completely cool, transfer the green buttercream frosting to a piping bag fitted with a multi-opening tip (like a grass tip or even a star tip if you don’t have a grass tip for a more structured look). Hold the piping bag above the center of each cookie and, using gentle pressure, pipe a circular “nest” shape, building up the edges slightly to create a recessed center. The goal is to mimic the look of natural twigs and grass. Once your nests are piped, carefully place three small candy eggs into the center of each frosting nest. Arrange them artfully to complete the charming bird’s nest illusion. The contrast of the vibrant green frosting and the speckled eggs against the dark chocolate cookie is simply stunning and ready to impress!
More Festive Decorating Ideas!
Looking to sprinkle even more magic onto your Chocolate Nest Cookies? Beyond the classic green nests and candy eggs, there’s a world of creative decorating ideas! For a whimsical spring look, consider using small edible flowers (like pansies or violas) instead of or in addition to eggs. You could also tint your buttercream nest in varying shades of brown, beige, and green for a more natural, earthy aesthetic, perhaps with a few edible glitter speckles for morning dew. For a baby shower, use tiny pastel blue or pink candy melts as “baby bird” accents. During fall, swap the green for autumnal oranges, reds, and yellows, using small candy pumpkins or edible leaves. For Christmas, pipe white “snow” frosting on top of the dark cookie and sprinkle with festive red and green sprinkles, skipping the nest altogether. And for a truly luxurious touch, drizzle melted white or dark chocolate over the finished nests, or add a dusting of edible gold luster dust for an elegant flair!
Storing Chocolate Nest Cookies
To keep your delightful Chocolate Nest Cookies fresh and delicious, proper storage is key. If kept at room temperature, store them in an airtight container for up to 3-4 days. Placing a piece of parchment paper between layers will prevent the frosting from smudging. For longer freshness, these cookies can be refrigerated in an airtight container for up to one week. Just be sure to let them come to room temperature for about 15-20 minutes before serving to ensure the frosting is soft and the cookie is tender. If you’re planning ahead, these cookies also freeze beautifully! Place the unfrosted cookies in a single layer on a baking sheet to flash freeze for about an hour, then transfer them to a freezer-safe bag or container for up to 3 months. Thaw them at room temperature and then proceed with frosting. The frosted cookies can also be frozen, again flash-frozen on a tray and then transferred to an airtight container, but they might be best enjoyed within 1-2 months to maintain optimal frosting texture. Always ensure they are completely thawed before serving to truly enjoy their tender texture.
Print
Chocolate Nest Cookies
Chocolate Nest Cookies: Irresistible & easy recipe! Bake yours today!
- Total Time: 40 minutes
- Yield: 24 cookies
Ingredients
- 250 grams all-purpose flour
- 60 grams unsweetened cocoa powder
- 1 teaspoon baking soda
- 1/2 teaspoon salt
- 226 grams unsalted butter, softened
- 200 grams granulated sugar
- 150 grams brown sugar
- 2 large eggs
- 2 teaspoons pure vanilla extract
- 60 ml milk
- 450 grams powdered sugar
- 226 grams unsalted butter, softened
- 450 grams powdered sugar
- 60 ml milk or heavy cream
- 1 teaspoon pure vanilla extract
- green food coloring gel
- 24 small candy eggs
Instructions
- First things first, preheat your oven to a delightful 350°F (175°C) and line your baking sheets with parchment paper or silicone mats. This ensures your cookies don’t stick and bake evenly to golden-brown perfection. In a medium bowl, whisk together your all-purpose flour, unsweetened cocoa powder, baking soda, and salt. Make sure there are no lumps; a well-combined dry mixture is key to consistent cookies. Now, in a large bowl, cream together the softened unsalted butter with both granulated sugar and light brown sugar until the mixture is light and fluffy – this usually takes about 2-3 minutes with an electric mixer. This creaming process is essential for incorporating air, which results in a tender cookie. Next, beat in the large eggs one at a time, incorporating each fully before adding the next, then stir in the pure vanilla extract. At this stage, scrape down the sides of the bowl to ensure everything is well-combined.
- Gradually add the dry ingredients to the wet ingredients, mixing on low speed until just combined. Be careful not to overmix, as this can lead to tough cookies. The dough will be thick and rich. Stir in the milk until the dough comes together smoothly. Use a cookie scoop or two spoons to drop rounded tablespoons of dough onto your prepared baking sheets, leaving about 2 inches between each cookie. These cookies will spread slightly, but not excessively. Bake for 8-10 minutes. You’re looking for cookies that are set around the edges but still slightly soft in the center when gently pressed. Don’t overbake! An overbaked chocolate cookie tends to be dry. Remove from the oven and let them cool on the baking sheets for 5 minutes before transferring them to a wire rack to cool completely. Cooling completely is crucial before frosting, otherwise, your beautiful buttercream nest will melt.
- While your scrumptious chocolate cookies are cooling, let’s whip up that dreamy buttercream frosting. In a large bowl, using an electric mixer, beat the softened unsalted butter on medium speed for about 2-3 minutes until it becomes light, creamy, and pale in color. This aerates the butter, making for a fluffier frosting. Gradually add the powdered sugar, one cup at a time, beating well after each addition until smooth. Once all the powdered sugar is incorporated, beat in the milk or heavy cream and pure vanilla extract. Continue to beat on medium-high speed for another 2-3 minutes until the frosting is incredibly light and fluffy, with a beautifully smooth consistency. Now, add a few drops of green food coloring gel until you achieve the perfect ‘nest’ shade – a lovely sage green works wonderfully. Mix thoroughly until the color is evenly distributed, and you have a beautifully pipeable, creamy frosting ready for decorating.
- Now for the most delightful part – creating those adorable nests! Once your chocolate cookies are completely cool, transfer the green buttercream frosting to a piping bag fitted with a multi-opening tip (like a grass tip or even a star tip if you don’t have a grass tip for a more structured look). Hold the piping bag above the center of each cookie and, using gentle pressure, pipe a circular “nest” shape, building up the edges slightly to create a recessed center. The goal is to mimic the look of natural twigs and grass. Once your nests are piped, carefully place three small candy eggs into the center of each frosting nest. Arrange them artfully to complete the charming bird’s nest illusion. The contrast of the vibrant green frosting and the speckled eggs against the dark chocolate cookie is simply stunning and ready to impress!
Notes
Prepare yourself for a truly enchanting treat that will steal hearts and delight taste buds: our Chocolate Nest Cookies! These aren’t just any cookies; they’re a symphony of rich, fudgy chocolate goodness, perfectly baked to a tender chewiness, then artfully adorned with a vibrant swirl of frosting and charming candy eggs.
- Prep Time: 30 minutes
- Cook Time: 10 minutes
- Category: Dessert
- Cuisine: American