
There is something undeniably magical about the combination of deep, cocoa-infused red velvet and tangy, creamy cheesecake. Whether it’s Valentine’s Day, a holiday party, or just a Tuesday where you need a little something sweet, these Red Velvet Cheesecake Brownie Bites are the ultimate showstopper.

I remember the first time I made these for a neighborhood potluck. I barely had the tray on the table before half of them disappeared. There’s a reason for that: they are the perfect two-bite treat. You get that dense, fudgy brownie texture paired with a decadent cheesecake swirl that feels like a party in every bite.
If you’ve ever found traditional red velvet cake a bit too “airy,” this brownie version is for you. It’s heavy on the chocolate, rich in color, and topped with a swirl that makes them look like they came straight from a high-end bakery.
Why You’ll Love This Recipe
- Bite-Sized Perfection: These are made in a mini muffin pan, making them the perfect “pop-able” snack for parties or lunchboxes.
- Decadent Texture: Unlike cakey brownies, these are incredibly fudgy and moist.
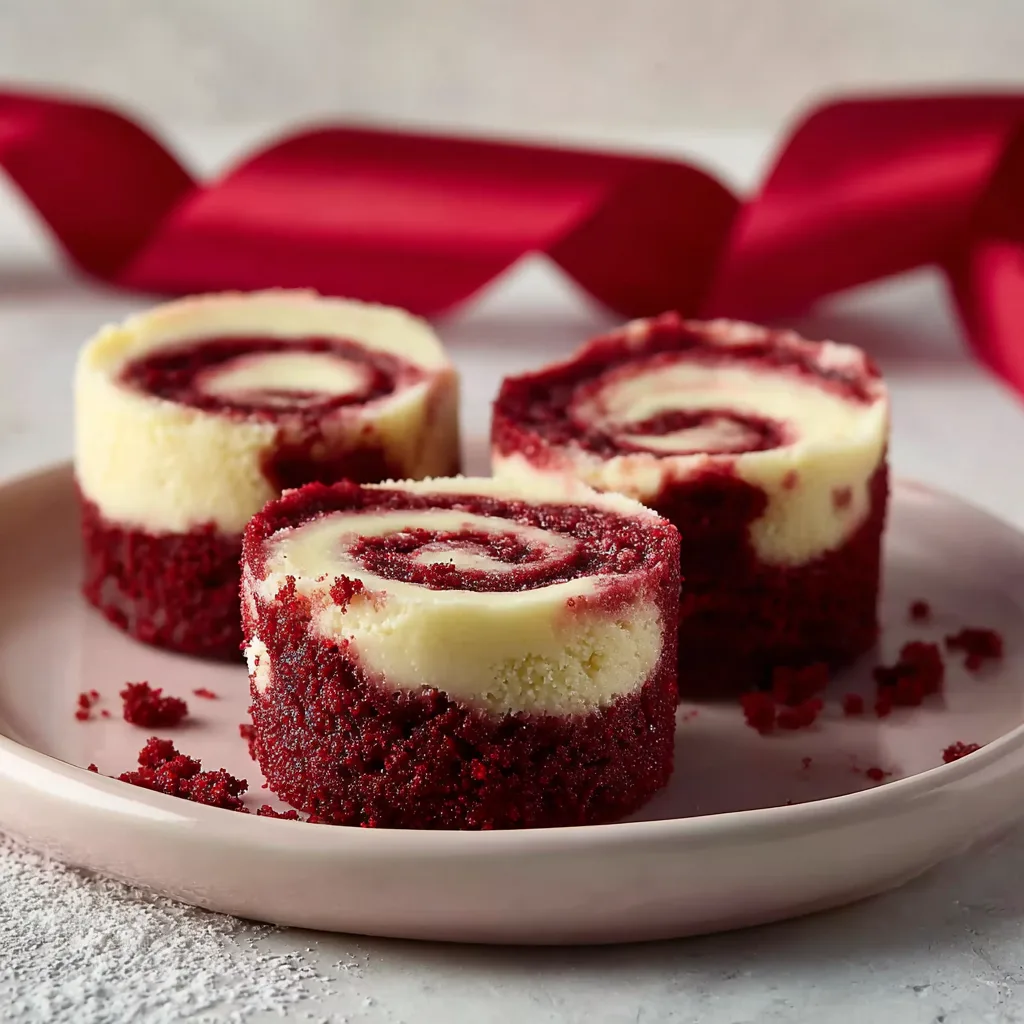
- Stunning Visuals: The contrast between the vibrant red and the creamy white cheesecake creates a beautiful marbled effect.
- Flavor Depth: We use secret ingredients like espresso powder and vinegar to make the chocolate flavor truly sing.
- Quick Bake Time: Since they are small, they bake in just 12 minutes!
Ingredient Notes
To get that professional-grade result at home, the quality of your ingredients matters. Here is what I recommend:
- Butter: I swear by Kerrygold unsalted butter. It has a higher fat content than standard American butter, which leads to a richer, silkier brownie.
- Cocoa Powder: Sift this! Cocoa powder is notorious for clumping. Sifting ensures you don’t end up with bitter pockets of dry powder in your red velvet base.
- Espresso Powder: Don’t worry, these won’t taste like coffee. Espresso powder is a baker’s secret weapon—it intensifies the chocolate notes and gives the red velvet a deeper “grown-up” flavor.
- Vinegar: This is a classic red velvet staple. It reacts with the cocoa and adds that signature slight tang that balances the sugar.
- Cream Cheese: Ensure this is at room temperature (about 70°F). If it’s cold, your cheesecake swirl will be lumpy and won’t marble beautifully.
- Flour: I always reach for King Arthur All-Purpose Flour. It has a consistent protein content that provides the perfect structure for brownies.
Step-by-Step Instructions
1. Prep the Pan and Oven
Start by preheating your oven to 350°F. This recipe moves fast once the batter is ready, so you want that oven hot! Generously grease your mini muffin pan. I prefer using a bit of softened butter or a high-quality cooking spray. Making sure you coat the sides is crucial for that “clean release” later.
2. Make the Red Velvet Batter
In a medium bowl, melt your butter. Whisk in the sugar, sifted cocoa, vanilla, red food coloring, salt, espresso powder, and vinegar. You’ll see the color turn into that iconic deep crimson. Whisk in the eggs one at a time. Finally, gently fold in the flour. Stop as soon as the white streaks disappear—overmixing is the enemy of a fudgy brownie!
3. Prepare the Cheesecake Swirl
In a separate small bowl, beat the room-temperature cream cheese with sugar and vanilla. I find a hand whisk works best here to keep it creamy without incorporating too much air. Once smooth, fold in the egg yolk. This yolk is what keeps the cheesecake layer rich and prevents it from drying out in the oven.
4. The Layering and Swirling
Spoon about 1 tablespoon of brownie batter into each muffin cup. Follow it with 1 teaspoon of the cheesecake mixture, and then another teaspoon of brownie batter on top. Use a toothpick to gently swirl the layers together. Think “figure-eights”—don’t overdo it, or the colors will just muddy together.
5. Bake and Cool
Bake for 12 minutes. You’re looking for the tops to be set but the centers to remain slightly soft. Let them cool in the pan for 5 minutes. This “carry-over” cooking helps them firm up enough to be removed without falling apart.
Expert Tips for Best Results
- The Toothpick Test: Unlike cakes, you don’t necessarily want a toothpick to come out “clean” from a brownie. A few moist crumbs are the sign of a fudgy center.
- Room Temp Eggs: Set your eggs in a bowl of warm water for 5 minutes if you forgot to take them out of the fridge. Room-temp eggs emulsify better into the fat, leading to a smoother batter.
- Don’t Over-swirl: Two or three quick turns with the toothpick is all you need. The beauty of these bites is the distinct contrast between the red and white.
- Release with Care: Use a thin knife or a small offset spatula to gently nudge the brownies out of the pan. If they feel too soft, give them another 5 minutes to cool.
Variations and Substitutions
- Pink Velvet: For a baby shower or a softer look, use just a few drops of red food coloring to achieve a pink hue.
- Gluten-Free: You can swap the all-purpose flour for a 1:1 gluten-free baking flour. The texture remains remarkably similar!
- Add-ins: Feel free to fold in 1/4 cup of white chocolate chips to the brownie batter for extra sweetness.
- Natural Coloring: If you prefer to avoid food dyes, you can use beet powder, though the color will be more of a “brick” red than “bright” red.
Storage and Freezing
To Store: Because of the cream cheese, these should be stored in an airtight container in the refrigerator. They will stay fresh and delicious for up to 5 days.
To Freeze: These brownie bites freeze beautifully! Wrap them individually in plastic wrap and place them in a freezer-safe bag. They will last for up to 3 months. Simply thaw in the fridge overnight or for an hour on the counter before serving.
FAQ
Why do I need vinegar in red velvet brownies?
The vinegar provides a subtle tang that is characteristic of red velvet. Historically, it also helped brighten the red color when used with non-alkalized cocoa powder.
Can I use a regular-sized muffin pan?
Yes! However, you will need to increase the baking time to about 18–22 minutes. Keep a close eye on them to ensure they don’t overbake.
Why is my cheesecake swirl grainy?
This usually happens if the cream cheese was too cold when you started mixing. Always make sure it is soft and at room temperature for the smoothest texture.
Final Thoughts
These Red Velvet Cheesecake Brownie Bites are more than just a dessert; they are a conversation starter. There’s something so satisfying about the way the tangy cheesecake cuts through the rich chocolate brownie. Plus, their small size makes them dangerously easy to eat!
Give these a try for your next gathering, and I promise you’ll be asked for the recipe before the night is over. Happy baking
Print
Fudgy Red Velvet Cheesecake Brownie Bites
Fudgy, vibrant, and perfectly bite-sized, these Red Velvet Cheesecake Brownie Bites feature a rich chocolate base with a tangy cream cheese swirl.
- Total Time: 27
- Yield: 24 bites
Ingredients
For the brownie mixture:
9 tbsp butter (Kerrygold unsalted preferred)
1 1/4 cups sugar
1/4 cup cocoa powder (sifted)
1/2 tsp vanilla
1 tbsp red food coloring
1/8 tsp salt
1/4 tsp espresso powder
1/2 tsp vinegar
2 eggs
3/4 cup King Arthur all-purpose flour
For the cheesecake swirl:
9 oz cream cheese (room temperature)
3 tbsp sugar
1/2 tsp vanilla
1 egg yolk
Instructions
1. Preheat oven to 350°F. Grease a mini muffin pan generously. Sift cocoa powder into a small bowl.
2. In a medium bowl, whisk melted butter, sugar, cocoa, vanilla, food coloring, salt, espresso powder, and vinegar. Whisk in eggs one at a time. Fold in flour until just combined.
3. In a separate bowl, beat cream cheese, sugar, and vanilla until smooth. Fold in the egg yolk.
4. Spoon 1 tbsp brownie batter into each muffin cup. Top with 1 tsp cream cheese mixture, then another tsp of brownie batter. Swirl with a toothpick.
5. Bake for 12 minutes. Cool in pan for 5 minutes before moving to a wire rack.
Notes
Ensure cream cheese is truly at room temperature (70°F) for a smooth swirl.
Do not overbake! The centers should remain slightly soft for that fudgy texture.
- Prep Time: 15
- Cook Time: 12
- Category: Dessert
- Method: Baking
- Cuisine: American