
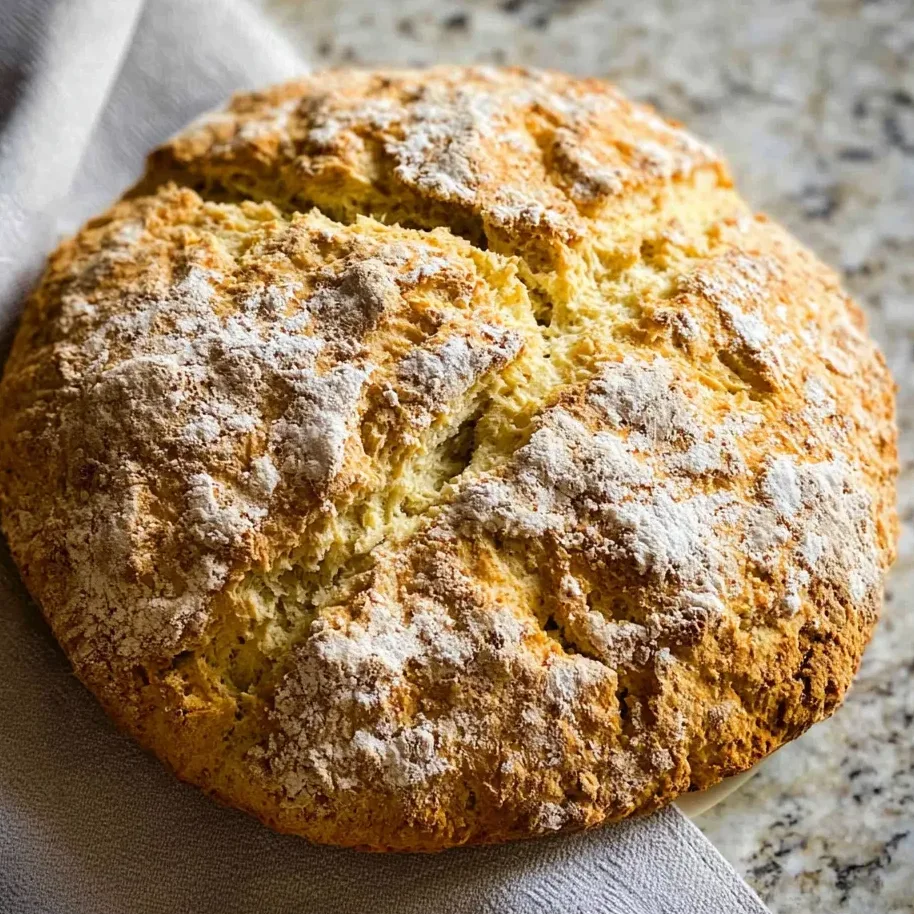
There is nothing quite like the aroma of freshly baked bread wafting through a kitchen, but for many, the prospect of working with yeast can be intimidating. Enter the Traditional Irish Soda Bread. This rustic, crusty loaf is the ultimate “emergency bread” it requires no proofing, no rising, and only four simple ingredients you likely already have in your pantry. Whether you are preparing a feast for St. Patrick’s Day or simply need a warm, hearty side for a weeknight stew, this recipe delivers a professional-quality loaf in under an hour. With its golden-brown exterior and tender, biscuit-like crumb, this bread proves that simplicity is often the pinnacle of culinary excellence. Get ready to discover why this humble Irish staple has remained a global favorite for generations.

Why You’ll Love This Recipe
You are going to fall in love with this recipe because it eliminates every barrier to home bread baking. First, the speed is unmatched; you can go from a bowl of flour to a hot loaf on the table in about 60 minutes. Second, the minimalist ingredient list means no special trips to the store for commercial yeast or bread flour. Third, it is incredibly forgiving. Unlike sourdough or brioche, which require precision and technique, soda bread thrives on a “less is more” approach. It’s the perfect project for kids or beginners, yielding a rustic, artisanal look every single time without the stress of a failed rise.
What Is Traditional Irish Soda Bread?
Authentic Irish Soda Bread is a “quick bread,” meaning it relies on a chemical leavener—baking soda—rather than biological fermentation (yeast). Historically, it emerged in Ireland during the mid-19th century when baking soda became widely available. Because Ireland’s climate was better suited for “soft” wheat (which is lower in gluten), yeast didn’t work as effectively. The reaction between the alkaline baking soda and the acidic buttermilk created the carbon dioxide bubbles necessary to lift the heavy dough. While many Americanized versions add sugar, raisins, or caraway seeds, the traditional version remains a savory, plain loaf designed to soak up butter and broth.
Ingredients Overview
The magic of this loaf lies in the synergy of four basic components:
- All-Purpose Flour (580g): While traditional Irish flour is “soft,” standard all-purpose flour works beautifully to provide structure while maintaining a tender crumb.
- Baking Soda (1½ tsp): This is your primary leavening agent. Ensure it is fresh for the best rise. It reacts instantly with the acid in the buttermilk.
- Salt (1 tsp): Essential for flavor. Without it, the bread will taste flat. Use a fine sea salt for even distribution.
- Cold Buttermilk (470ml): The secret weapon. Real buttermilk provides the acidity needed to activate the soda. It also contributes a subtle tang and a moist, tender texture. Always use cold buttermilk to keep the dough temperature down, which helps prevent over-activation of the gluten before it hits the oven.
Ingredient Substitutions & Tips
If you don’t have buttermilk on hand, don’t panic. You can make a DIY substitute by adding 2 tablespoons of lemon juice or white vinegar to 2 cups of whole milk; let it sit for 10 minutes until slightly curdled. For a more rustic, “Brown Soda Bread” style, swap 2 cups of the all-purpose flour for whole wheat flour. While purists might cringe, if you prefer a sweeter loaf, you can add a tablespoon of sugar and a handful of raisins. However, for the most authentic experience, stick to the base four ingredients to truly appreciate the natural grain and buttermilk flavors.
Step-by-Step Instructions
- Preparation: Preheat your oven to 400℉ (200℃). This high temperature is crucial for creating that signature thick, crunchy crust. Line a baking sheet with parchment or use a well-seasoned cast-iron skillet for an extra-crispy bottom.
- The Dry Mix: In a large bowl, whisk your flour, baking soda, and salt. Whisking is important here to ensure the baking soda is perfectly distributed, preventing “soapy” tasting pockets in the finished bread.
- The Wet Mix: Create a well in the center and pour in the cold buttermilk. Use a wooden spoon or a sturdy spatula to stir from the center outward. Stop the moment the dough becomes too stiff to stir and the flour is mostly moistened.
- The Gentle Knead: Turn the dough onto a floured surface. This is where most people go wrong—do not knead like pizza dough. Use floured hands to gently fold the dough over itself 5 to 10 times just until it holds together. Overworking will result in a rock-hard loaf.
- Shaping and Scoring: Form an 8-inch round. Use a very sharp knife to cut a deep “X” into the top, about half an inch deep.
- The Bake: Place the loaf in the oven for 45-50 minutes. If the top browns too quickly, tent it loosely with foil. The bread is done when the bottom sounds hollow when tapped or reaches an internal temperature of 195℉.
Expert Baking/Cooking Tips
The most critical tip for a perfect Traditional Irish Soda Bread is to handle the dough as little as possible. The goal is to keep the gluten relaxed. If the dough looks a bit shaggy and “ugly,” you are on the right track! Another tip is to check your baking soda’s expiration date; since there is no yeast to help, the soda does all the heavy lifting. Finally, for a softer crust, wrap the hot loaf in a clean tea towel immediately after taking it out of the oven. The trapped steam will soften the exterior, making it easier to slice for sandwiches.
The Folklore of the “X”
Why do we cut a cross into the top of the bread? While modern bakers know the “X” (or scoring) allows the bread to expand without bursting and ensures the center cooks through, Irish tradition has more colorful explanations. Legend says the cross was cut to “let the devil out” or to ward off evil spirits while the bread baked. Others suggest it was a way to easily divide the loaf into four quarters (farls). Regardless of whether you are superstitious or scientific, that deep score is the hallmark of an authentic Irish loaf and is essential for the proper texture.
Serving Suggestions
This bread is at its absolute peak when served warm, about 20 minutes after leaving the oven. Slice it into thick wedges and slather it with high-quality salted Irish butter. It is the quintessential companion to a bowl of Guinness Beef Stew or a creamy potato leek soup. For a simple breakfast, try it toasted with a bit of orange marmalade or honey. Its sturdy structure also makes it excellent for open-faced smoked salmon sandwiches.
Storage & Make-Ahead Tips
Because this bread contains no preservatives or fats (like oil or butter), it is best enjoyed on the day it is baked. If you have leftovers, store them in an airtight bag at room temperature for up to 2 days. To revive the bread, toast individual slices or pop the whole loaf back into a 350°F oven for 5-10 minutes. You can also freeze the baked loaf; wrap it tightly in plastic wrap and foil for up to 3 months.
FAQs
Q: Why is my soda bread so dense?
A: This usually happens from over-mixing or over-kneading. The more you work the dough, the more gluten develops, leading to a tough, bread-like texture instead of a tender, crumbly one.
Q: Can I use gluten-free flour?
A: Yes, a high-quality 1:1 gluten-free baking flour blend works well, though the texture will be slightly more crumbly. Ensure the blend contains xanthan gum.
Q: My bread has green spots—is it safe?
A: Yes! This is a chemical reaction between the baking soda and certain antioxidants in flour (or if you added sunflower seeds/walnuts). It’s perfectly safe to eat, though it looks startling.
Q: Do I have to use buttermilk?
A: Yes, or an acidic substitute. The acid is required to react with the baking soda. Without it, the bread will not rise and will have a bitter, metallic taste.
Q: Can I bake this in a Dutch oven?
A: Absolutely. A Dutch oven (with the lid on for the first 20 minutes) will create a spectacular, crispy crust similar to sourdough.
Traditional Irish Soda Bread is a testament to the beauty of minimalist cooking. With just four ingredients and an hour of time, you can create a centerpiece-worthy loaf that bridges the gap between ancient tradition and modern convenience. It’s a recipe that encourages you to get your hands messy and enjoy the process. So, dust off your flour, grab that buttermilk, and bring a taste of the Emerald Isle into your kitchen today!