Custard is one of those classic, feel-good desserts that never really gets old. A good creamy custard recipe is thick, smooth, and melts in your mouth with every bite. Whether you want to spoon it up on its own or serve it as a base for your favorite tarts and trifles, homemade custard is easier to master than you might think.

Table of Contents
In this comprehensive guide, we’ll walk you through everything from choosing the right ingredients to perfecting the cooking technique for that signature creamy texture. You’ll learn how to make creamy custard from scratch, discover the secrets to thickening it just right, and understand the different types of custard that chefs use across cuisines.
What is a Creamy Custard?
- Understanding Traditional Custard vs. Modern Variations
Learn how traditional egg-thickened custard differs from newer adaptations using stabilizers and emulsifiers. - Creamy Custard Texture Explained
Discover the texture benchmarks: from light and pourable to rich and pudding-like.
Key Ingredients for a Perfect Creamy Custard Recipe
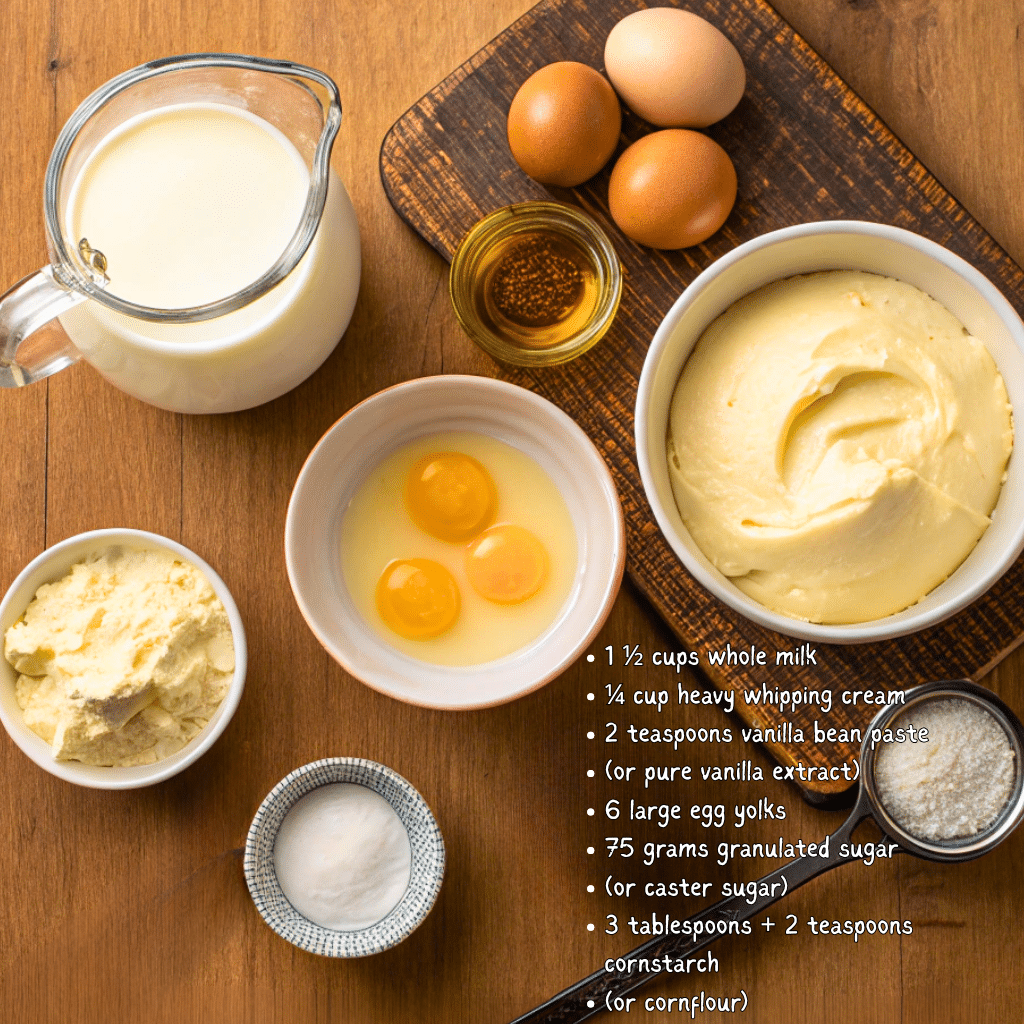
Creating a smooth and velvety custard starts with the right foundation. Each ingredient plays a crucial role in achieving that luxurious mouthfeel and rich taste. Here’s a closer look at what you’ll need to bring your creamy custard recipe to life.
Whole Milk and Cream: The Creamy Base
Milk forms the bulk of any custard recipe, but using whole milk ensures enough fat content for a rich consistency. Pair it with heavy whipping cream to elevate the creaminess and achieve a thicker, more decadent texture.
- Whole Milk: Delivers a rich dairy flavor without being overly heavy.
- Heavy Cream: Adds body, silkiness, and a slightly buttery finish to the custard.
Egg Yolks: The Secret to Thickness
Egg yolks are the traditional thickening agent in custard. They provide richness, body, and that classic custard flavor. For the best results, use fresh large egg yolks.
- Why only yolks? The proteins in egg whites can create a rubbery texture. Yolks, on the other hand, thicken smoothly.
Sugar: Sweetness and Structure
Custard isn’t overly sweet, but sugar does more than just add flavor. It helps with texture, prevents the eggs from scrambling too quickly, and aids in even thickening. You can use granulated sugar or caster sugar for finer blending.
- Granulated Sugar: Best for standard recipes.
- Caster Sugar: Ideal for a finer, smoother finish.
Cornstarch: Ensuring Silky Thickness
While traditional custards rely on eggs alone, this creamy custard recipe uses cornstarch to guarantee thickness and prevent curdling. It gives you control over the final consistency.
- Pro Tip: Always sift your cornstarch to avoid lumps during whisking.
This creamy custard recipe yields a thick, rich dessert that’s full of vanilla flavor.
Vanilla Bean Paste or Extract: Flavor Enhancer
The subtle aroma of vanilla transforms custard into a gourmet dessert. Use pure vanilla extract for convenience or vanilla bean paste for an intense, aromatic hit and visual flair from vanilla specks.
Step-by-Step Instructions for Making Custard
Making a creamy custard recipe from scratch might sound intimidating, but with a few careful steps and the right technique, you’ll have a silky dessert that rivals any bakery’s. Here’s a detailed walkthrough to help you master it.
Step-by-Step Instructions to Make a Creamy Custard Recipe
Step 1: Gently Warm the Dairy
To begin your creamy custard recipe, combine 1½ cups of whole milk, ¼ cup of heavy cream, and 2 teaspoons of vanilla bean paste (or pure extract) in a medium saucepan over low-medium heat. Stir gently and allow the mixture to warm up without boiling. This gentle heating allows the vanilla to infuse while preventing the dairy from scalding.
Tip: Milk can scorch fast — stay close and stir occasionally to protect the flavor of your creamy custard recipe.
Step 2: Whisk the Yolks and Sugar
While the milk mixture is warming, whisk together 6 large egg yolks and 75 grams of granulated sugar in a separate mixing bowl. Whisk vigorously for about 2–3 minutes, until the mixture lightens in color and becomes thick and creamy — this step lays the flavor foundation of your creamy custard recipe.
Don’t forget to scrape down the sides of the bowl to ensure everything blends smoothly.
Step 3: Add the Cornstarch
Next, whisk in 3 tablespoons plus 2 teaspoons of cornstarch until fully dissolved. This step adds essential structure to your creamy custard recipe, giving it that perfectly thick, pudding-like consistency.
Pro Tip: Always add the cornstarch before heating to prevent clumps from forming later on.
Step 4: Temper the Eggs
Now comes a crucial part of any creamy custard recipe: tempering. This prevents the yolks from scrambling.
Start by slowly pouring about a third of the warm milk mixture into the egg mixture while whisking continuously. This step gradually raises the temperature of the eggs. Once fully incorporated, slowly add the remaining milk mixture, continuing to whisk thoroughly.
Why it matters: This gradual process is what keeps your creamy custard recipe silky instead of grainy.
Step 5: Cook to Thicken
Return the full mixture to the saucepan and cook it over low-medium heat. Whisk constantly — this prevents sticking and ensures a uniform texture.
After 4–6 minutes, the custard should start to thicken. You’ll know your creamy custard recipe is ready when:
- It coats the back of a spoon
- You can draw a line through the custard, and the line stays
Step 6: Strain and Chill
Take the pan off the heat. For the smoothest, lump-free finish, strain the custard through a fine-mesh sieve into an airtight container. This ensures a flawless texture in your creamy custard recipe.
Next, press plastic wrap directly onto the surface of the custard. This prevents a skin from forming during cooling.
Refrigerate for at least 2 hours before serving — or store for up to 3 days if you’re prepping in advance.
Chilling helps your creamy custard recipe set fully and develop its signature silky consistency.
Serving Tip
Before serving, whisk the custard to restore its smooth consistency. You can enjoy it on its own, over pie, or layered into trifles.

Pro Tips for the Perfect Creamy Custard Recipe
Even with the best creamy custard recipe, small mistakes can impact the final texture. These expert tips will help you consistently get that dreamy, smooth finish every single time.
Use Fresh, Room-Temperature Eggs
Cold eggs take longer to emulsify and can cause uneven thickening. Let your eggs sit out for about 30 minutes before starting your recipe.
- Why it matters: Room-temperature yolks blend more smoothly and temper better with warm milk.
Whisk Constantly While Cooking
Never walk away during the cooking process. Constant whisking prevents hot spots and keeps the eggs from curdling.
- Use a heatproof silicone whisk or balloon whisk for the best coverage in your saucepan.
Low-Medium Heat is Key
High heat may speed up the process, but it can easily ruin custard. Always use low-medium heat and cook slowly.
- Look for steam, not bubbles. If it starts to bubble, remove from heat immediately.
Don’t Skip the Straining Step
Even if your custard looks smooth, straining removes any microscopic curdled bits for that perfect silky texture.
- Use a fine-mesh metal sieve and a bowl or jug underneath to catch the good stuff.
Chill Properly
Custard thickens more as it cools. Wrap it with plastic wrap directly touching the surface to prevent a skin from forming on top.
- Refrigerate for at least 2 hours before using it in other desserts or serving alone.
Common Mistakes When Making Custard and How to Avoid Them
Even seasoned cooks slip up when making custard. Knowing what can go wrong—and how to fix it—will help you perfect your creamy custard recipe every time.
Mistake #1: Scrambling the Eggs
If the heat is too high or you pour hot milk too quickly into the eggs, they’ll scramble. This creates a lumpy, gritty custard.
How to Avoid It:
- Temper your eggs slowly by adding a small amount of warm milk at a time.
- Whisk vigorously and constantly.
- Cook on low to medium heat only.
Mistake #2: Not Stirring Constantly
Custard is delicate. If left unstirred, it will stick to the pan and form clumps—or worse, burn.
How to Avoid It:
- Never leave the stovetop unattended.
- Grab a whisk or silicone spatula and keep stirring—gently, but don’t stop.
Mistake #3: Overcooking
Overcooking not only thickens custard too much but also causes separation, where the fats split from the mixture.
How to Avoid It:
- Remove from heat when the mixture coats the back of a spoon and leaves a clean line when swiped with your finger.
- Custard will continue to thicken as it cools.
Mistake #4: Skipping the Straining Step
Even if your custard seems smooth, tiny bits of overcooked egg can still remain, ruining the mouthfeel.
How to Avoid It:
- Strain your custard through a fine-mesh sieve before chilling. Always.
Mistake #5: Storing Without a Skin Barrier
If you refrigerate custard without covering it properly, a rubbery skin forms on top.
How to Avoid It:
- Press plastic wrap directly against the custard’s surface before chilling.
Types of Custards – Know the Differences
There isn’t just one kind of custard. In fact, the term “custard” covers a broad category of desserts that vary in texture, cooking methods, and uses. To get the most out of your creamy custard recipe, it’s helpful to know the main types and when to use each.
Stirred Custard (Crème Anglaise)
This is the most common version, often served as a sauce or poured over desserts. It’s slowly cooked on the stove with constant stirring to keep it from curdling.
- Texture: Pourable, silky smooth
- Used For: Pouring over pies, cakes, or fruit
- Made With: Egg yolks, milk/cream, sugar, vanilla
Baked Custard
This type sets in the oven using gentle heat and a water bath (bain-marie). Examples include flan, crème brûlée, and egg custard pie.
- Texture: Firm, sliceable
- Used For: Pies, tart fillings, standalone desserts
- Made With: Whole eggs, milk, cream, sugar
This creamy custard recipe is perfect as a base for trifles, tarts, or enjoyed on its own.
Pastry Cream (Crème Pâtissière)
This rich, thick custard is perfect for filling éclairs, cream puffs, and cakes. It uses cornstarch or flour to ensure stability and thickness.
- Texture: Very thick, spreadable
- Used For: Fillings in baked goods
- Made With: Egg yolks, milk, sugar, cornstarch/flour, vanilla
Set Custards (Gelatin-Based)
Some modern custards use gelatin instead of eggs for setting, creating a mousse-like or panna cotta texture.
- Texture: Smooth and jiggly
- Used For: Chilled molds or plated desserts
- Made With: Milk, cream, gelatin, flavoring
Steamed Custard
Popular in Asian cuisine, this type is gently steamed, often in ramekins or bowls, and may include savory ingredients.
- Texture: Soft and delicate
- Used For: Sweet or savory dishes
- Made With: Eggs, stock or milk, flavorings
So Which One is Best?
When it comes to versatility and flavor, stirred custard or pastry cream is the way to go. They’re the most adaptable to cakes, sauces, and chilled desserts.
How to Serve and Pair Custard for Any Occasion
One of the best things about a creamy custard recipe is how versatile it is. From elegant dinner parties to laid-back family desserts, custard can take on many roles. Here’s how to serve it like a pro and pair it with other flavors for maximum deliciousness.
Serve It Warm or Chilled
Custard can be served at various temperatures depending on how you want to enjoy it.
- Warm: Serve freshly cooked custard over sponge cake or fruit for comfort-food vibes.
- Chilled: Ideal for parfaits, tarts, or as a base in layered trifles.
Looking for inspiration? Try our chilled fruit trifle with vanilla custard to cool down your dessert table.
Pair with Fruit for Freshness
Custard’s creamy texture makes it a perfect companion for tangy, juicy fruits.
- Great Choices: Berries, mango, kiwi, grilled peaches, and poached pears.
- Tip: Add a dusting of cinnamon or grated lemon zest for extra flavor depth.
Serve in Tarts, Trifles, or Layered Parfaits
Take your custard beyond the spoon by using it in creative dessert builds:
- Tarts: Fill a baked pastry shell and top with fresh fruit.
- Trifles: Layer with cake cubes, fruit, and whipped cream.
- Parfaits: Alternate custard, granola, and berries in glasses for individual servings.
Use as a Sauce
Lighten your custard slightly and turn it into a dessert sauce for cakes, puddings, and pies.
- Drizzle over warm brownies or banana bread
- Pour on top of steamed puddings for classic British comfort
Top with Crumble, Caramel, or Nuts
Adding texture contrasts can elevate your custard.
- Crumble: Add crushed biscuits or graham cracker topping
- Caramel drizzle: For extra indulgence
- Toasted nuts: Pistachios, almonds, or hazelnuts add a crunchy finish

Storage Tips and How Long Custard Lasts
Custard is rich and delicate, so storing it the right way is essential to preserving flavor, texture, and safety. Here’s how to get the most shelf life out of your creamy custard recipe without sacrificing taste.
Cool Before Storing
Never put hot custard straight into the fridge—it’ll trap heat and create condensation, which makes it watery.
- Let it cool on the counter for around 30 minutes first.
- Stir occasionally while it cools to prevent a skin from forming.
Use Airtight Containers
After it’s cooled down, pour the custard into an airtight container. Make sure there’s minimal air trapped inside.
- Pro Tip: Press plastic wrap directly against the surface of the custard before sealing the lid to prevent a rubbery skin from forming.
Refrigerator Shelf Life
Custard can be safely stored in the fridge for up to 3 days.
- Do not freeze custard—it will separate and lose its creamy texture when thawed.
- If using as part of a trifle or tart, it’s best consumed within 24 hours for peak flavor and texture.
Don’t miss our dessert storage hacks to make all your sweets last longer without losing quality.
How to Tell if Custard Has Gone Bad
Spoiled custard has a sour smell, watery separation, or unusual graininess. Always check for signs before serving leftovers.
- If in doubt, throw it out—especially with egg-based desserts.
Re-whisk Before Serving
Custard thickens and may stiffen in the fridge. Whisk it gently before serving to restore that luscious, smooth consistency.
- Optional: Add a splash of milk to loosen the texture if needed.
For a professional-level overview of custard types and uses, check out Types of Custard
Master the Art of Creamy Custard
A rich and silky creamy custard recipe is one of the most satisfying desserts you can make at home. With just a handful of basic ingredients and the right techniques, you can transform eggs and dairy into a decadent treat perfect for any occasion.
Whether you serve it warm over fruit, chill it in tarts, or enjoy it by the spoonful, homemade custard is the kind of dessert that never goes out of style. Take your time, follow the steps carefully, and you’ll be rewarded with a flawless finish every time.
Frequently Asked Questions About Creamy Custard
How to Make Custard?
To make custard, warm up the milk, cream, and vanilla together in a saucepan. Separately whisk egg yolks with sugar and cornstarch. Slowly temper the warm milk into the egg mixture, then return everything to the heat and cook while whisking until thickened. Strain, chill, and enjoy.
What is Cream Custard Made Of?
A classic creamy custard recipe includes just a few simple ingredients that work together beautifully:
Whole milk
Heavy cream
Egg yolks
Sugar
Cornstarch (for added stability and thickness)
Vanilla extract or vanilla bean paste
Each element in this creamy custard recipe contributes to the smooth, rich, and melt-in-your-mouth texture that defines this dessert. Using high-quality dairy and fresh eggs is key to achieving a balanced and flavorful result.
These steps help avoid curdling and ensure that luxuriously smooth finish.
What is the Secret to a Good Custard?
The secret to a successful creamy custard recipe lies in mastering the fundamentals:
Cook over low, slow heat to avoid scrambling
Stir constantly to maintain an even, glossy texture
Temper the eggs gradually to prevent curdling
Always strain the custard before chilling for extra smoothness
Use only fresh, high-quality ingredients for the best taste
When followed correctly, these techniques ensure your creamy custard recipe comes out perfectly thick, silky, and full of deep vanilla flavor — every single time.
How to Make Thick Creamy Custard?
Use a combination of egg yolks and cornstarch.
Cook the custard until it coats the back of a spoon and holds a line when swiped.
Let it chill fully—it thickens more as it cools.
What Are the Three Types of Custard
Stirred Custard (like crème anglaise)
Baked Custard (like flan or crème brûlée)
Pastry Cream (used as filling in desserts)
Creamy Custard Recipe: The Ultimate Guide to Making This Classic Dessert Perfect Every Time
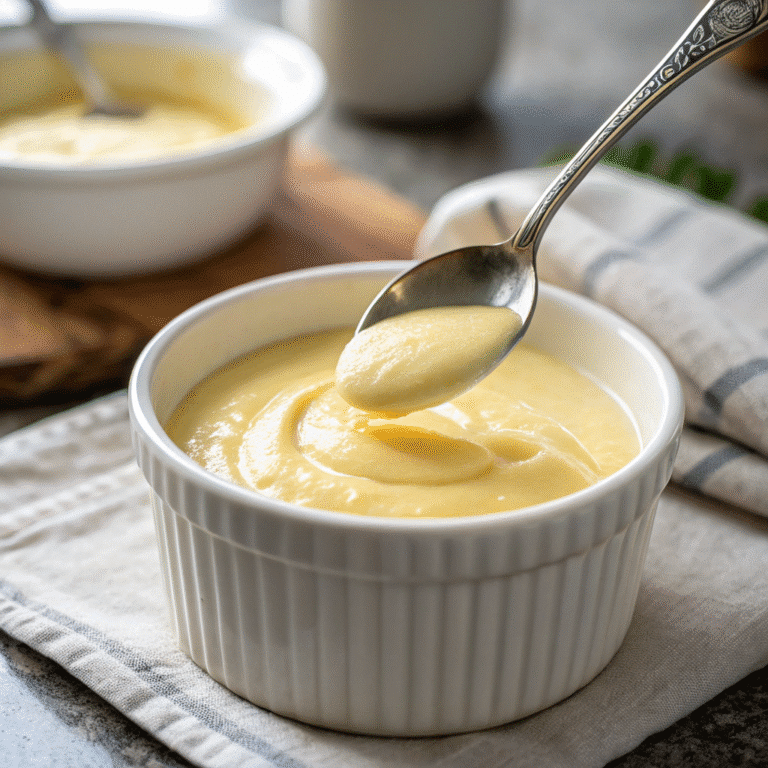
This creamy custard recipe is a rich, velvety-smooth classic made from simple pantry staples — milk, cream, egg yolks, sugar, and vanilla. Perfect for tarts, trifles, or spooned straight from the bowl, this English-style custard is thickened just right and chilled to silky perfection. Whether you’re a beginner or an experienced home cook, this foolproof method ensures a luxurious, lump-free custard every time.
- Total Time: 2 hours 15 minutes
- Yield: 2 Cups
Ingredients
1 ½ cups whole milk
¼ cup heavy whipping cream
2 teaspoons vanilla bean paste (or pure vanilla extract)
6 large egg yolks
75 grams granulated sugar (or caster sugar)
3 tablespoons + 2 teaspoons cornstarch (or cornflour)
Instructions
Warm the dairy: In a medium saucepan, gently warm the whole milk, heavy cream, and vanilla over low-medium heat. Do not boil. Let steep for a few minutes, then remove from heat.
Whisk yolks and sugar: In a medium bowl, whisk together the egg yolks and sugar for 2–3 minutes until pale and creamy. Scrape down the sides of the bowl.
Add cornstarch: Whisk in the cornstarch until smooth and fully combined.
Temper the eggs: Slowly pour about one-third of the warm milk mixture into the egg mixture while whisking constantly. Then gradually whisk in the remaining milk.
Cook to thicken: Return the entire mixture to the saucepan. Cook over low-medium heat, whisking constantly for 4–6 minutes until the custard thickens and coats the back of a spoon.
Strain and chill: Strain through a fine mesh sieve into an airtight container. Press plastic wrap directly onto the surface to prevent a skin. Chill in the refrigerator for at least 2 hours.
Notes
Vanilla bean paste adds flavor depth and visual appeal (tiny vanilla specks).
Cornstarch helps ensure a thicker, more stable custard that won’t curdle easily.
Always stir continuously to avoid lumps and scrambling.
Serving Suggestions:
Serve chilled with berries
Use as tart or pie filling
Layer into trifles or parfaits
Spoon over sponge cake or baked apples
Storage:
Store in an airtight container in the fridge for up to 3 days. Do not freeze. Re-whisk before serving.
- Prep Time: 5
- Cook Time: 10
- Category: Dessert
- Method: Stovetop
- Cuisine: English
- Diet: Vegetarian

