S’mores Cookie Bars are about to become your new obsession – and I’m not just saying that because I’ve made these addictive treats over twenty times this summer alone. Picture this: you’re craving that nostalgic campfire flavor of toasted marshmallows, melted chocolate, and crunchy graham crackers, but it’s raining outside or you simply don’t have access to a fire pit. That’s exactly how I felt three months ago when my family was hit with a sudden s’mores craving during a thunderstorm.

What started as a desperate attempt to satisfy our campfire dessert cravings has turned into the most requested recipe in my household. These bars capture every magical element of traditional s’mores – the gooey marshmallow center, the rich chocolate chunks, and that distinctive graham cracker crunch – all wrapped up in a convenient, shareable bar format that’s perfect for potlucks, bake sales, or those moments when you need something special without the campfire setup.
Understanding What Makes S’mores Cookie Bars Extraordinary
The Magic Behind the Three-Layer System
After testing countless variations, I discovered that the secret to exceptional S’mores Cookie Bars lies in understanding the science behind each component. Unlike traditional cookie recipes that mix everything together, these bars require a strategic layering approach that I’ve perfected through extensive trial and error.
The bottom layer serves as your foundation – a graham cracker-infused cookie dough that’s sturdy enough to support the gooey center while maintaining that signature crunch we associate with campfire s’mores. I learned this the hard way during my fifth attempt when I used regular cookie dough and ended up with soggy, structurally unsound bars that collapsed when cut.
Why Graham Cracker Crumbs Make All the Difference
The inclusion of graham cracker crumbs in the cookie base isn’t just about flavor – it’s about texture engineering. When I first started developing this recipe, I tried using whole graham crackers as a bottom layer, similar to cheesecake crusts. The result was disappointing: the crackers became soggy and lost their characteristic snap.
By incorporating graham cracker crumbs directly into the cookie dough, we achieve several benefits:
- Enhanced structural integrity that prevents sogginess
- Distributed graham flavor throughout each bite
- Better binding properties that keep the bars cohesive
- Improved texture contrast against the smooth marshmallow layer
The Marshmallow Creme Revelation
Here’s where many home bakers make a critical mistake: attempting to use regular marshmallows instead of marshmallow creme. I made this error during my second batch, thinking I could save a trip to the store by using mini marshmallows from my pantry. The result was a disaster – the marshmallows melted completely, creating unsightly craters and virtually disappearing from the final product.
Marshmallow creme (or “Fluff” as it’s commonly known) maintains its integrity during baking due to its stabilized composition. Unlike regular marshmallows that melt and lose their structure, marshmallow creme creates that perfect gooey center we’re after while remaining visually appealing and texturally satisfying.
Chocolate Chip Distribution Strategy
The placement of chocolate chips isn’t random – it’s strategic. By layering the chocolate chips on top of the marshmallow creme before adding the final cookie dough layer, we create pockets of melted chocolate that mirror the experience of biting into a traditional s’more where the chocolate has been warmed by the marshmallow.
The Complete Step-by-Step Recipe Guide
Essential Ingredients and Preparation
Prep Time: 15 minutes
Cook Time: 25 minutes
Total Time: 3 hours (includes cooling)
Yield: 16 generous bars
What You’ll Need:
- 1/2 cup (8 Tbsp; 113g) unsalted butter, softened to room temperature
- 3/4 cup (150g) packed light or dark brown sugar
- 1 large egg, at room temperature
- 1 teaspoon pure vanilla extract
- 1 cup (125g) all-purpose flour (spooned & leveled)
- 1 cup (120g) graham cracker crumbs (about 8 full-sheet graham crackers)
- 1/2 teaspoon baking powder
- 1/4 teaspoon salt
- 1 cup (180g) semi-sweet chocolate chips
- 1 heaping cup marshmallow creme (store-bought “Fluff” or homemade)
The Foolproof Method
Step 1: Foundation Setup
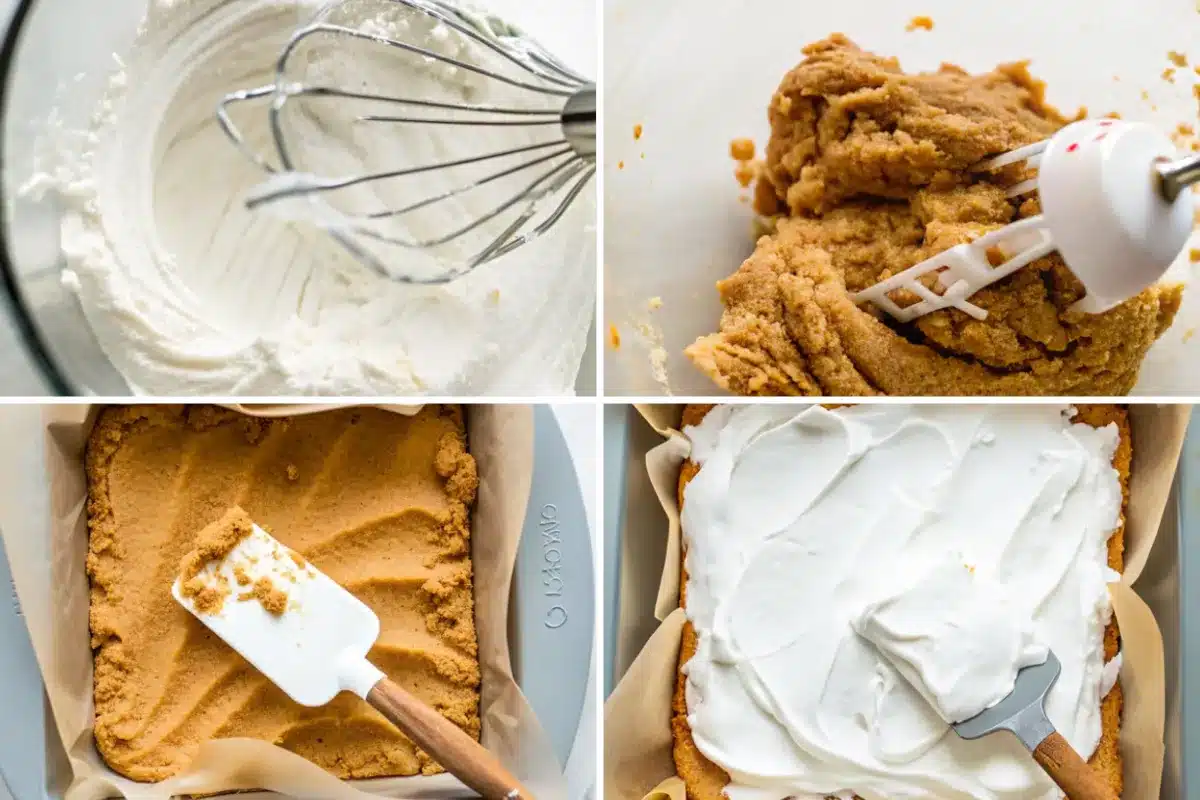
Preheat your oven to 350°F (177°C). This temperature is crucial – too hot and the marshmallow creme will bubble excessively; too cool and the cookie layers won’t develop proper texture. Line an 8-inch or 9-inch square baking pan with parchment paper, ensuring generous overhang on all sides. This overhang becomes your lifeline for easy removal later.
Step 2: Creating the Perfect Cookie Base
In a large bowl, cream the softened butter and brown sugar using either a handheld or stand mixer fitted with a paddle attachment. Beat on medium-high speed for about 3 minutes until the mixture becomes light and fluffy. Don’t rush this step – proper creaming creates the tender texture that makes these bars special.
Add the room temperature egg and vanilla extract, beating until just combined. The mixture might appear slightly curdled at this point, which is completely normal and nothing to worry about.
Step 3: Dry Ingredient Integration
In a separate medium bowl, whisk together the flour, graham cracker crumbs, baking powder, and salt. This pre-mixing ensures even distribution of leavening agents and prevents pockets of concentrated salt or baking powder.
Pour the dry mixture into the wet ingredients and beat on medium speed until just combined. Overmixing at this stage can result in tough, dense bars.
Step 4: The Critical Assembly Process
Here’s where precision matters most. Press approximately two-thirds of the cookie dough into your prepared pan. The dough will be sticky – this is expected. Use your hands or the back of a spoon to create an even layer, but don’t stress about perfection.
Next comes the marshmallow creme layer. This step requires patience and technique. Using an offset spatula or the back of a spoon, gently spread the marshmallow creme over the cookie base. Work slowly to avoid disturbing the bottom layer, and aim for even coverage despite the sticky nature of the creme.
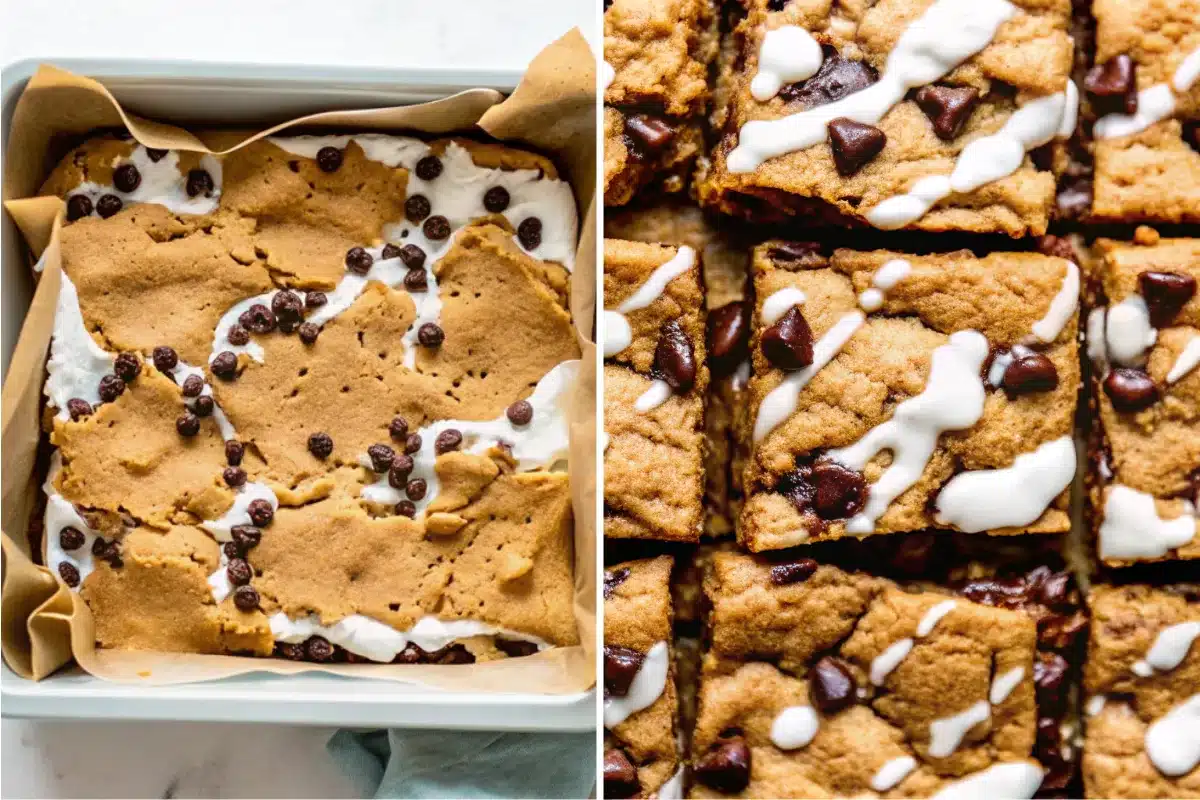
Sprinkle the chocolate chips evenly over the marshmallow layer. Finally, take the remaining cookie dough and flatten it into small pieces, arranging them over the chocolate chips like puzzle pieces. You won’t have enough dough to cover everything completely – this intentional “rustic” appearance is part of the bars’ charm.
Step 5: Baking to Perfection
Bake for 25-30 minutes, watching for the top to turn lightly golden brown. The marshmallow creme may bubble slightly around the edges, which indicates proper baking. Avoid overbaking, as this can make the cookie layers tough and the marshmallow creme overly firm.
Step 6: The Patience Test
Remove from the oven and place the pan on a wire rack. Here’s the hardest part: you must let these bars cool completely before cutting. I know it’s tempting to dive in while they’re warm, but cutting too early results in messy, structurally unstable bars that fall apart.
After complete cooling (about 2-3 hours), use the parchment paper overhang to lift the entire batch from the pan. Cut into 16 squares using a sharp knife, cleaning the blade between cuts for neat edges.
Expert Tips for Guaranteed Success
Temperature Control Mastery
Room temperature ingredients are non-negotiable for optimal results. Cold eggs won’t emulsify properly with the butter mixture, and cold butter won’t cream effectively. Plan ahead by removing eggs and butter from the refrigeration 1-2 hours before baking.
The Graham Cracker Crumb Shortcut
While you can certainly crush your own graham crackers, I’ve found that store-bought graham cracker crumbs provide more consistent results. If making your own, ensure the pieces are fine and uniform – large chunks can create texture issues.
Marshmallow Creme Spreading Technique
Warm your spatula or spoon with hot water, then dry it thoroughly before spreading marshmallow creme. The slight warmth makes spreading significantly easier and more even.
Storage and Serving Recommendations
Store leftover S’mores Cookie Bars covered at room temperature for up to one week. For longer storage, these bars freeze beautifully for up to three months when properly wrapped and stored in airtight containers with parchment paper layers between bars.
For the ultimate serving experience, try warming individual bars in the microwave for 10-15 seconds before serving. This softens the marshmallow layer slightly, recreating that fresh-from-the-oven experience.
Frequently Asked Questions
Can I make these in a larger pan? Absolutely! Double the entire recipe for a 9×13-inch pan, extending the baking time to 35-38 minutes.
What about homemade marshmallow creme? Homemade marshmallow creme works wonderfully. Use half a batch (about 1¼ cups) following your favorite recipe.
Can I substitute the graham crackers? For international readers, digestive biscuit crumbs make an excellent substitute for graham cracker crumbs.
Why can’t I use regular marshmallows? Regular marshmallows melt completely during baking, creating unappealing craters and losing their textural contribution to the bars.
These S’mores Cookie Bars have become my go-to dessert for every occasion, from casual family dinners to impressive party spreads. The combination of convenience, nostalgia, and incredible flavor makes them impossible to resist. Give this recipe a try, and I guarantee they’ll earn a permanent place in your dessert rotation.
For more irresistible dessert recipes and baking tips, explore our complete collection at HomemadeRecipes.net.
The magic of s’mores has deep American roots, with the USDA Forest Service
Print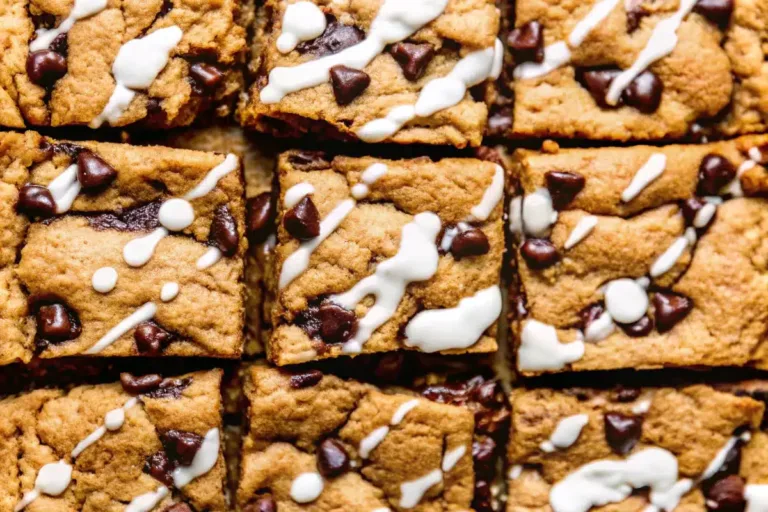
S’mores Cookie Bars
Graham cracker and brown sugar cookie dough sandwiches a gooey marshmallow creme layer with plenty of chocolate chips in these irresistible S’mores Cookie Bars. Perfect for satisfying campfire cravings indoors any time of year!
- Total Time: 3 hours (includes cooling)
- Yield: 16 bars
Ingredients
1/2 cup (8 Tbsp; 113g) unsalted butter, softened
3/4 cup (150g) packed light or dark brown sugar
1 large egg, at room temperature
1 tsp pure vanilla extract
1 cup (125g) all-purpose flour (spooned & leveled)
1 cup (120g) graham cracker crumbs (about 8 full-sheet graham crackers)
1/2 tsp baking powder
1/4 tsp salt
1 cup (180g) semi-sweet chocolate chips
1 heaping cup marshmallow creme (Fluff or homemade)
Instructions
1. Preheat oven to 350°F (177°C). Line an 8- or 9-inch square pan with parchment, leaving overhang.
2. Cream butter and brown sugar until fluffy (3 min). Beat in egg and vanilla.
3. Whisk flour, graham cracker crumbs, baking powder, and salt. Mix into wet until just combined.
4. Press 2/3 dough into pan. Spread marshmallow creme on top. Sprinkle with chocolate chips. Flatten remaining dough into pieces and scatter over top (leave gaps).
5. Bake 25–30 min until golden. Cool completely 2–3 hours before cutting.
6. Lift bars out using parchment. Slice into 16 squares with sharp knife.
Notes
Use marshmallow creme—not marshmallows—for best texture.
Cool fully before cutting or bars will fall apart.
Room temp butter and eggs are crucial for dough.
Storage: airtight at room temp up to 1 week, or freeze up to 3 months.
For a larger batch: double recipe and bake in 9×13 pan for 35–38 minutes.
- Prep Time: 15 minutes
- Cook Time: 25 minutes
- Method: Baking
- Cuisine: American