
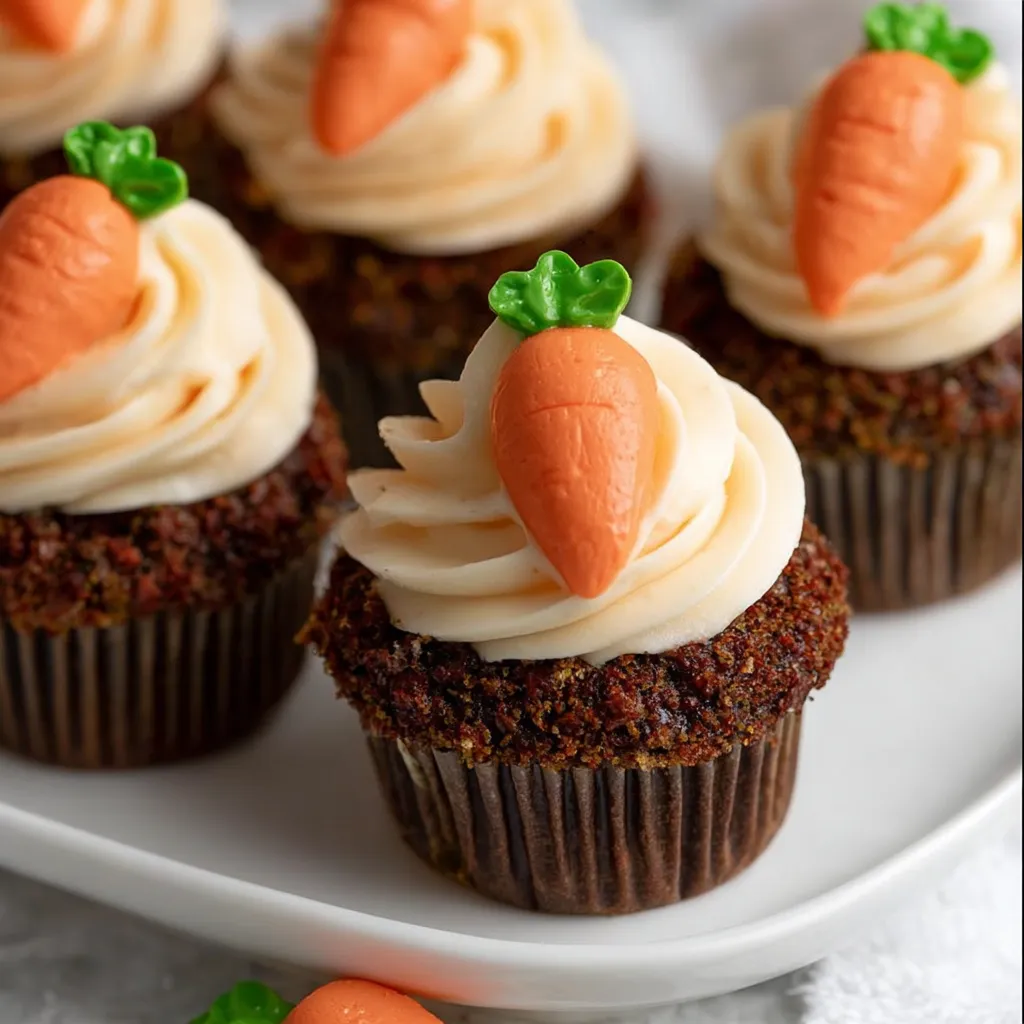
There is something truly magical about a dessert that looks like it was plucked straight from a spring garden. These Strawberry Carrot Chocolate Cupcakes are the perfect example of “trompe l’oeil” in baking—food that deceives the eye in the most delicious way possible. Featuring a deep, moist chocolate sponge and a silky buttercream “dirt” topping, these treats are capped off with a fresh strawberry disguised as a bright orange carrot. Whether you are hosting an Easter brunch, a garden-themed birthday party, or simply want to celebrate the arrival of spring with the kids, these cupcakes are guaranteed to be the star of the show. They combine the rich, nostalgic flavor of a classic chocolate cupcake with the fresh, juicy snap of a chocolate-covered strawberry.
Why You’ll Love This Recipe
You will fall in love with these cupcakes because they strike the perfect balance between whimsical design and sophisticated flavor. Unlike many “novelty” desserts that prioritize looks over taste, this recipe uses a high-quality cocoa sponge enriched with light brown sugar for a caramel-like depth and incredible moisture. The Oreo “dirt” adds a delightful crunch that contrasts beautifully with the smooth chocolate buttercream. Plus, it is a fantastic way to get children involved in the kitchen; dipping the “carrots” and “planting” them in the dirt is a joyful activity for all ages. It is a creative, no-fuss way to impress guests without needing advanced professional decorating skills.
What Is a Strawberry Carrot Cupcake?
A Strawberry Carrot Chocolate Cupcake is a creative dessert assembly where a classic chocolate cupcake is transformed into a miniature garden plot. The “soil” is created using a rich chocolate frosting dipped into finely crushed Oreo cookies (or similar dark chocolate sandwich cookies). The “carrot” is actually a fresh, whole strawberry that has been dipped in orange-tinted white chocolate. When placed on top of the dark cookie crumbs, the strawberry looks like a carrot growing out of the ground. This concept has become a viral sensation on social media platforms like Pinterest and Instagram because it offers a stunning visual payoff with relatively simple techniques.
Ingredients Overview
To achieve the best results, quality ingredients are paramount. For the cupcake base, we use unsalted butter at room temperature to ensure a light, aerated crumb when creamed with light brown soft sugar. Brown sugar is the “secret weapon” here, as the molasses content keeps the chocolate cake from drying out. Self-raising flour provides the necessary lift, while high-quality cocoa powder gives that deep mahogany color and intense chocolate flavor.
The buttercream requires more unsalted butter and sifted icing sugar. Sifting is non-negotiable for a professional, lump-free finish. For the decoration, look for medium-sized strawberries that are uniform in shape. If they are too large, they will topple over; if they are too small, they won’t have that iconic carrot silhouette. For the coating, white chocolate is melted and tinted. Use an oil-based orange food coloring if possible, as water-based dyes can cause the chocolate to “seize” or turn grainy. Finally, the Oreo crumbs should be processed until they resemble fine topsoil, providing that earthy aesthetic that makes the “garden” come to life.
Ingredient Substitutions & Tips
If you need to adapt this recipe, there are several easy swaps. For a gluten-free version, replace the self-raising flour with a high-quality 1:1 gluten-free baking blend and add 1/2 teaspoon of xanthan gum if the blend doesn’t include it. Use gluten-free chocolate sandwich cookies for the dirt. If you don’t have orange food coloring, you can use a tiny drop of red and yellow, but ensure they are compatible with chocolate. For those who find white chocolate too sweet, you can use orange-flavored candy melts, which are already colored and specifically designed for easy dipping and quick setting.
Step-by-Step Instructions
- Prep the Oven and Tin: Start by preheating your oven to 180ºC (160ºC fan). Line a 12-cup muffin tin with dark brown or black cupcake liners to enhance the “earthy” look of the final product.
- Cream the Base: In a large bowl, beat the 200g of room-temperature butter and 200g of light brown sugar. Use an electric hand mixer or a stand mixer for about 3–5 minutes until the mixture is pale and notably fluffy.
- Mix the Batter: Sift in 150g of self-raising flour and 50g of cocoa powder. Add the 4 medium eggs. Beat on low speed until just combined to avoid overworking the gluten, which can lead to tough cakes.
- Bake: Divide the batter evenly. Bake for 20–22 minutes. The cupcakes are done when they spring back to the touch or a toothpick comes out clean. Transfer to a wire rack to cool completely.
- Make the “Carrots”: Wash your strawberries and dry them thoroughly with paper towels. Melt 200g of white chocolate in 30-second bursts in the microwave. Stir in the orange coloring. Dip each strawberry, holding it by the green stem, and place on parchment paper. Drizzle extra chocolate over them to create “root lines.”
- Frosting and Dirt: Beat the buttercream ingredients (butter, icing sugar, 50g cocoa, vanilla) until smooth. Pipe a large “blob” on each cooled cupcake.
- The Assembly: Place crushed Oreos in a shallow bowl. Press the frosted top of the cupcake into the crumbs until the buttercream is fully covered.
- The Planting: Gently push a strawberry carrot into the center of each cupcake.
Expert Baking/Cooking Tips
For the most realistic “dirt” look, do not remove the white cream filling from the Oreos before crushing; the fats in the cream help the crumbs stick together and adhere to the frosting better. When it comes to the strawberries, ensure they are at room temperature before dipping. If the berries are cold, the chocolate will set too fast and may crack. Another pro tip: if your buttercream feels too stiff to pipe, add one tablespoon of boiling water at a time. This “tempering” of the frosting makes it incredibly glossy and easier to dip into the cookie crumbs without losing its shape.
The Art of the Oreo Dirt
Creating the perfect “soil” texture is what elevates these cupcakes from home-baked to professional-grade. To get the right consistency, use a food processor to pulse the cookies until you have a mixture of fine dust and very small “pebbles.” This mimicry of real soil adds to the organic feel of the garden theme. If you don’t have a food processor, place the cookies in a zip-top bag and use a rolling pin to crush them. For an even more realistic look, you can add a few sprigs of fresh mint next to the strawberry carrot to represent additional foliage growing from the “ground.”
Serving Suggestions
These cupcakes are best served on a rustic wooden board or a slate platter to lean into the garden aesthetic. They look stunning as a centerpiece for an Easter table or nestled inside a clean, new terracotta pot for a themed party. Because of the fresh fruit, they are best enjoyed the day they are assembled, but they can be served with a side of extra whipped cream or a glass of cold milk for the ultimate afternoon treat.
Storage & Make-Ahead Tips
The cupcake bases can be made up to two days in advance and stored in an airtight container at room temperature. The buttercream can also be made ahead and kept in the fridge. However, once the strawberries are dipped and “planted,” they should be eaten within 24 hours. Strawberries naturally release moisture once cut or pierced, which can soften the chocolate and the cupcake over time. Store assembled cupcakes in a cool, dry place.
FAQs
Q: My chocolate seized when I added the food coloring. What happened?
A: Most liquid food colorings are water-based. Chocolate and water do not mix! Always use oil-based colors or “candy colors” specifically formulated for chocolate and compound coatings.
Q: Can I use store-bought frosting?
A: Yes! Simply mix a tub of chocolate frosting with a little extra cocoa powder to darken the color, then follow the Oreo dipping steps as usual.
Q: The strawberries are “sweating” under the chocolate. Is this normal?
A: This usually happens due to temperature changes. To minimize sweating, don’t store the dipped strawberries in a very cold fridge before putting them on the cupcakes, and avoid moving them between hot and cold environments.
Q: How do I get the “drizzle” look on the carrots?
A: Once the initial dip has slightly set, take a spoon or a piping bag with a tiny hole and move it rapidly back and forth over the strawberry to create those horizontal “carrot” lines.
Final Thoughts
These Strawberry Carrot Chocolate Cupcakes are a testament to how simple ingredients like fresh fruit and cookies can be transformed into a work of edible art. They are playful, delicious, and surprisingly easy to assemble. By following these steps, you’ll create a dessert that isn’t just a treat for the palate, but a conversation starter for your next spring gathering. Happy baking and happy gardening!