Making homemade bread doesn’t have to mean hours of kneading, proofing, and complicated steps. If you’re a busy parent or just looking for an easy and healthier baking option, these 2 ingredient cottage cheese bread rolls are your new best friend. With no yeast and no kneading involved, they’re unbelievably soft, slightly chewy, and full of protein thanks to the magic of cottage cheese.

We’ll walk you through every detail in this article—from choosing the right ingredients to shaping perfect rolls and even how to store or modify them for your family’s needs. You’ll also get expert baking tips, FAQs, and fun ways to customize this basic recipe into something uniquely yours.
Table of Contents
Don’t miss our Cottage Cheese Banana Bread recipe if you’re loving cottage cheese baking ideas.
Why 2 Ingredient Cottage Cheese Bread Rolls Are a Game-Changer
What Makes These Rolls Unique and Practical
Unlike traditional bread recipes that often call for yeast, long rising times, or fancy techniques, this recipe flips the script. You only need two ingredients—cottage cheese and self-rising flour. That’s it. No eggs, no butter, no oil, and definitely no stress.
What sets these rolls apart is their naturally tender texture. Thanks to the high-protein cottage cheese, you get a rich flavor and a moist crumb that mimics classic yeast bread. That’s why these rolls have become a go-to for busy parents and beginners alike.
Here’s a quick overview of why they’re a must-try:
| Feature | Benefit |
|---|---|
| 2 Ingredients | Minimal grocery shopping and cleanup |
| No Yeast Required | No rising time, great for impromptu baking |
| High Protein Cottage Cheese | Adds nutrition and moisture without added fats |
| Self-Rising Flour | Built-in leavening simplifies the whole process |
| No Kneading | Easy for kids and beginners |
| Ready in Under an Hour | Perfect for weeknights or early mornings |
These 2 ingredient cottage cheese bread rolls are unlike anything you’ve tried.
Why Busy Parents Love This 2-Ingredient Hack
If you’re juggling kids, work, and everything else on your plate, the last thing you want is a bread recipe that takes half your day. That’s where these 2 ingredient cottage cheese bread rolls shine.
Busy moms love that:
- The dough can rest overnight and be ready the next day.
- It’s freezer-friendly, making batch prep easy.
- Kids can help with shaping (it’s fun and mess-friendly!).
- You skip the yeast hassle and still get that bakery-soft roll feel.
And for those sneaky snackers at home? These rolls are high in protein and low in added sugar—making them a smarter option than store-bought breads.
Learn more about how to use cottage cheese in sweet snacks in this Cottage Cheese Cookie Dough.
Ingredients Breakdown for the Best Cottage Cheese Bread
Choosing the Right Cottage Cheese (High Protein vs. Regular)
The star of this 2-ingredient wonder is undoubtedly cottage cheese—but not just any kind will do. You’ll want to use high protein cottage cheese, ideally one that contains 13–14 grams of protein per ½ cup (113g). Why? Because it impacts both the texture and moisture level of your bread.
High-protein cottage cheese absorbs more liquid, which helps create a dough that’s sturdy enough to hold shape, bake well, and mimic a yeasted bread’s bounce. Lower protein versions or runny cottage cheese will leave you with dough that’s too wet and likely to fall apart after baking.
Here’s how popular brands compare:
| Brand | Protein per ½ cup | Recommended? |
|---|---|---|
| Amazon Grocery 1% | 14g | Yes |
| Good Culture | 19g | Too thick |
| Daisy 2% | 12g | Moderate |
| Store Generic 1% | 10–11g | Too low |
Pro Tip: Always blend the cottage cheese before adding it to the flour. This ensures a smooth yogurt-like consistency that incorporates easily and evenly into your dough.
To make the best 2 ingredient cottage cheese bread rolls, choose a flour with 3g protein per serving.
What to Know About Self-Rising Flour & Homemade Alternatives
The second hero in this recipe is self-rising flour. It’s not just regular flour—it comes with baking powder and salt already mixed in, which is essential for getting that light, fluffy rise in your rolls.
But not all self-rising flours are created equal. Here’s what you should know:
- Use a medium protein flour (3g protein per ¼ cup or 30g)
- Avoid low-protein versions (like White Lily or King Arthur) as they absorb less liquid
- Brands like Gold Medal are perfect for this recipe
If you don’t have self-rising flour on hand, you can make your own at home:
Homemade Self-Rising Flour (3 cups):
- 3 cups all-purpose flour
- 4.5 teaspoons baking powder
- 1.5 teaspoons salt
Whisk until fully combined
Still unsure? Let’s look at the differences:
| Type | Protein Content | Suitable for This Recipe? |
|---|---|---|
| Gold Medal Self-Rising Flour | 3g | Yes |
| White Lily Self-Rising Flour | 2g | Too soft |
| Homemade Blend (3g AP Flour) | 3g | yes |
Check out this Homemade Yeast Rolls Recipe if you’re curious how different flours affect traditional dough too.
Step-by-Step Guide to Making 2 Ingredient Cottage Cheese Bread Rolls
Making these bread rolls is surprisingly simple, but there are a few techniques that make all the difference between dry, uneven bread and soft, fluffy rolls. Let’s break it down step by step so you get bakery-level results without the stress.
How to Prep and Blend the Cottage Cheese Correctly
The first and most essential step? Blending your cottage cheese until smooth.
Cottage cheese straight from the container is lumpy, and that’s not what you want here. You’re looking for a creamy, smooth texture that looks almost like Greek yogurt.
Step-by-Step:
- Measure out 3 cups of high-protein cottage cheese.
- Pour into a high-speed blender or food processor.
- Blend until there are no visible curds left. Scrape down the sides if needed.
- The final result should look like this: smooth, thick, and pourable.
This ensures an even mix with the flour, prevents lumps in the dough, and leads to a consistent bake.
Mixing and Resting the Dough (No Kneading Required)
Here’s where this recipe becomes magical. No need to knead or proof—just mix, chill, and bake.
Instructions:
- In a large bowl, combine:
- 3 cups of self-rising flour
- All of your blended cottage cheese
- Use a silicone spatula to fold everything together.
- You’ll get a sticky dough. Don’t panic—it’s meant to be soft and slightly tacky.
- Cover the bowl tightly with plastic wrap.
- Refrigerate for at least 3 hours (up to 12 hours is fine too).
Why refrigerate? Chilling relaxes the flour and lets moisture distribute evenly. It also makes the dough easier to handle when shaping.
Before baking, take the dough out and flour your hands and work surface generously. You’ll notice it’s easier to work with once chilled.
Mixing the flour and cottage cheese into a smooth dough is the first step to perfect 2 ingredient rolls.
Baking Techniques for Perfect Texture
Great dough is only half the battle. The real magic happens in the oven—and with just a few smart techniques, you can bake rolls that are golden on the outside and soft on the inside. Let’s talk setup, timing, and pro tricks to get that bakery-quality finish.
Using a Water Bath and Oven Setup for Moisture
One of the biggest challenges with no-yeast, high-protein doughs is drying out too quickly in the oven. To fix that, we borrow a trick from professional bakers: steam baking.
How to Do It:
- Preheat your oven to 400°F (205°C).
- Place a large, oven-safe cast iron skillet or deep baking dish filled halfway with water on the bottom rack.
- Place your baking sheet on the rack just above the water bath.
This creates a steamy environment inside your oven, which prevents the tops from browning too quickly and keeps the inside moist and chewy.
Bonus Tip:
Be careful when opening the oven door—steam will escape, and it’s hot! Use oven mitts and stand back when checking your rolls.
Timing, Temperature, and Placement Tips for Even Baking
Baking bread rolls evenly is all about positioning and patience. You want them to rise and brown uniformly without hard spots or soggy centers.
Baking Tips:
- Space each roll about 2 inches apart on your parchment-lined baking sheet.
- Bake for 25–30 minutes, depending on your oven and the size of your rolls.
- Check doneness by:
- Looking for a deep golden top
- Tapping the bottom of a roll—it should sound hollow
- Inserting a toothpick into the center—if it comes out clean, they’re ready
Let the rolls cool on a wire rack for at least 30 minutes before eating. This helps the inside finish cooking and gives you the perfect texture.
Want a more refined crust? Brush the tops with a light egg white wash before baking. This gives your rolls a smoother, shinier finish and prevents excessive splitting. It’s optional, but highly recommended.
Check out our Chicken Cheese Stuffed Bread for another savory, golden-baked recipe you’ll love.
Expert Tips for Perfecting Every Batch
Even with just two ingredients, getting consistently perfect rolls every time takes a few smart tweaks. These tips will help you shape, roll, and finish like a seasoned home baker—without the stress.
How to Shape, Portion, and Roll the Dough Easily
After your dough has rested in the fridge, it’ll be sticky—but workable. The trick is to flour generously and handle gently.
Step-by-Step Shaping Guide:
- Flour your work surface and hands thoroughly with self-rising flour.
- Turn the dough out onto the floured area and pat it into a rough rectangle.
- Use a bench scraper or sharp knife to divide the dough into 12 equal portions. Tip: Weigh each piece with a kitchen scale to ensure uniform size and even baking.
- To shape each piece:
- Pull the outer edges toward the center and pinch the seam closed.
- Flip the dough seam-side down.
- Cup your hand over it and roll in a circular motion to form a smooth, round ball.
This rolling technique creates surface tension, giving your rolls a professional look and helping them rise upward instead of spreading flat.
To Egg Wash or Not? Appearance vs. Simplicity
Adding an egg wash is optional—but it does have visual benefits. An egg white wash gives your rolls:
- A shinier surface
- Less cracking and splitting
- A slightly golden sheen
If you skip it, your rolls will still taste great but will have a more rustic, cracked appearance—perfectly fine for a homestyle vibe.
Egg Wash How-To:
- Whisk 1 large egg white in a small bowl.
- Just before baking, use a pastry brush to lightly coat the tops of each roll.
- Avoid brushing the sides to maintain the shape.
Don’t want to use eggs? Try a dairy-free milk alternative, but results may vary slightly in color.
Discover great ideas like our Creamy Custard Recipe if you enjoy soft, creamy textures in your recipes.
Serving Suggestions and Storage Tips
These fluffy, protein-packed rolls aren’t just easy to make—they’re incredibly versatile. Whether you’re serving them warm for breakfast or alongside a hearty dinner, there are plenty of ways to enjoy and store them.
Pairing with Breakfast, Side Dishes, or Appetizers
These 2 ingredient cottage cheese bread rolls fit nearly any meal. They’re mildly tangy, soft on the inside, and sturdy enough to support toppings or dips.
Easy Serving Ideas:
- For Breakfast:
- Toast and spread with nut butter or jam
- Pair with scrambled eggs or turkey sausage
- Use as mini breakfast sandwiches
- For Lunch or Dinner:
- Serve warm with soups, like tomato or butternut squash
- Use as sliders for pulled chicken or roast beef
- Serve with a cheese board as a savory snack
- As Appetizers:
- Split and toast, then top with ricotta, smoked salmon, or herbed cream cheese
- Use to soak up dips like hummus, spinach-artichoke, or buffalo chicken
These rolls hold their shape well and won’t crumble, making them excellent for spreads, fillings, and sauces.
Check out our Pickle Pizza Recipe for a tangy pairing that’s as bold as these rolls are soft.
Best Practices for Storing and Reheating Rolls
Homemade bread always tastes best fresh, but if stored properly, these rolls will keep their texture and flavor for days—or even weeks.
How to Store:
- Room Temperature: Up to 24 hours in a tightly sealed container
- Refrigerator: Up to 5 days in an airtight container
- Freezer: Up to 2 months—wrap individually and place in a freezer bag
Make sure the rolls are completely cooled before storing to avoid condensation, which can cause sogginess.
How to Reheat:
| Method | Instructions |
|---|---|
| Oven (Best Texture) | 300°F for 8–10 minutes |
| Toaster Oven | 2–3 minutes on toast setting |
| Microwave (Quickest) | Wrap in damp paper towel, heat for 15–20 sec |
Avoid microwaving too long—they’ll become rubbery. Reheating in an oven gives the best crust and softness balance.
Don’t miss our No-Bake Lemon Brownies if you’re looking for a sweet and simple dessert to go with your meal.
Common Mistakes and How to Fix Them
Even though these rolls only require two ingredients, a few common issues can trip up first-timers. Let’s go over how to avoid soggy centers, flat shapes, or dough that falls apart—so you can bake with confidence every time.
Why Your Rolls Might Be Falling Apart
One of the most frequently asked questions is:
“Why does my cottage cheese flatbread fall apart?”
This usually boils down to one of a few fixable mistakes:
1. Wrong Cottage Cheese Consistency
If your cottage cheese is too watery or not blended smooth enough, your dough won’t bind well. Always:
- Blend until fully smooth
- Use high-protein cottage cheese (13–14g per ½ cup)
2. Not Enough Chill Time
Skipping or rushing the chill time makes the dough too sticky to shape and weakens structure. Let it rest in the fridge for at least 3 hours—overnight is even better.
3. Not Enough Flour During Shaping
Because the dough is sticky, you must generously flour your surface and hands when rolling. If not, the dough can tear or stick too much.
Solution: If your dough is falling apart when shaping, fold in 1–2 extra tablespoons of self-rising flour to strengthen it.
Avoiding Dense or Dry Bread Texture
Another issue? Rolls that come out heavy or dry instead of soft and airy. This happens for a few reasons:
1. Using Low-Protein Flour
Low-protein self-rising flour (like White Lily) doesn’t absorb enough moisture, leading to overly wet dough that collapses or bakes dense.
Solution: Use a flour with 3g protein per ¼ cup like Gold Medal.
2. Overbaking
Baking too long dries out the rolls. Start checking them at the 25-minute mark. Once golden and hollow-sounding, they’re done.
3. Oven Rack Position
If the rolls are too close to the top of the oven, they may brown too quickly while the inside stays raw.
Solution: Always bake on the lowest rack above your steam tray for even heat and moisture.
Check out our Cinnamon Roll Cookies if you’re craving another soft-baked treat with a better success rate on your first try.
Creative Variations to Try
Once you’ve mastered the base recipe, the real fun begins. These 2 ingredient cottage cheese bread rolls are like a blank canvas—you can easily customize them to suit sweet cravings, savory pairings, or even dietary needs.
Adding Herbs, Cheese, or Savory Fillings
Want to give your rolls a little extra oomph? Here are a few simple ways to add flavor and flair without complicating the process.
Savory Add-Ins:
- Shredded Cheese: Mix in sharp cheddar, mozzarella, or pepper jack for a cheesy twist.
- Dried Herbs: Add 1–2 tsp of dried rosemary, thyme, or oregano directly into the dough.
- Garlic Powder or Onion Powder: Just ½ tsp gives a deep, savory aroma.
- Stuffed Centers: Place a small cube of feta or cream cheese in the center before shaping the dough into a ball.
| Add-In | Amount to Use | Result |
|---|---|---|
| Shredded Cheddar | ½ cup | Cheesy interior and top |
| Dried Herbs | 1–2 tsp | Savory aroma and color |
| Chopped Olives | ¼ cup | Mediterranean-style rolls |
Pro Tip: If adding extra moisture-rich ingredients (like olives or sun-dried tomatoes), reduce the cottage cheese slightly to balance the dough.
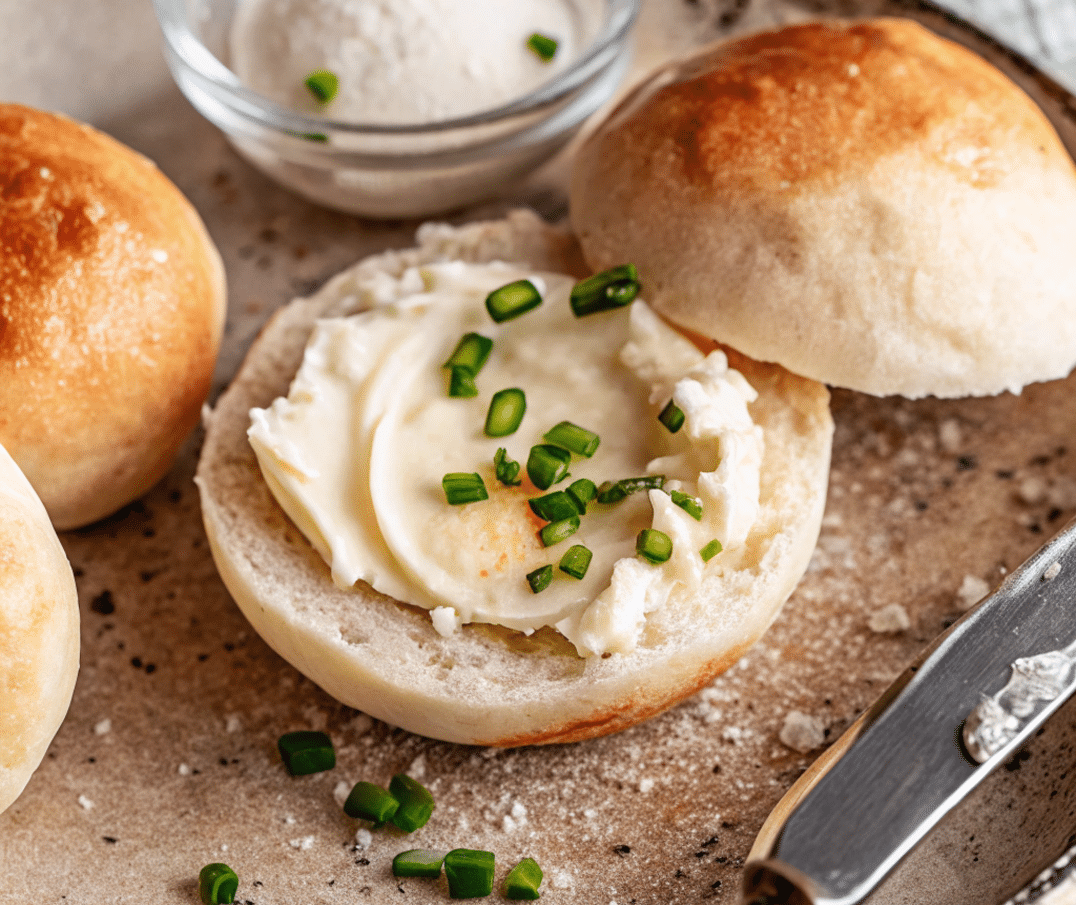
Sweet Versions: Cinnamon, Raisins, or Vanilla Sugar Twist
Yes, you can even turn these into dessert-style rolls! The dough’s neutral flavor adapts well to sweet touches.
Sweet Variations to Try:
- Cinnamon Sugar Rolls: After shaping, brush lightly with butter and sprinkle cinnamon sugar on top.
- Raisin Rolls: Fold ¼ cup raisins into the dough before shaping.
- Vanilla Sugar Finish: Mix 1 tsp vanilla extract into the cottage cheese and dust finished rolls with powdered sugar.
Bonus Glaze Idea: Mix ½ cup powdered sugar with 1 tbsp milk and ¼ tsp vanilla extract to drizzle on top once cooled.
These sweet versions are perfect for brunch, afternoon tea, or as a lighter dessert option.
Looking for more quirky ideas? Try our Dubai Pistachio Chocolate Bar for a creative dessert pairing.
Nutrition Facts and Dietary Tips
These rolls may be simple, but they’re surprisingly nutritious and versatile. Whether you’re watching carbs, going high-protein, or feeding picky eaters, there are ways to tailor the recipe without losing its charm.
Nutritional Breakdown Per Roll
Here’s the approximate nutrition profile for one roll (based on the original recipe using 1% high-protein cottage cheese and Gold Medal self-rising flour):
| Nutrient | Per 1 Roll (1 of 12) |
|---|---|
| Calories | 145 kcal |
| Protein | 9 g |
| Carbohydrates | 25 g |
| Net Carbs | 25 g |
| Fat | 1 g |
| Saturated Fat | 0.3 g |
| Sugar | 3 g |
| Sodium | 578 mg |
These are estimates from a nutrition calculator and may vary by ingredient brands. Always check labels for exact numbers.
Thanks to the high-protein dairy, each roll offers nearly 9g of protein—far more than typical dinner rolls.
Nutritional data for cottage cheese
Making It Gluten-Free, Low-Sodium, or High-Fiber
Want to adapt the recipe? Here’s how to meet different dietary goals:
Gluten-Free Version
- Use a gluten-free self-rising flour blend (like Bob’s Red Mill 1-to-1 + baking powder + salt)
- The texture may be slightly denser but still delicious
Low-Sodium Modification
- Make your own self-rising flour using low-sodium salt
- Opt for unsalted or reduced-sodium cottage cheese
High-Fiber Boost
- Replace ½ cup of self-rising flour with oat flour or white whole wheat flour
- Mix in 1–2 tbsp chia or flax seeds
| Diet Need | Modification Tip |
|---|---|
| Gluten-Free | GF flour + your own leavening mix |
| Low-Sodium | Homemade self-rising flour, low-salt dairy |
| High-Fiber | Add flax, oats, or whole grains |
Check out our Sizzling Spaghetti if you’re looking for a full meal to pair with these rolls for a high-fiber, family-friendly dinner.
Frequently Asked Questions About 2 Ingredient Cottage Cheese Bread Rolls
What are the two ingredients in cottage cheese wraps?
The two essential ingredients are:
Cottage cheese – typically high-protein, blended until smooth
Self-rising flour – which already includes baking powder and salt
These two work together to create a dough that rises without yeast and holds well as wraps, flatbreads, or rolls. You can also substitute the flour with gluten-free versions for specific diets.
How to make flatbread with 2 ingredients?
To make a 2-ingredient flatbread:
Combine 1 cup of blended cottage cheese with 1 cup of self-rising flour
Mix into a soft dough, roll into balls, and flatten into discs
Cook each disc in a non-stick skillet over medium heat for 2–3 minutes per side
The result? A chewy, slightly tangy flatbread that’s perfect for wraps, dips, or even pizza bases.
Can you make flatbread with cottage cheese?
Absolutely. Cottage cheese creates a tender, high-protein dough with a unique richness. When blended and combined with flour, it behaves similarly to Greek yogurt dough but with more body and structure.
It’s ideal for:
Savory breakfast wraps
High-protein sandwich bases
Soft flatbreads with dips like hummus or tzatziki
Tip: Always blend the cottage cheese for a smooth, cohesive dough.
Why does my cottage cheese flatbread fall apart?
The most common reasons are:
Too much moisture in the cottage cheese (use high-protein varieties)
Not enough resting time—let the dough chill for at least 3 hours
Low-protein flour, which makes the dough too soft
Fix it by blending your cheese, chilling the dough, and using a flour with at least 3g of protein per ¼ cup.
Don’t miss our Bruschetta Summer Pasta Salad if you’re searching for fresh sides to go with your flatbread or rolls.
Why You’ll Keep Coming Back to These Rolls
Whether you’re a busy parent, a beginner baker, or simply someone who loves easy recipes, these 2 ingredient cottage cheese bread rolls are a game-changer. No yeast. No kneading. Just two ingredients and 45 minutes to warm, protein-packed rolls the whole family will love.
They’re customizable, nutritious, and freezer-friendly—what more could you ask for?
Check out our No-Bake Lemon Brownies if you’re craving something easy and sweet to follow up your rolls.
Print
2 Ingredient Cottage Cheese Bread Rolls That’ll Change Your Baking Game
These 2 ingredient cottage cheese bread rolls are quick, yeast-free, and foolproof! With just cottage cheese and self-rising flour, you get soft, chewy rolls that are high in protein and perfect for any meal.
- Total Time: 45 minutes
- Yield: 12 rolls
Ingredients
3 cups high protein cottage cheese
3 cups self-rising flour
Instructions
1. Blend the cottage cheese until smooth.
2. Mix with self-rising flour to form a sticky dough.
3. Cover and chill for at least 3 hours.
4. Preheat oven to 400°F and set up a steam tray in the oven.
5. Shape dough into 12 equal balls and place on a parchment-lined baking sheet.
6. Bake for 25–30 minutes until golden brown and set.
7. Cool rolls on a wire rack before serving.
Notes
For extra flavor, you can add a pinch of garlic powder, herbs, or shredded cheese to the dough.
Store in an airtight container at room temperature for 2 days, or freeze for up to 2 months.
Perfect as sandwich rolls, breakfast buns, or dinner sides.
- Prep Time: 20 minutes
- Cook Time: 25 minutes
- Method: Baking
- Cuisine: American

